グループの管理はGrouperで行います。
初期状態ではグループ管理責任者が管理者として設定されています。
はじめに
グループの原簿管理はGrouperで行います。
初期状態ではグループ管理者が責任者として設定されています。
メンバーの追加
グループにメンバーを追加します。
ユーザを指定し追加する
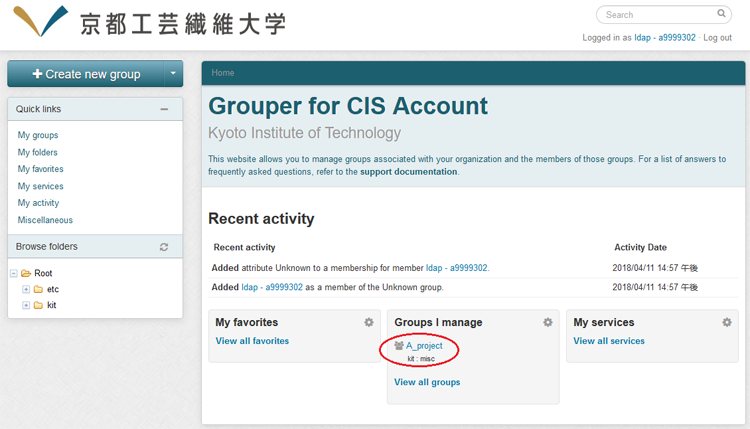
1. Grouperに管理者がCISアカウントでログインします。
URLについて
編集する原簿によってアクセスするURLが変わりますので注意して下さい。
CISアカウント(通常利用するアカウント)のグループ原簿を編集する場合:
https://portal.cis.kit.ac.jp/grouper-cis/
KIT Personal ID(「"u"または"f"+数字+英字」のアカウント)のグループ原簿を編集する場合:
https://portal.cis.kit.ac.jp/grouper-univ/
2. Groups I manageに管理できるグループが表示されていますので、編集したいグループを選択します。
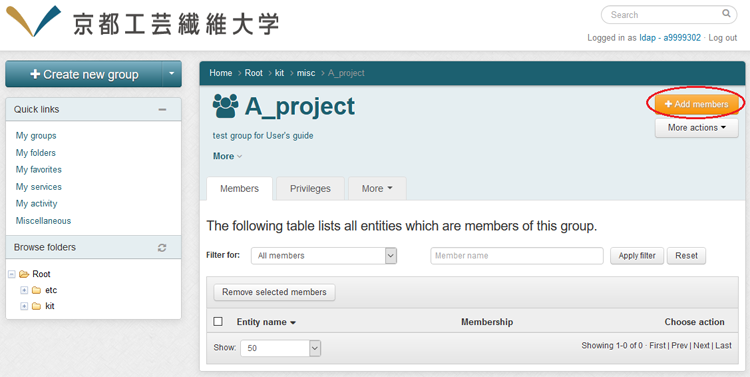
3. 画面右上のAdd membersをクリックします。
4. Member name or IDに追加したいユーザのログイン名を入力すると該当するユーザが検索されます。
見つかると職員番号が表示されますので正しいことを確認し、最後にAddをクリックします。
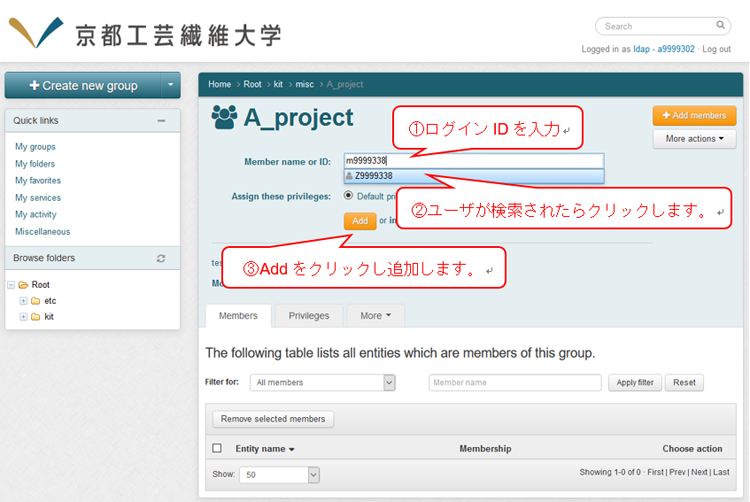
5. メンバーとして表示されましたら登録完了です。

グループ情報の反映時間
メンバーを一括登録する
メンバーの追加はテキストファイルによる一括登録が可能です。
追加したいユーザのログイン名を記載したテキストファイルを用意しておきます。
※1行目にはラベル名entityIdOrIdentifierを記述して下さい。
テキストファイルのフォーマット:
entityIdOrIdentifier
ログイン名
ログイン名
  :
  :
ログイン名
1. Groups I manageに管理できるグループが表示されていますので、編集したいグループを選択します。
3. 画面右上のAdd membersをクリックし続けてimport a list of membersをクリックします。
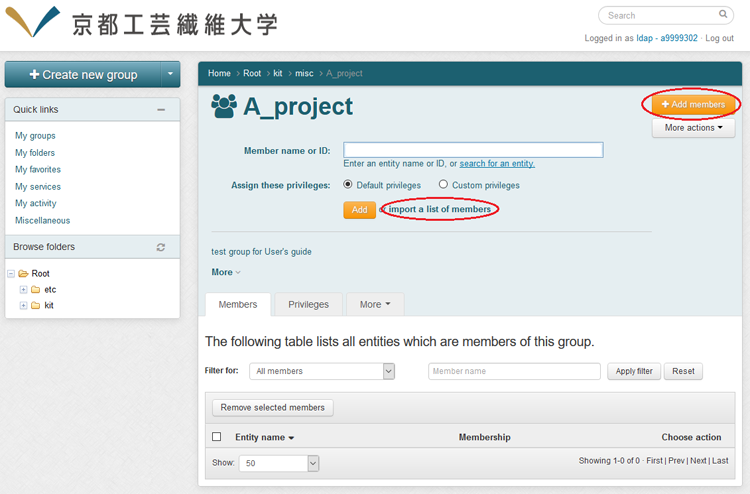
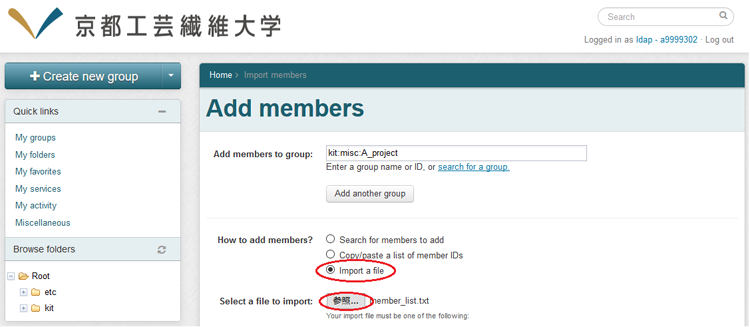
3. How to add members? にてImport a fileを選択しimport a list of membersをクリックし参照からあらかじめ用意しておいたテキストファイルを指定します。
4. 画面下のAdd Membersをクリックします。

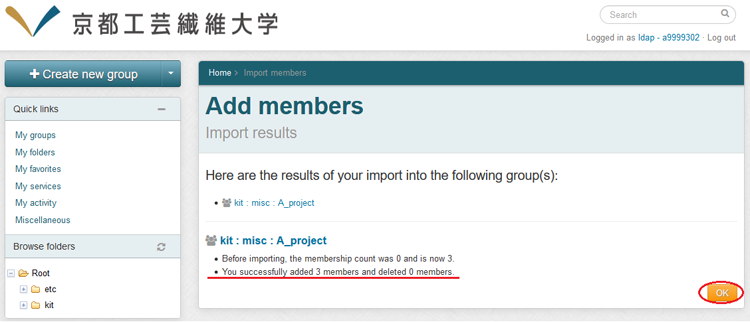
5. 登録結果を確認しOKをクリックします。
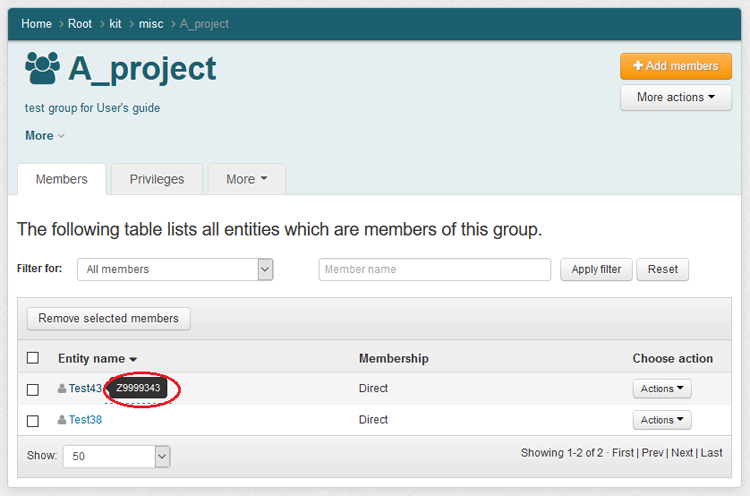
登録されたメンバーにマウスカーソルを合わせると職員番号が表示されますので正しいことを確認して下さい。
管理権限の追加
グループの管理権限を追加します。
管理権限について
メンバーの登録と管理権限の追加は独立しています。
※メンバーではないユーザに管理権限を付与することも可能です。
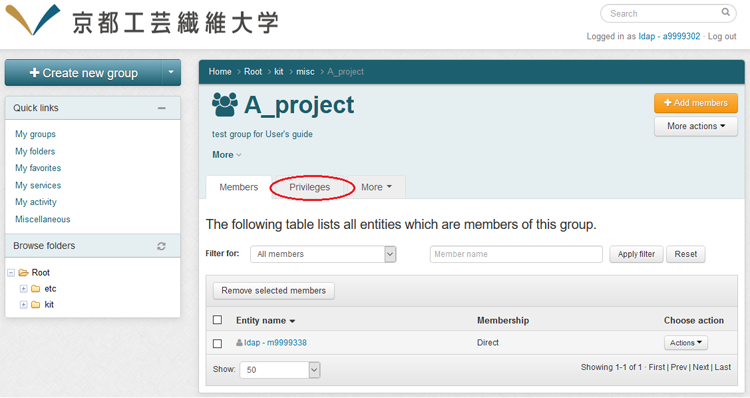
1. 編集したいグループを選択しPrivilegesタブをクリックします。
2. 画面右上のAdd membersをクリックします。

3. Member name or IDに追加したいユーザのログイン名を入力し、該当ユーザが検索されたらクリックし、付与する権限を指定し最後にAddをクリックします。
権限の一覧
| MEMBER | グループのメンバー権限を追加します。「メンバーの追加」と同じ状態になります。 グループの管理権限はありません。 | |
| Privileges | ADMIN | グループに対する全ての権限を付与します。グループの削除も可能となりますので操作には注意が必要です。 |
| UPDATE | グループへの参加、離脱、自分以外のメンバーの追加ができます。グループに所属するメンバー一覧は確認できません。 | |
| READ | My groupsにグループが表示されるようになります。また所属するメンバーの一覧が参照できます。 | |
| VIEW | Brouse Folsersにグループが表示されます。 | |
| OPTIN | グループへの参加ができます。離脱はできません。 | |
| OPTOUT | グループからの離脱ができます。参加はできません。 | |
| ATTRIBUTE READ | 属性情報が表示されるようになります。(グループの運用には必要ありませんので、通常利用することはありません) | |
| ATTRIBUTE UPDATE | 属性情報を更新することができるようになります。(グループの運用には必要ありませんので、通常利用することはありません) | |
