| Sv translation | |||||||||||||||||||||||||||||||||
|---|---|---|---|---|---|---|---|---|---|---|---|---|---|---|---|---|---|---|---|---|---|---|---|---|---|---|---|---|---|---|---|---|---|
| |||||||||||||||||||||||||||||||||
Mac で端末 VPN (FortiGate) を利用する場合の手順を説明します。
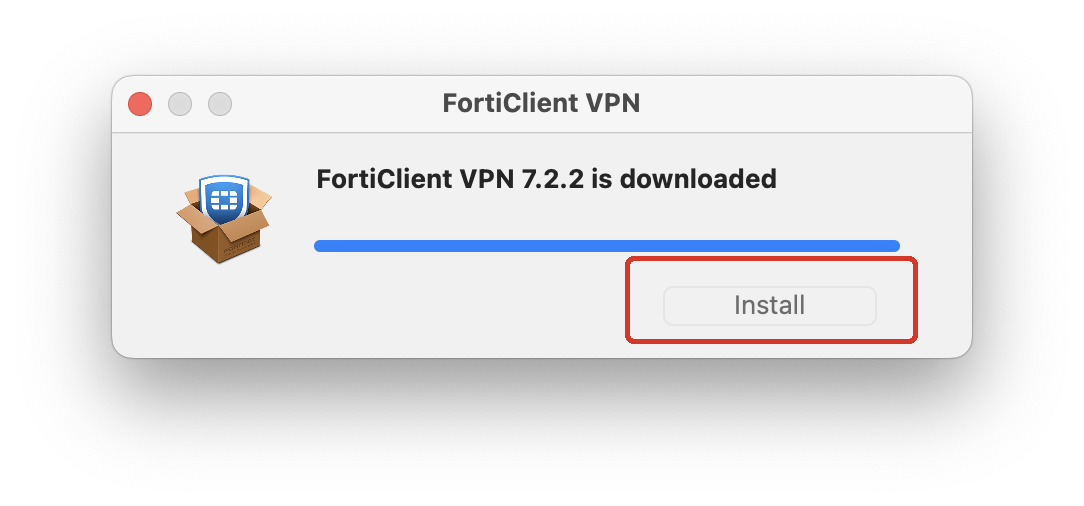
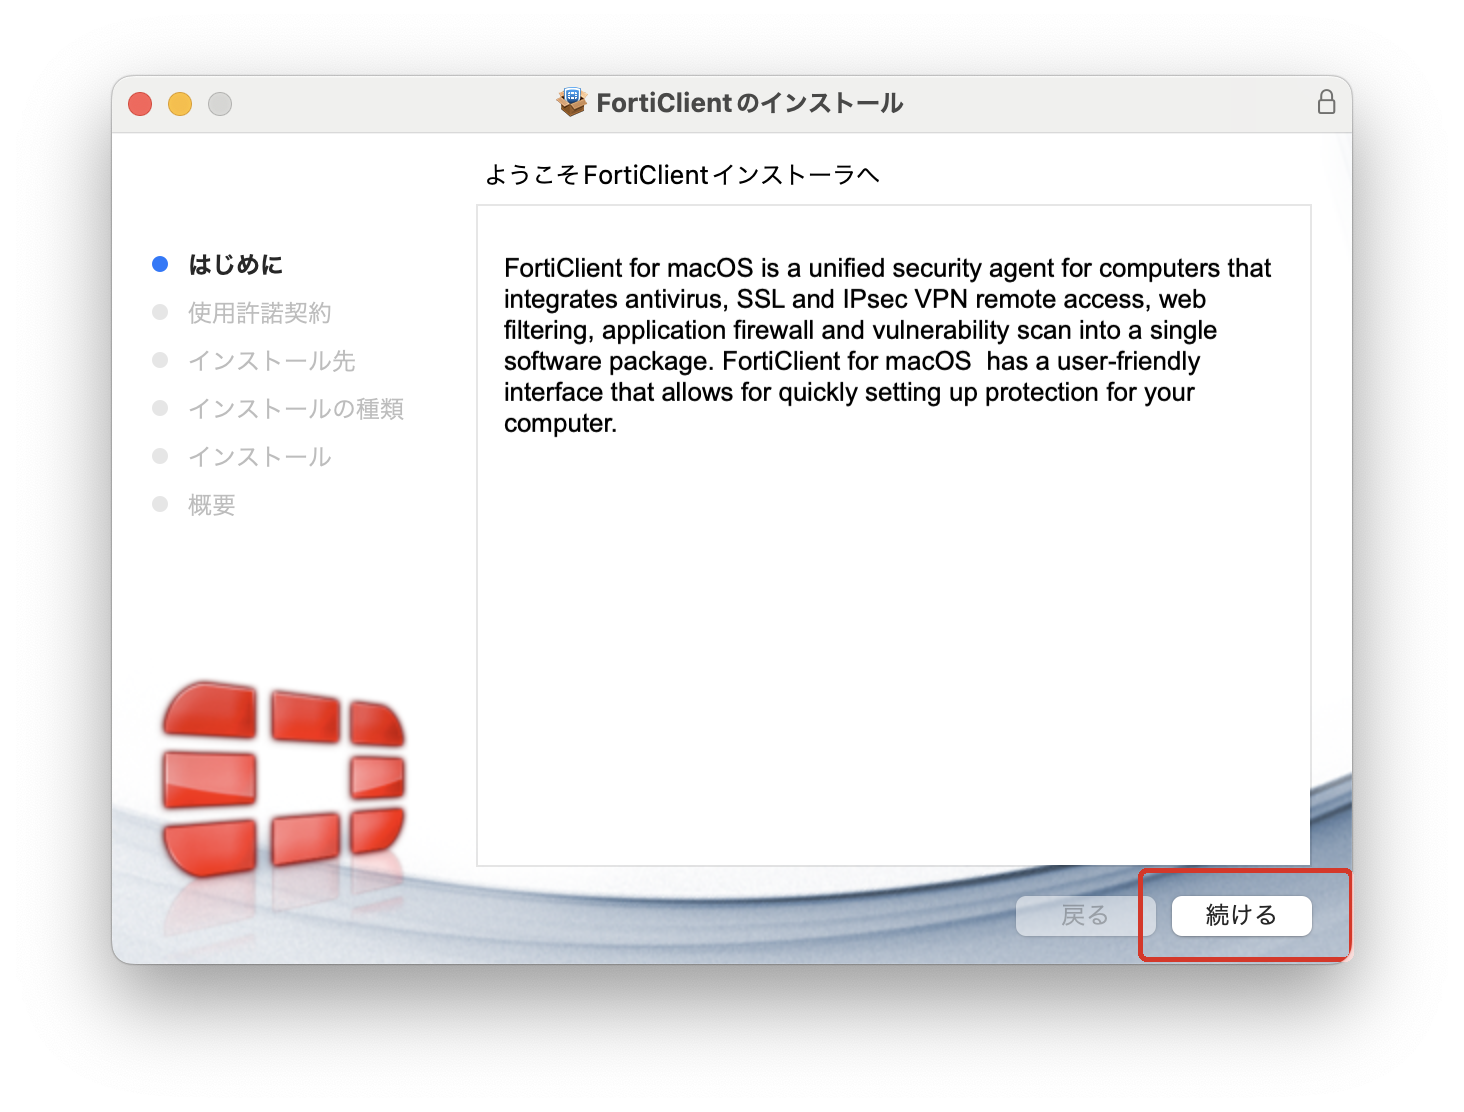
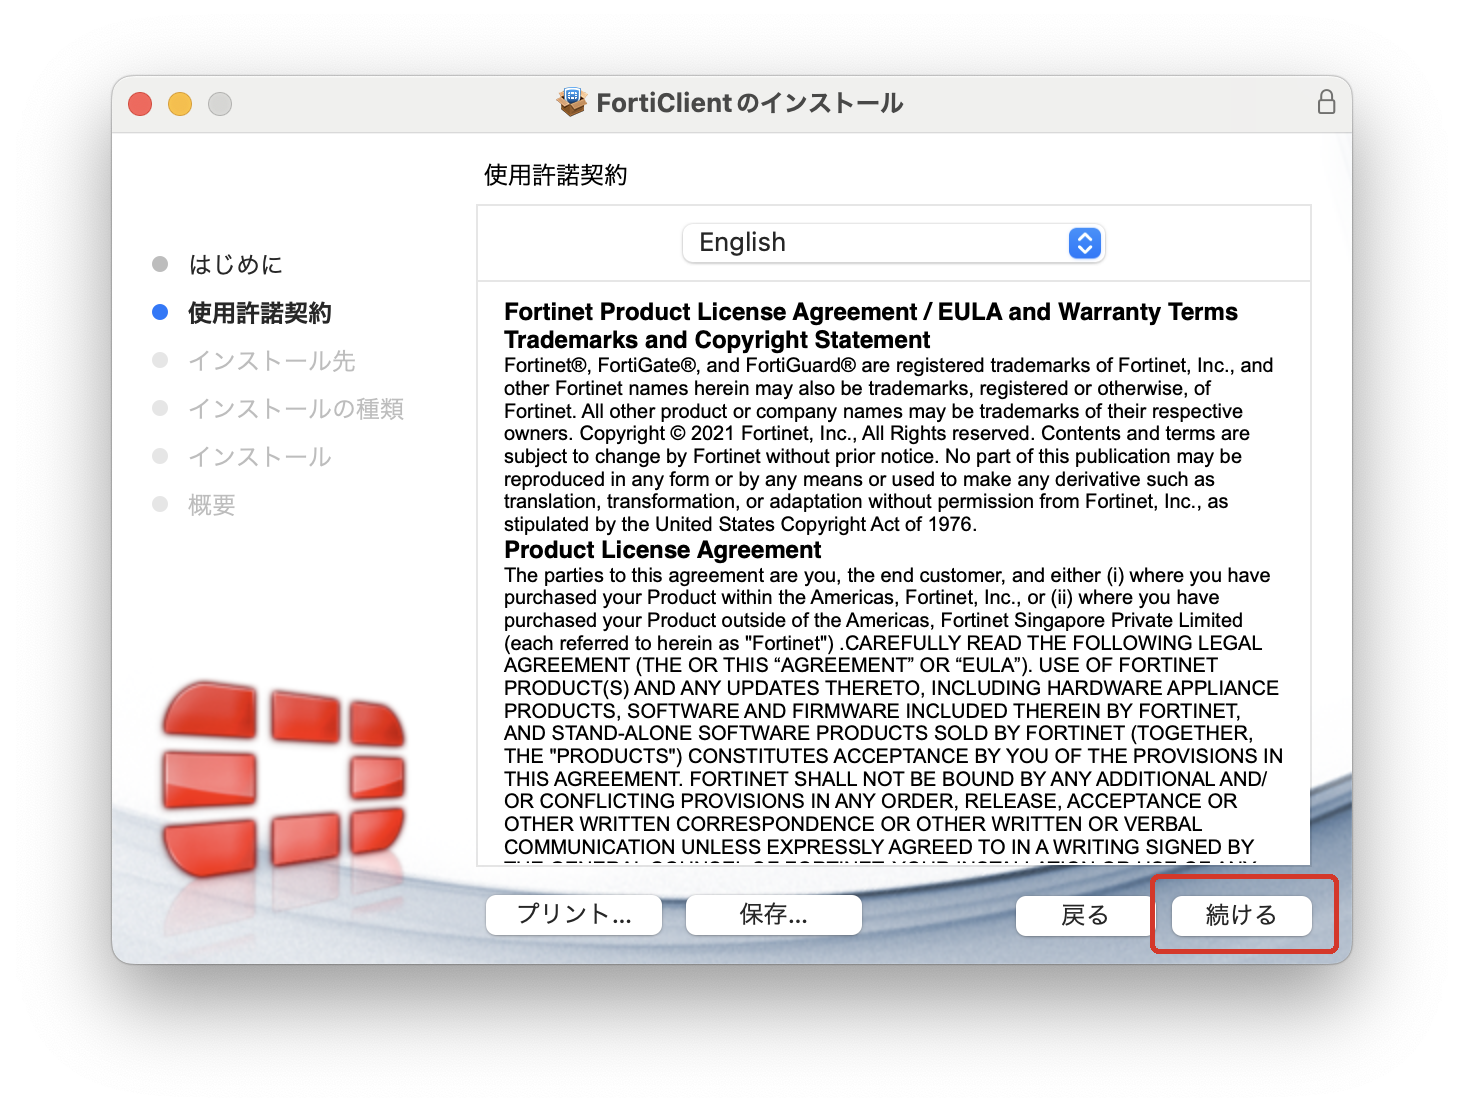
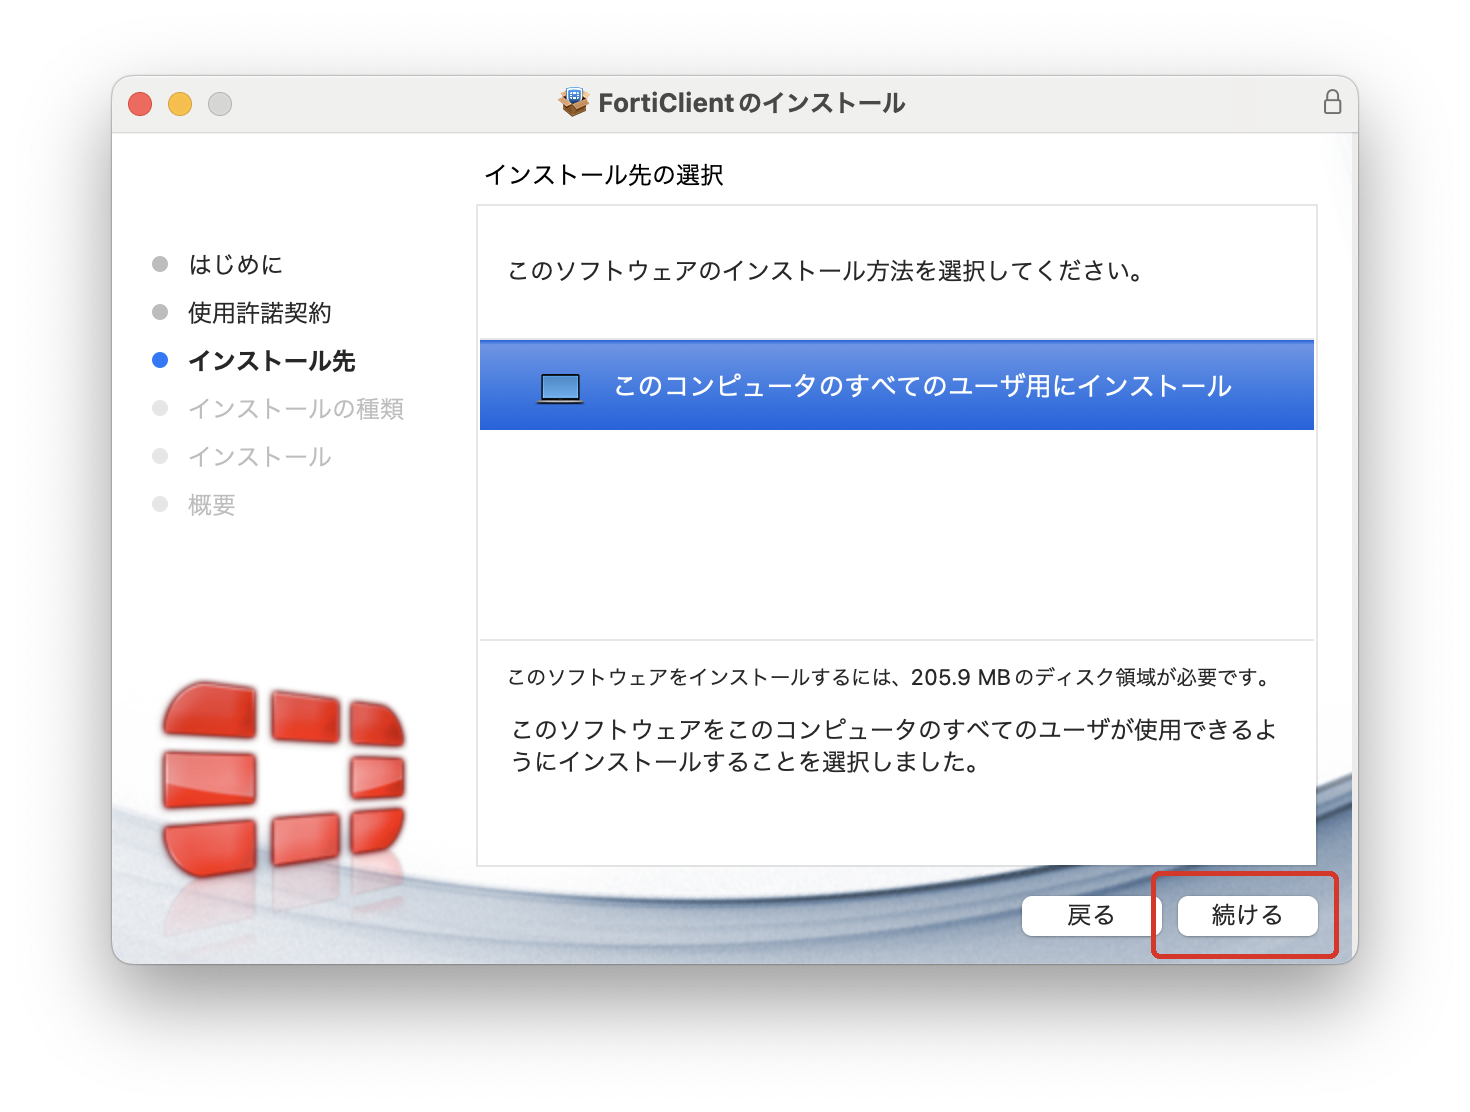
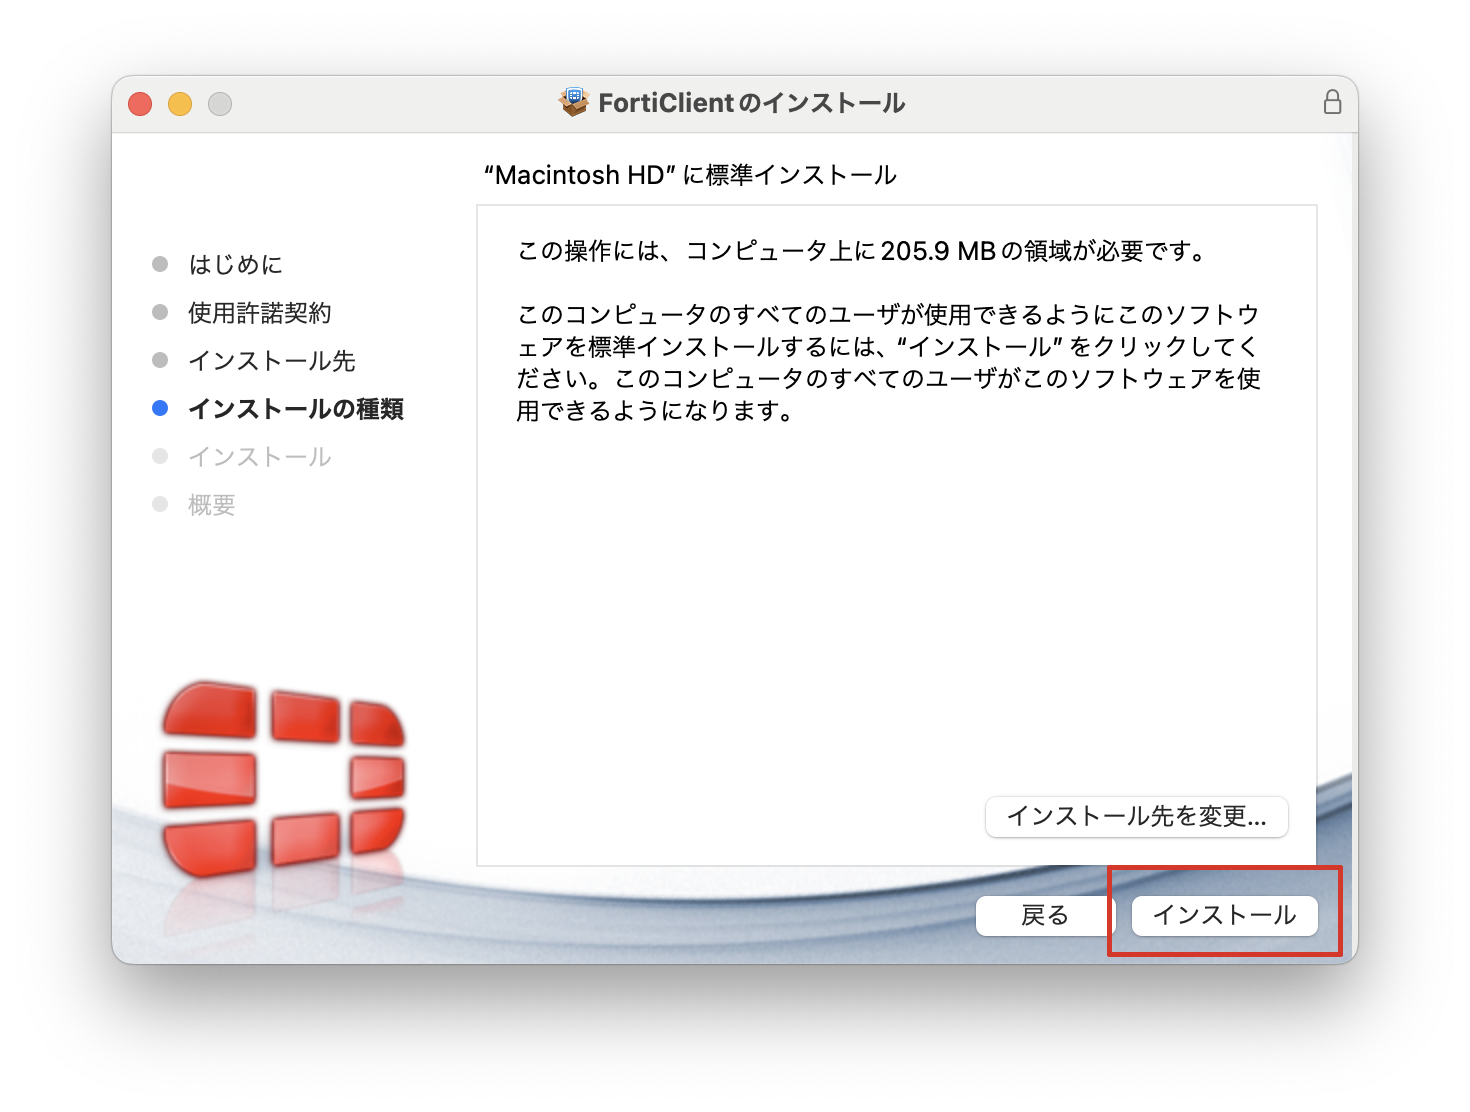
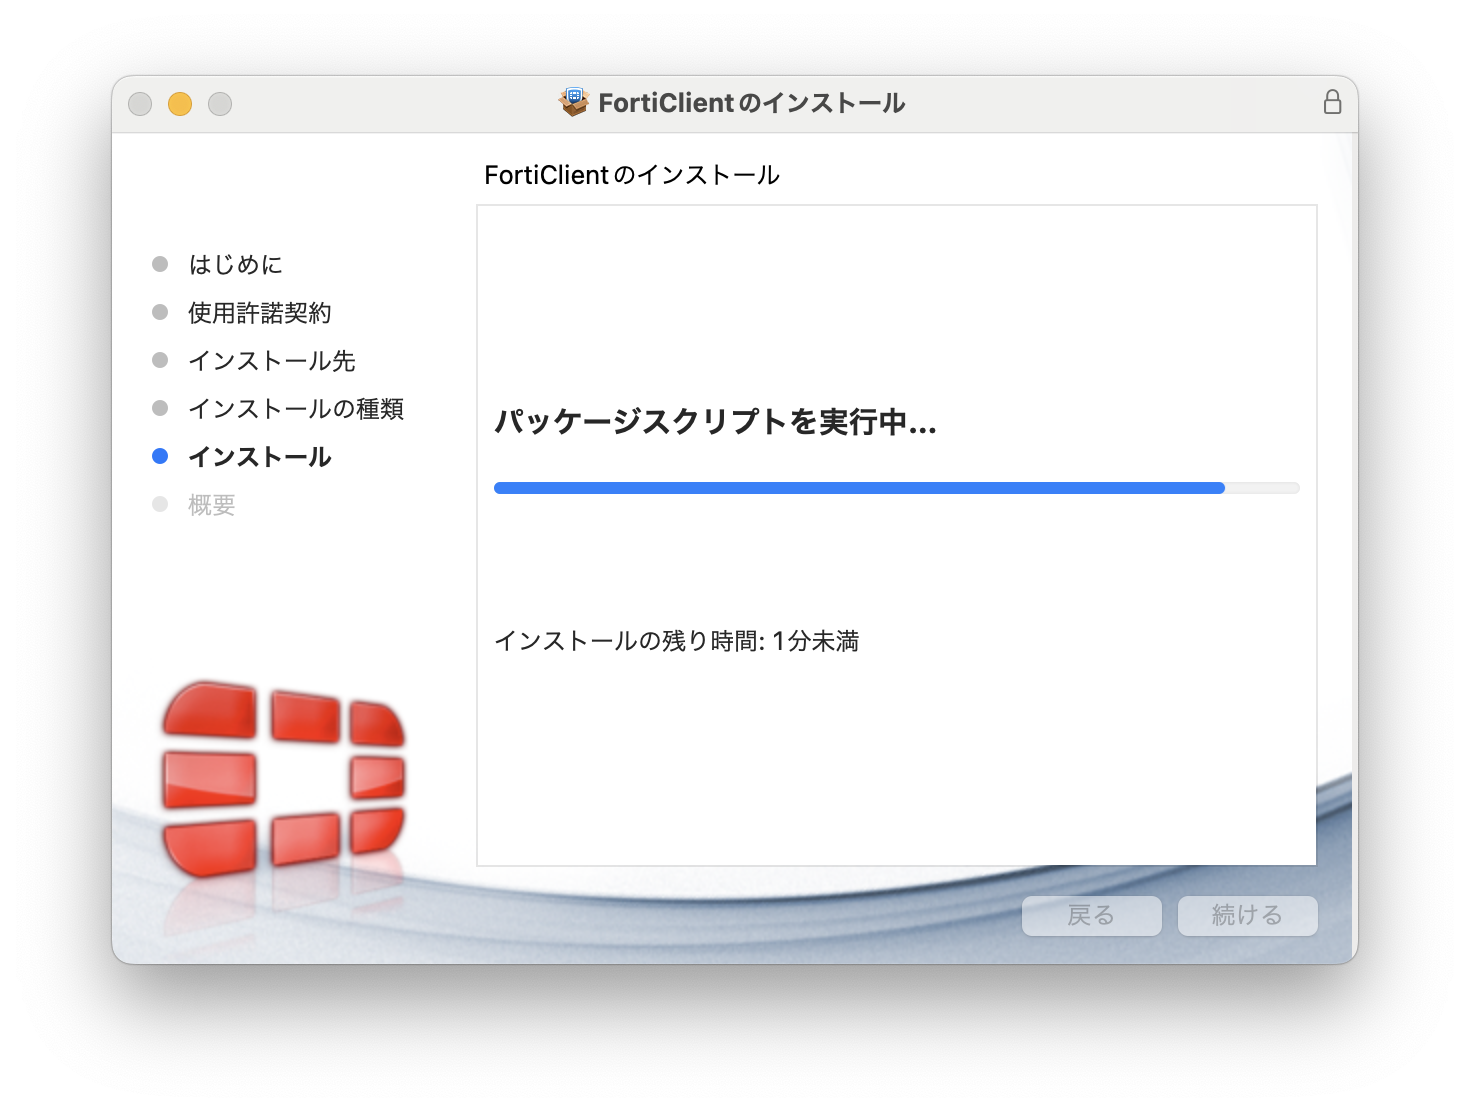
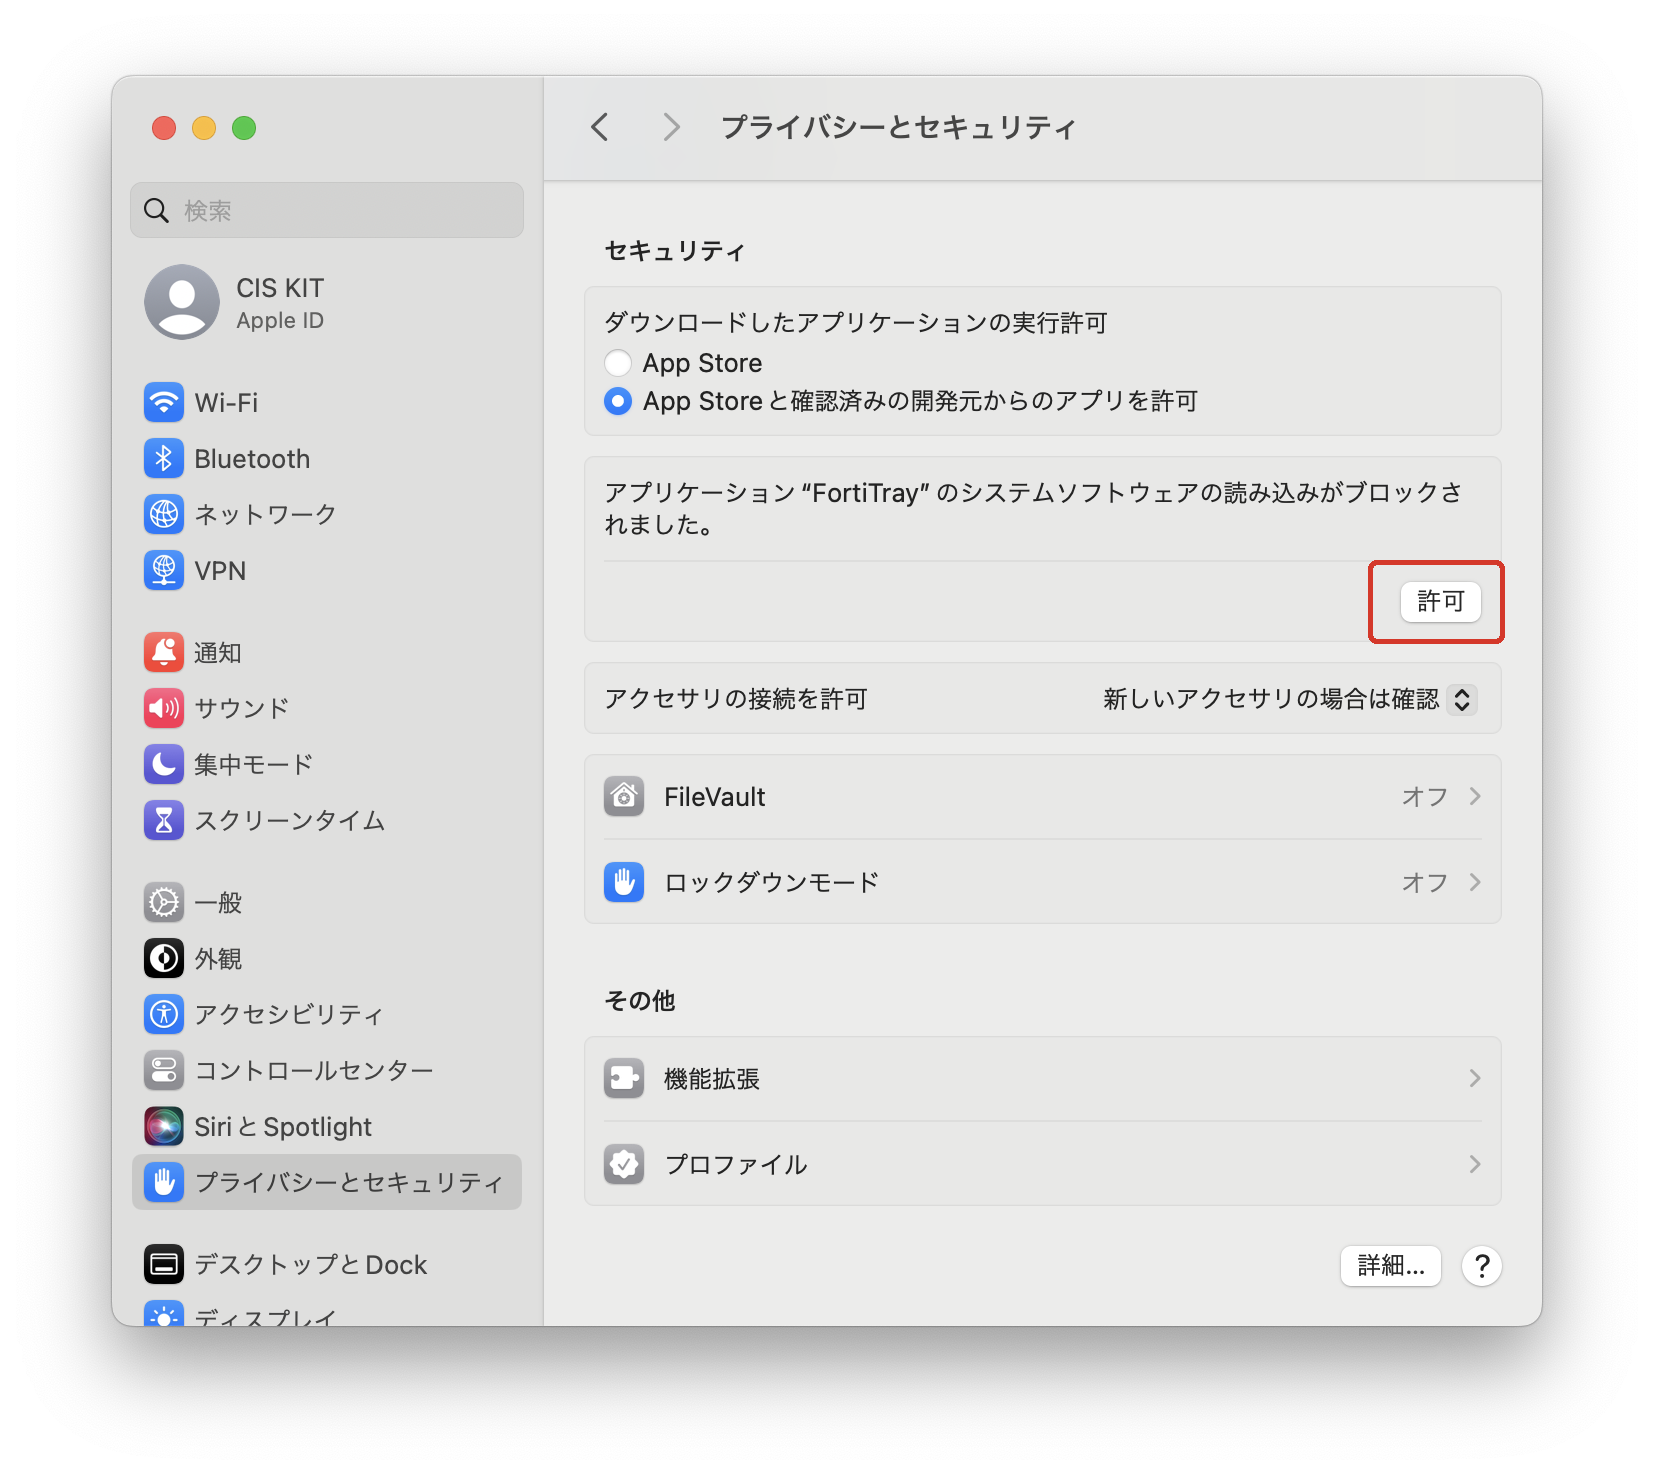
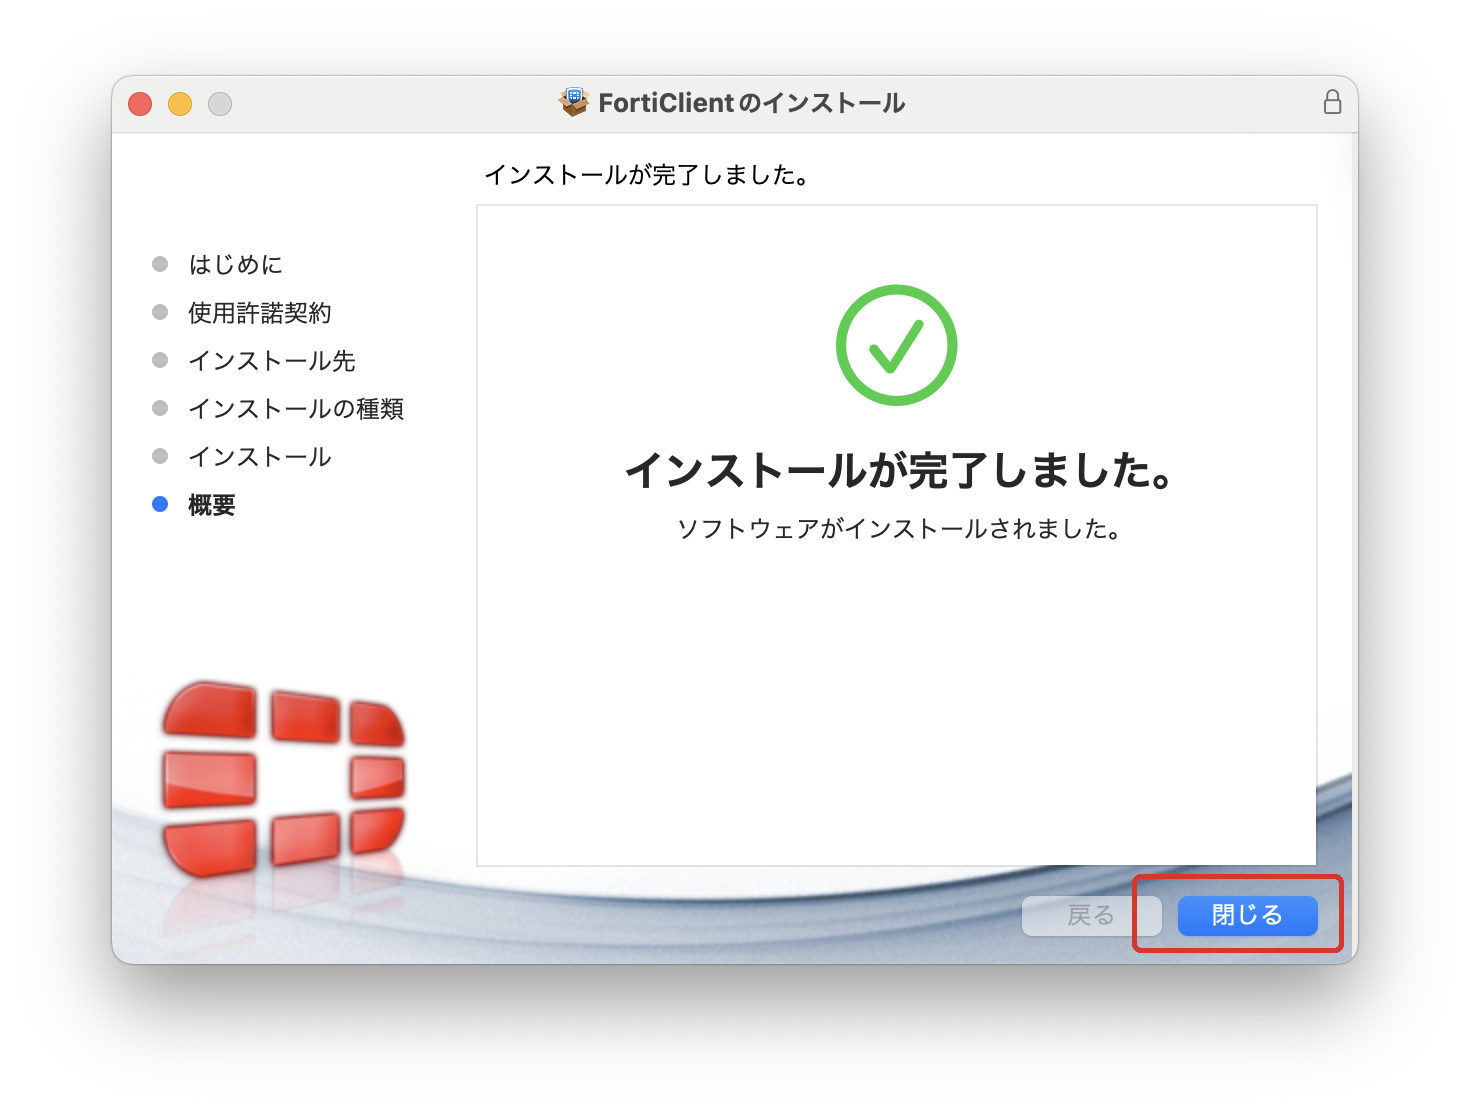
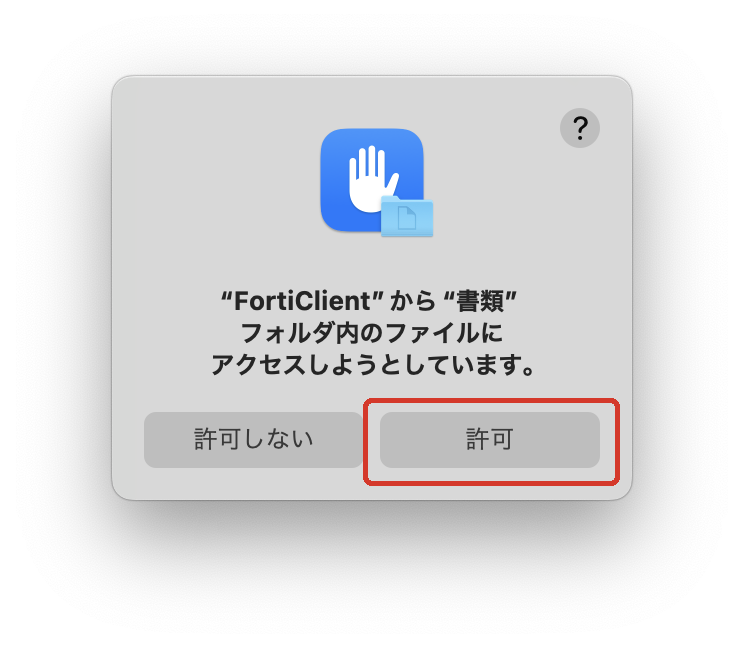
ステップ ガイド接続に必要な機密情報を入手するFortiClient をインストールする
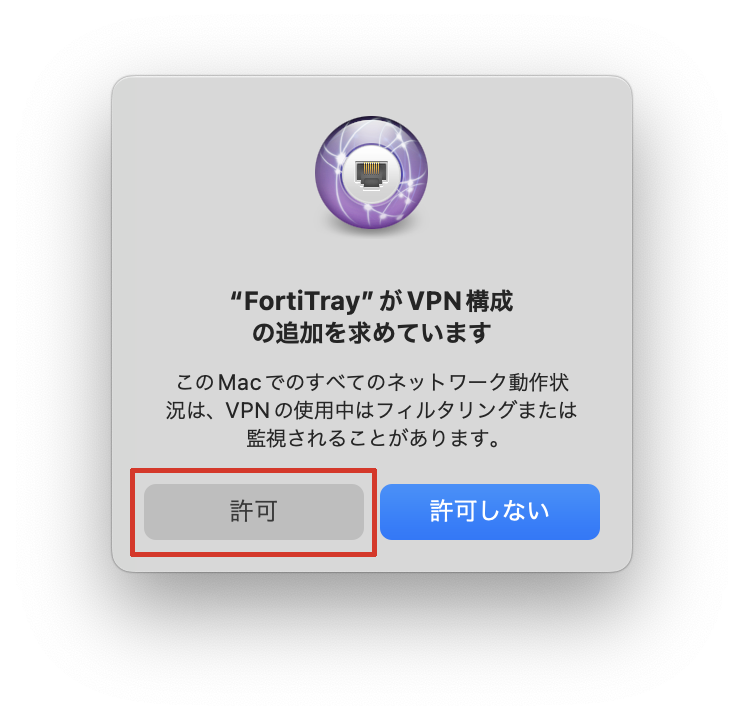
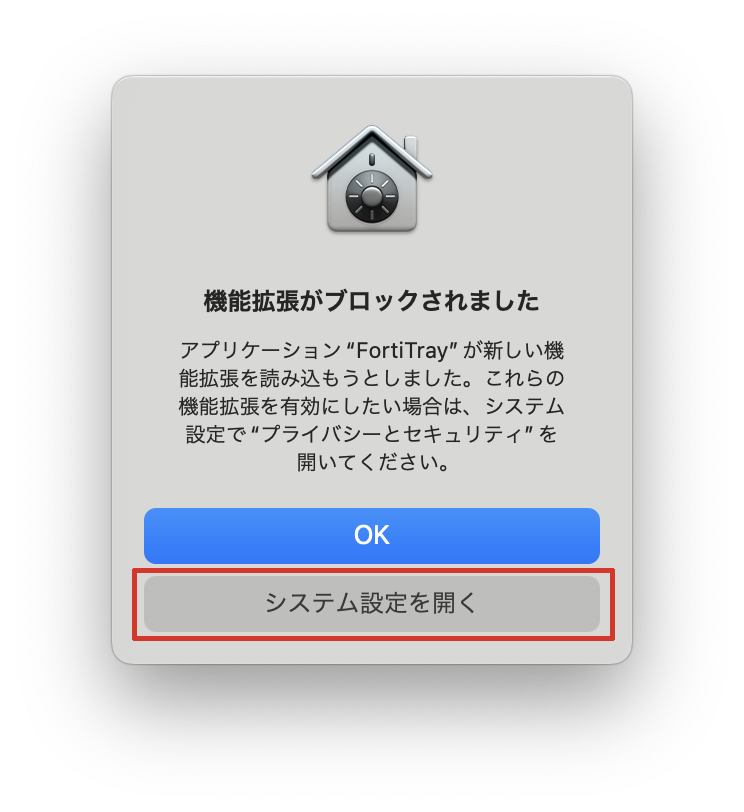
Mac を設定する    vpnt.cis.kit.ac.jp、アカウント名に情報科学センターアカウントのログイン名を入力して、【認証設定】ボタンを押します。   【プロキシ】タブを押します。  【プロキシ自動検出】(もしくは【Auto Proxy Discovery】)にチェックを入れて【OK】ボタンを押します。   サービスに接続して端末VPNを利用する
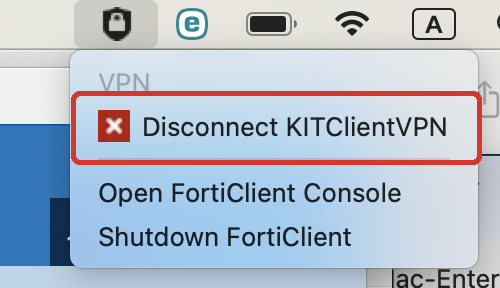
サービスから切断して元のネットワーク接続を利用する
情報 |
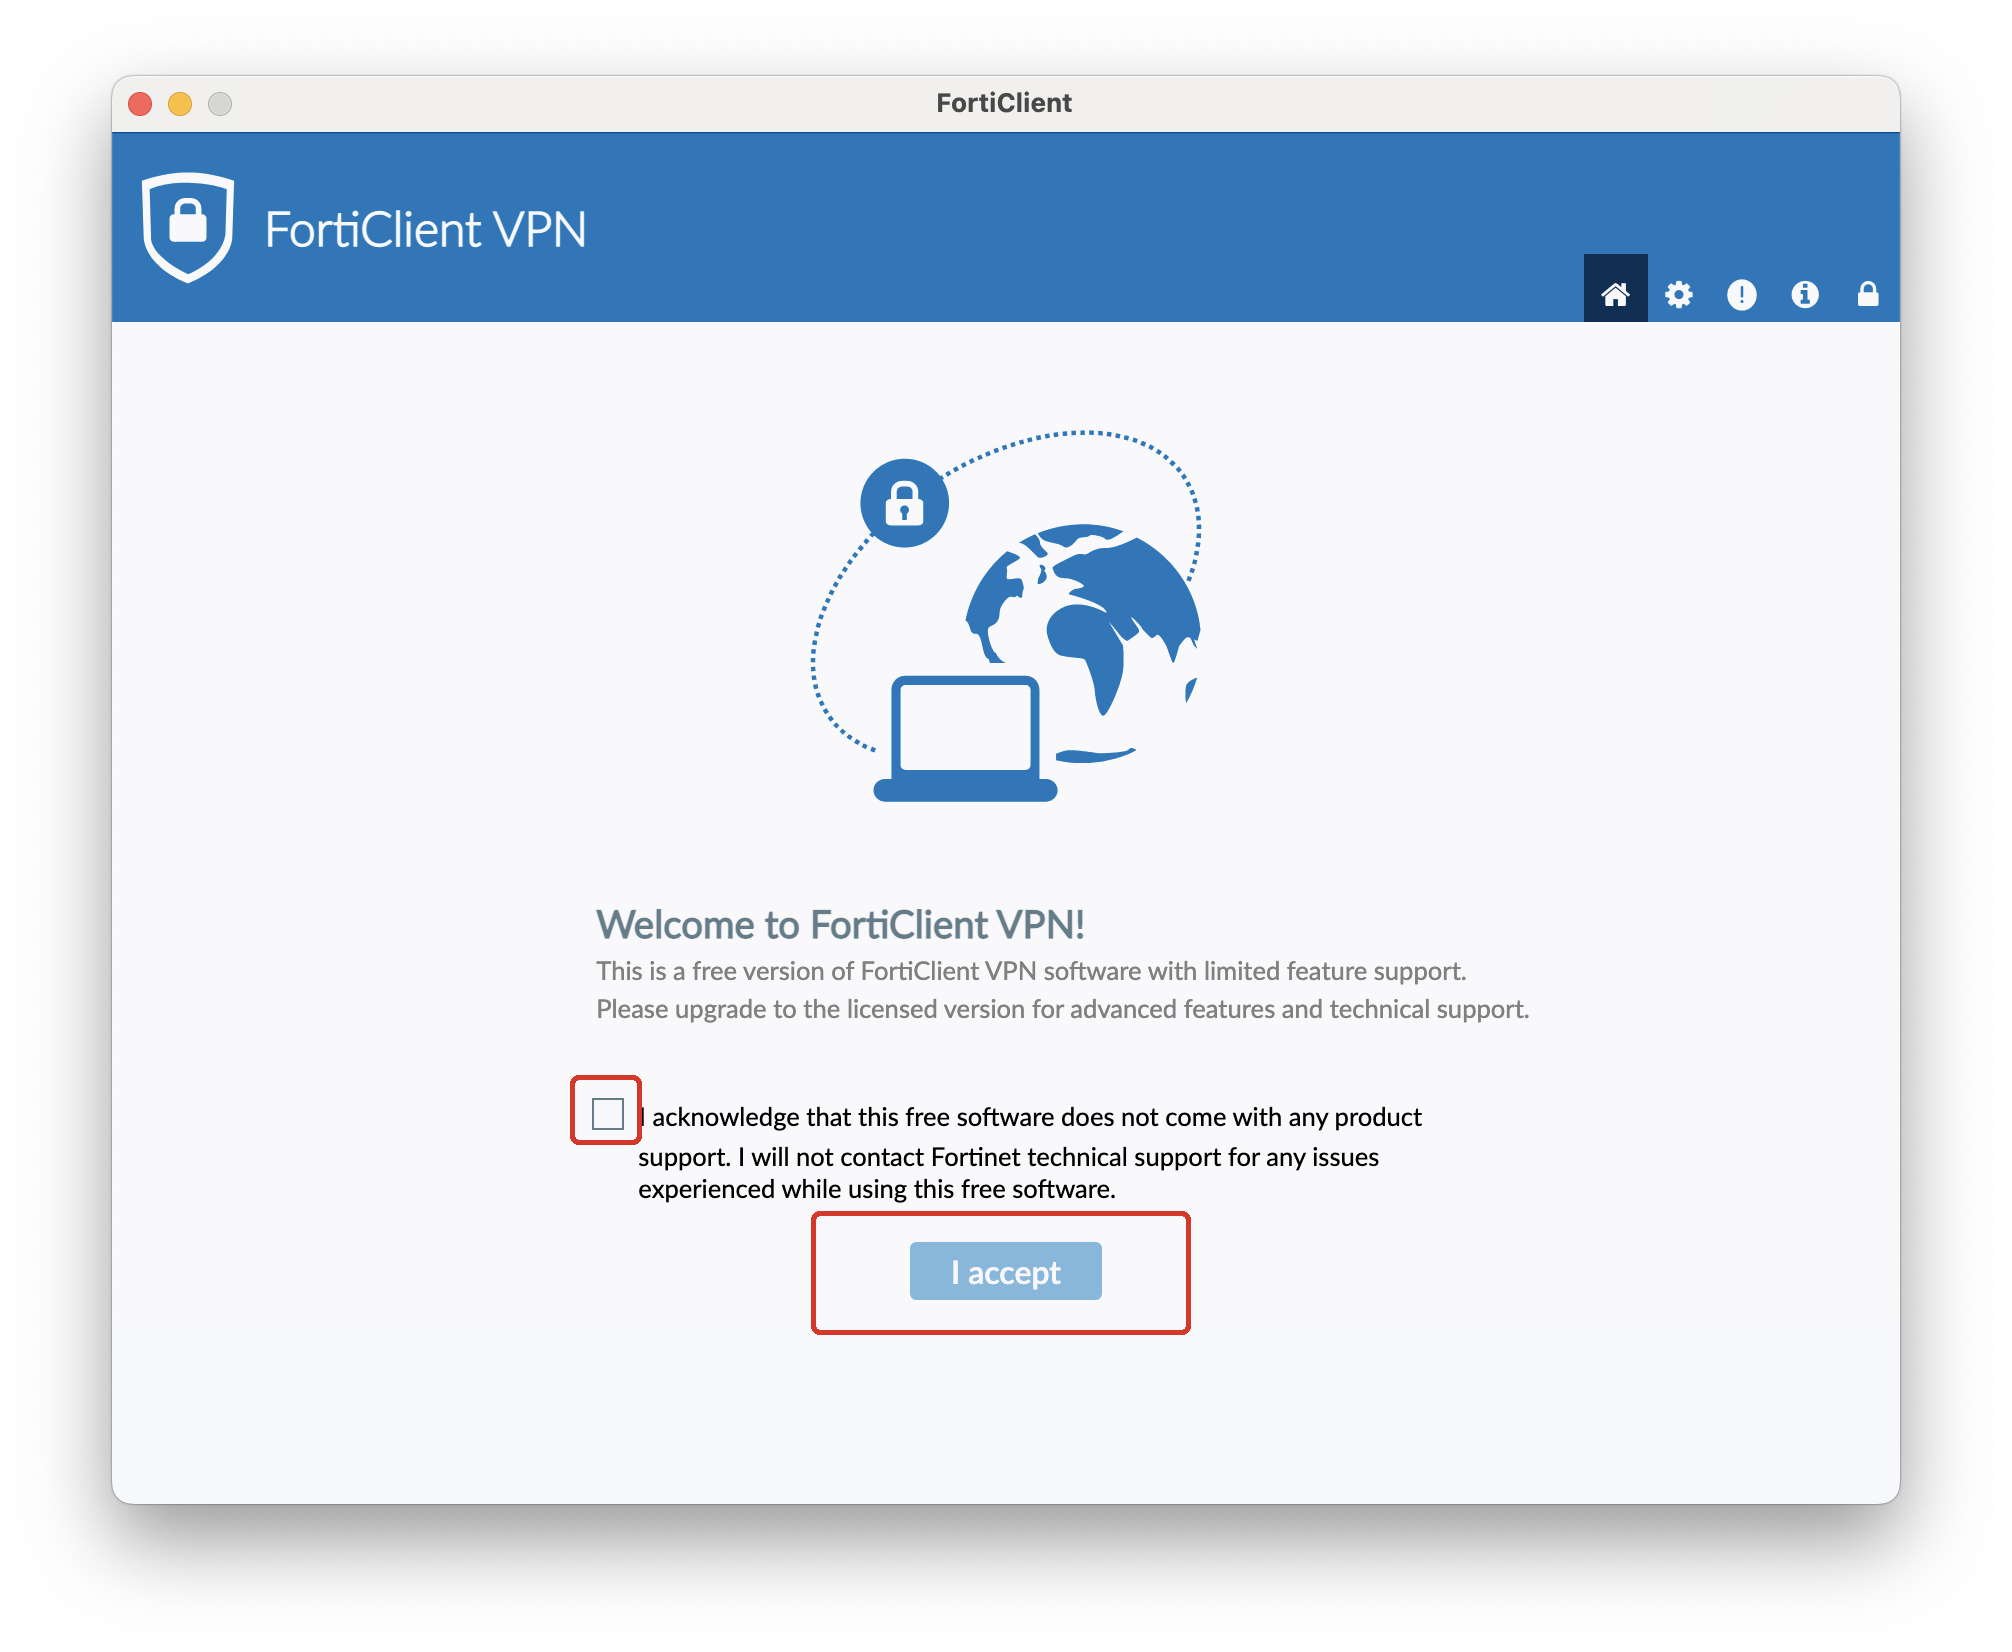
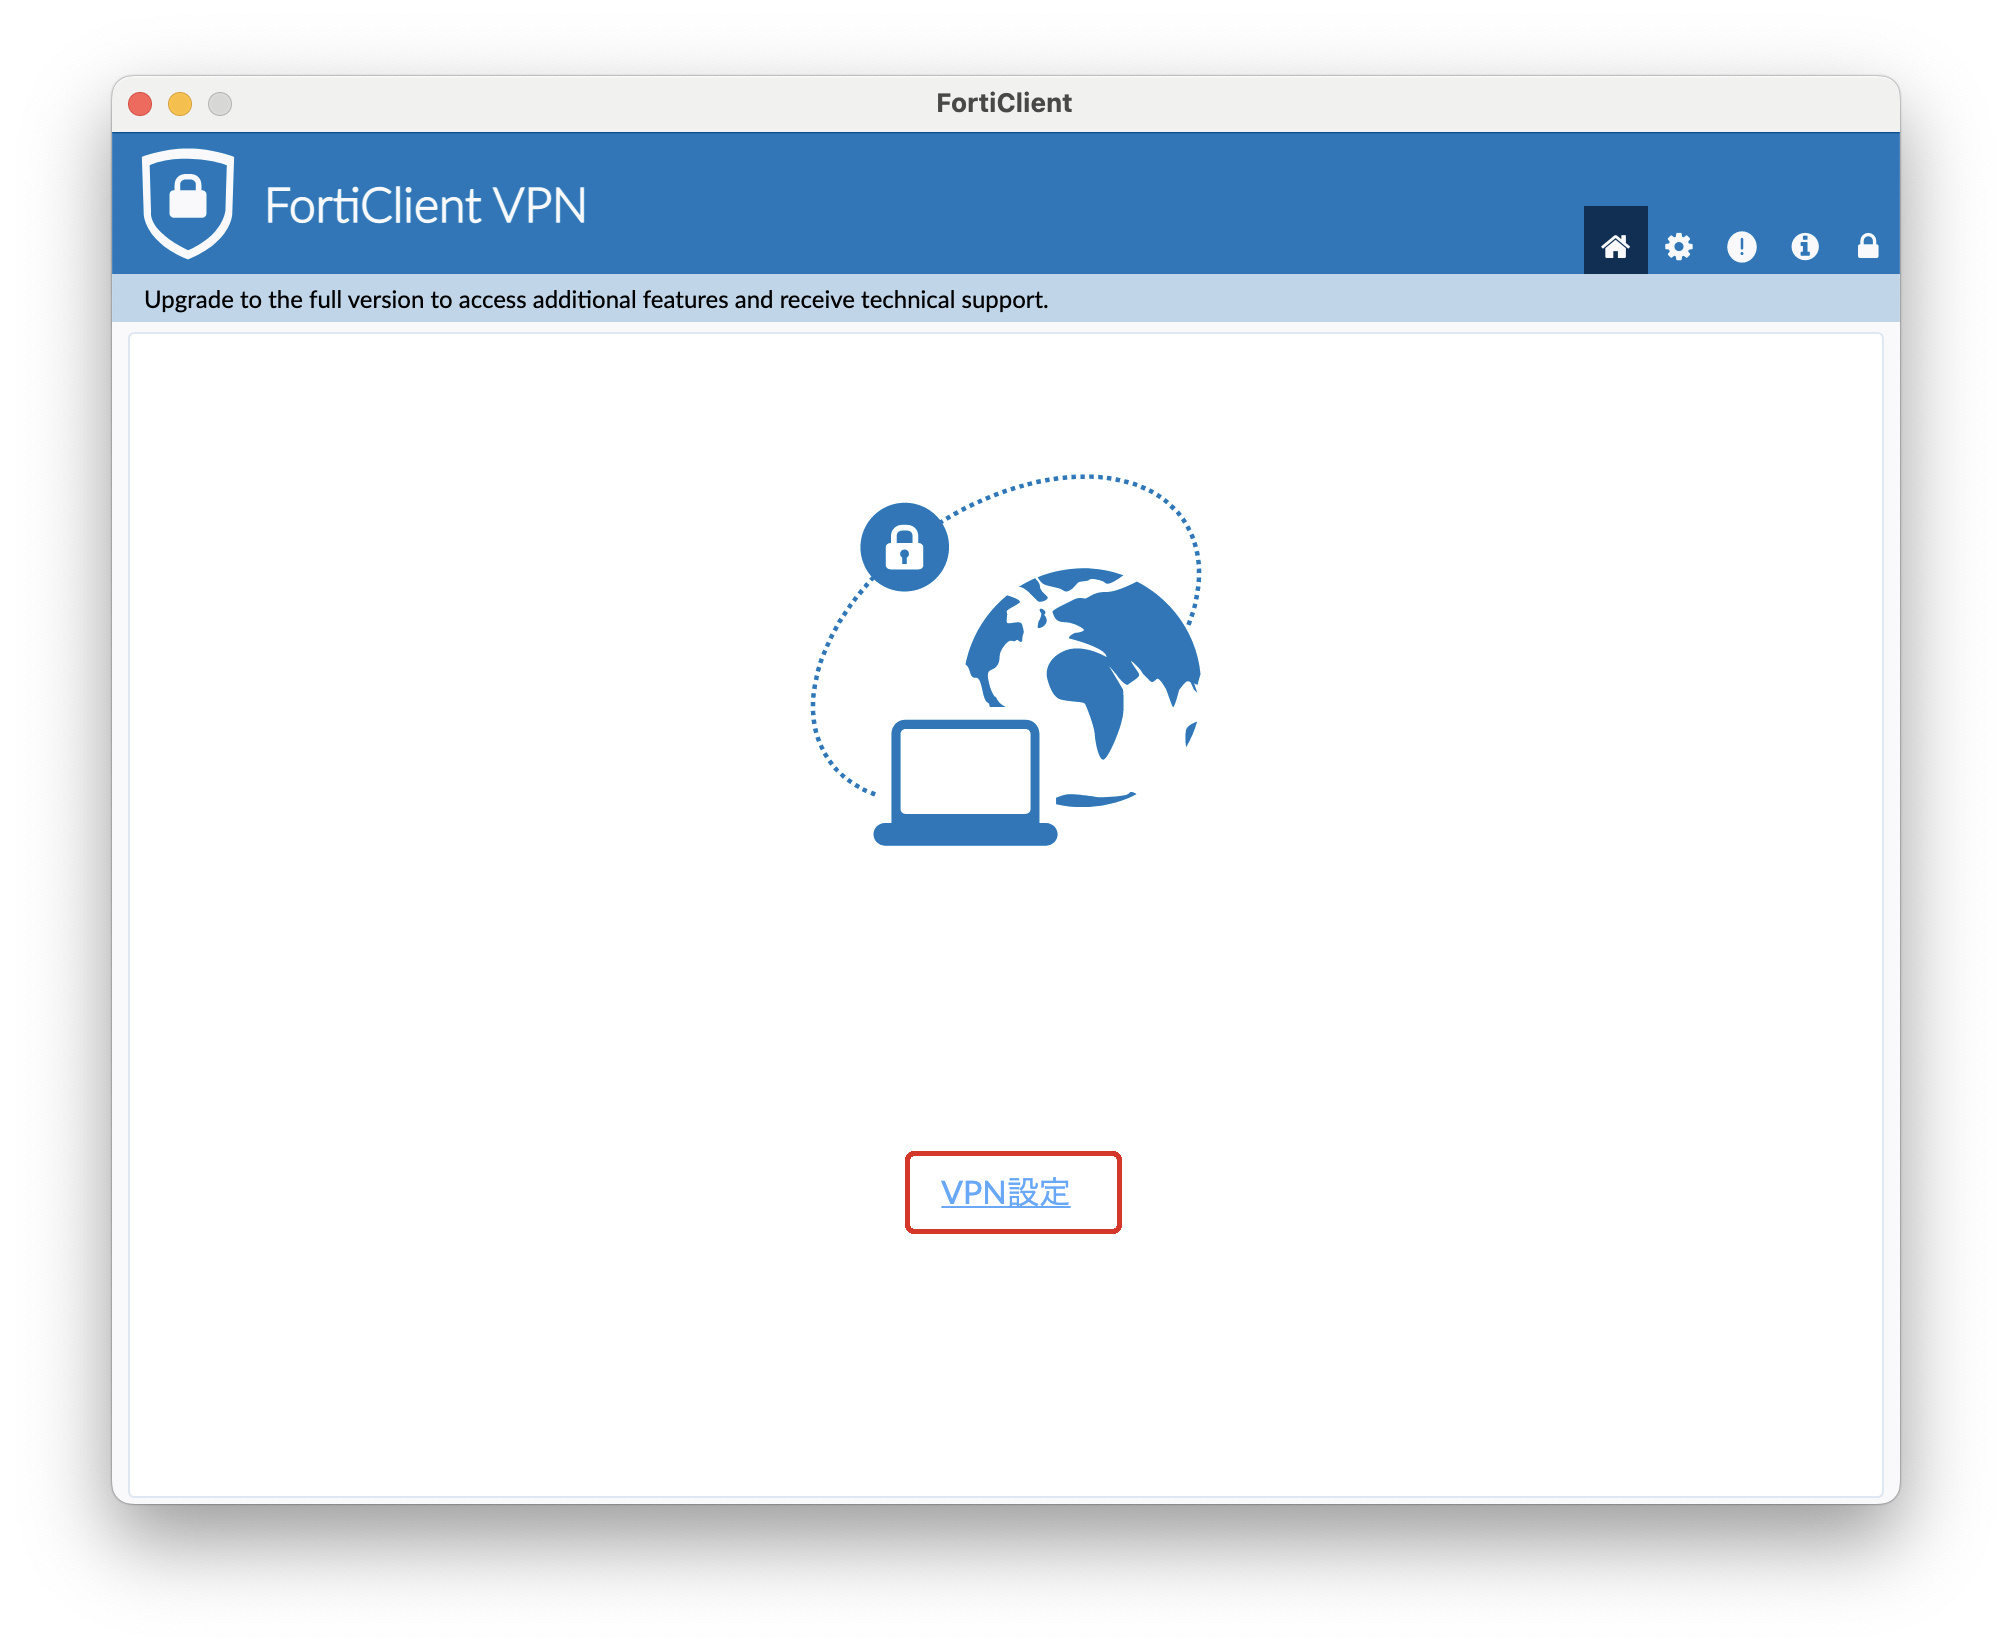
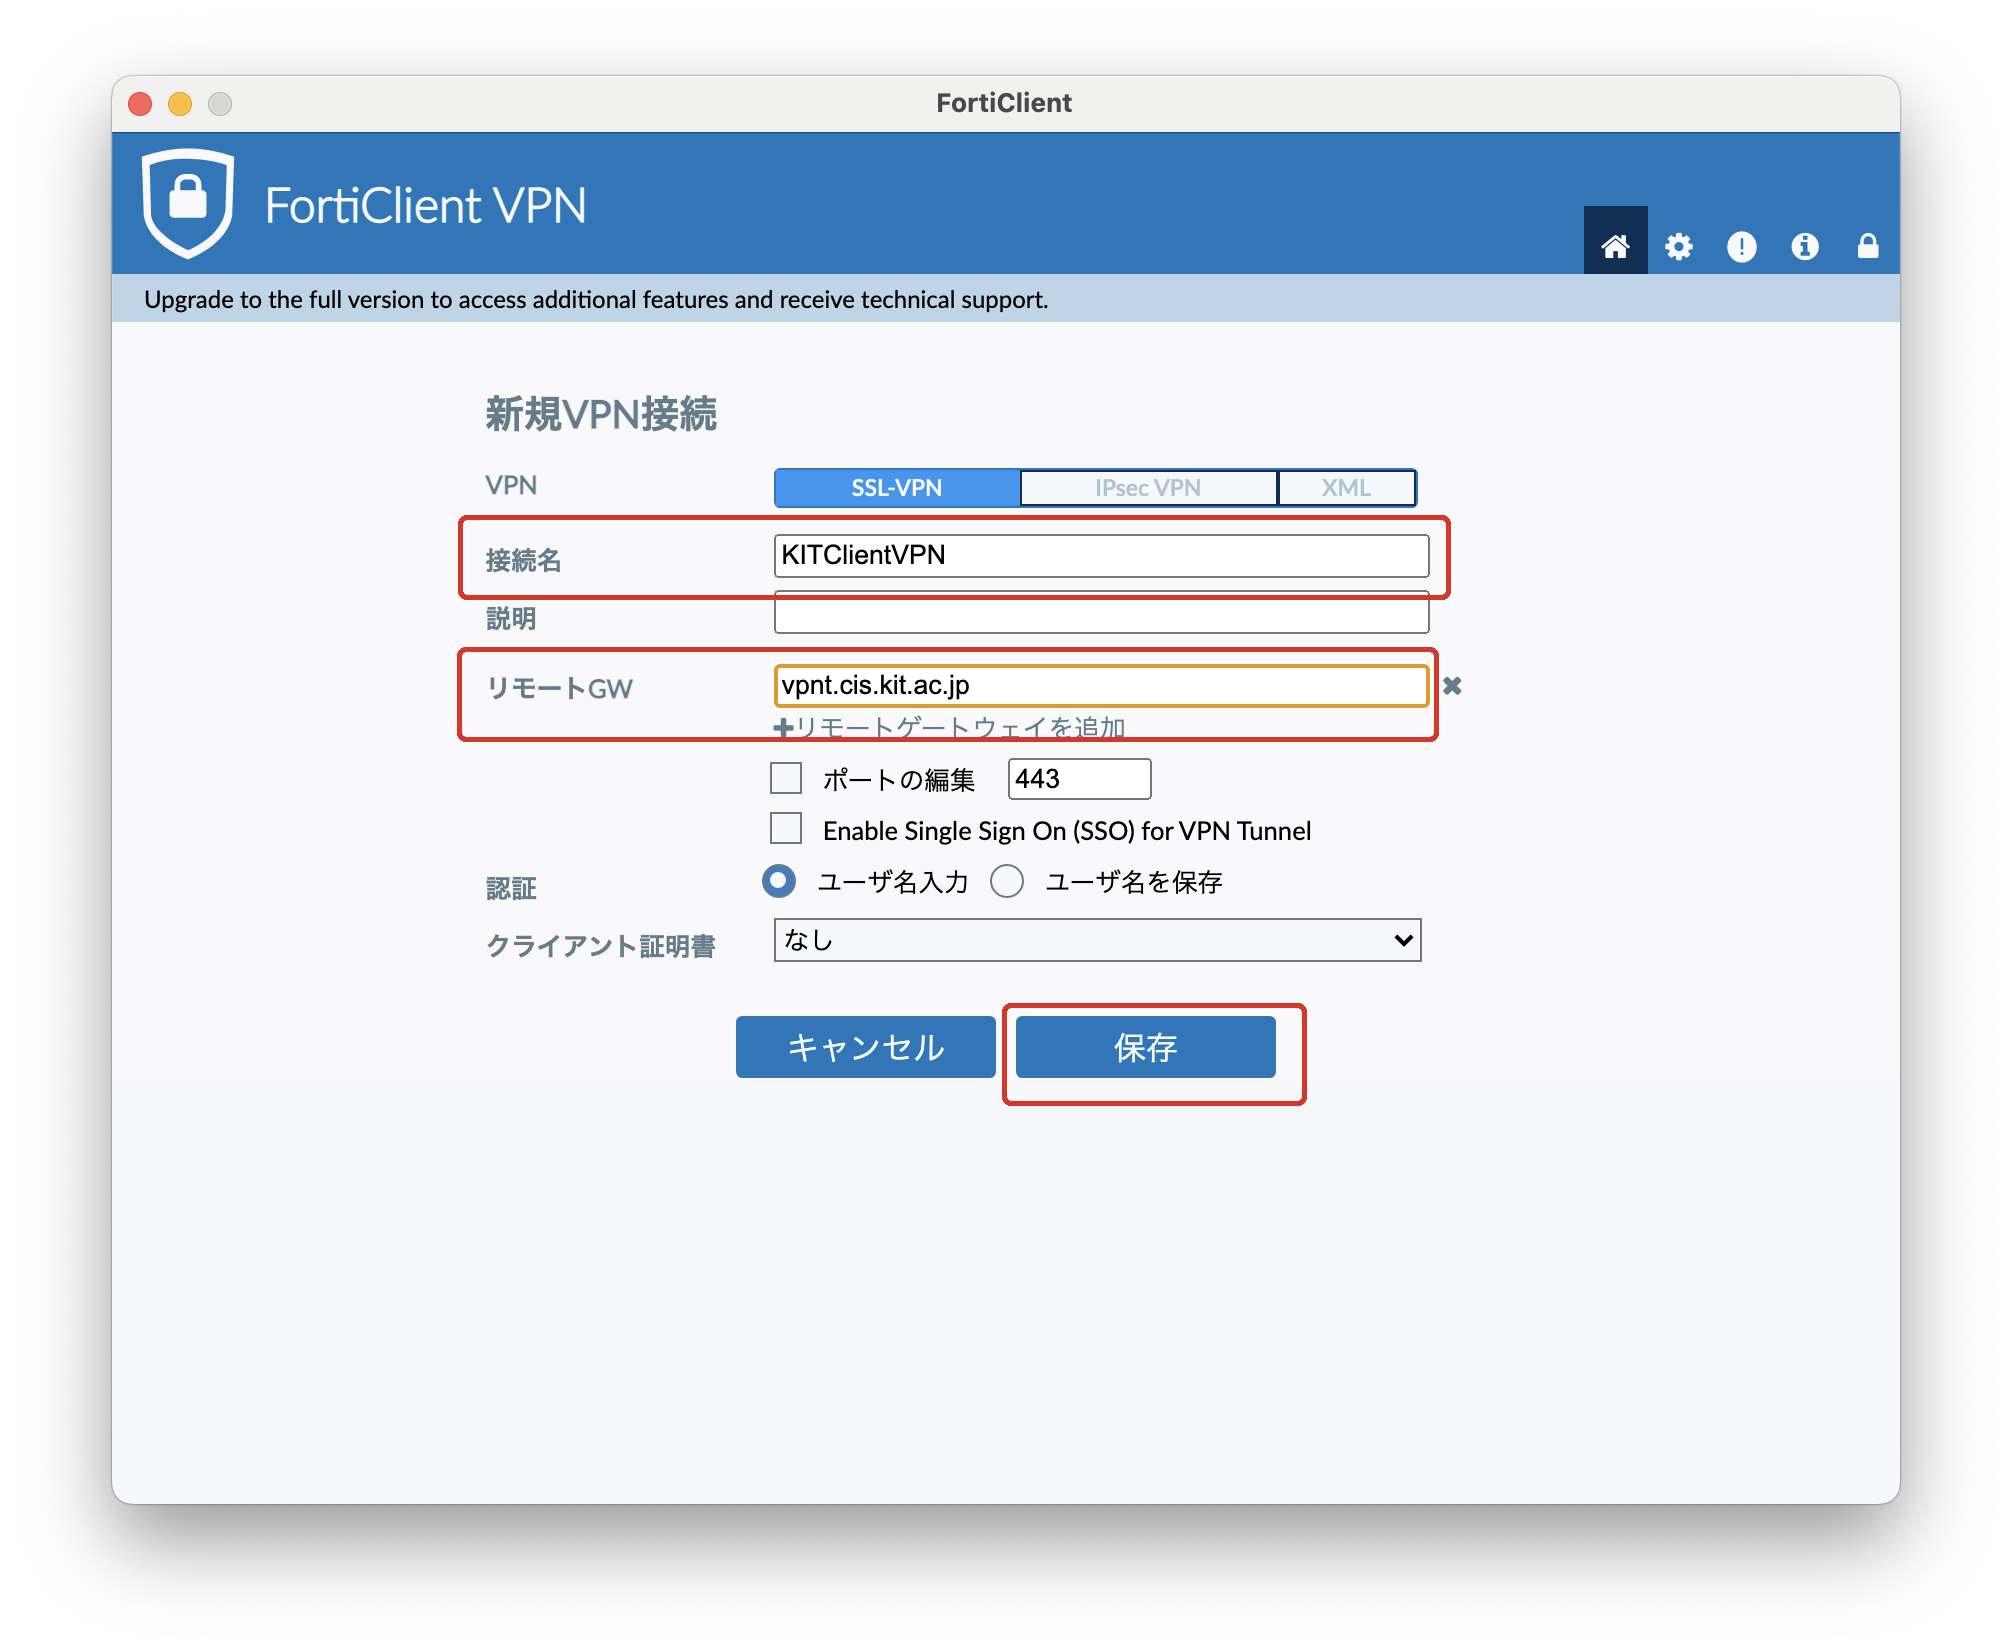
FortiClient を設定する
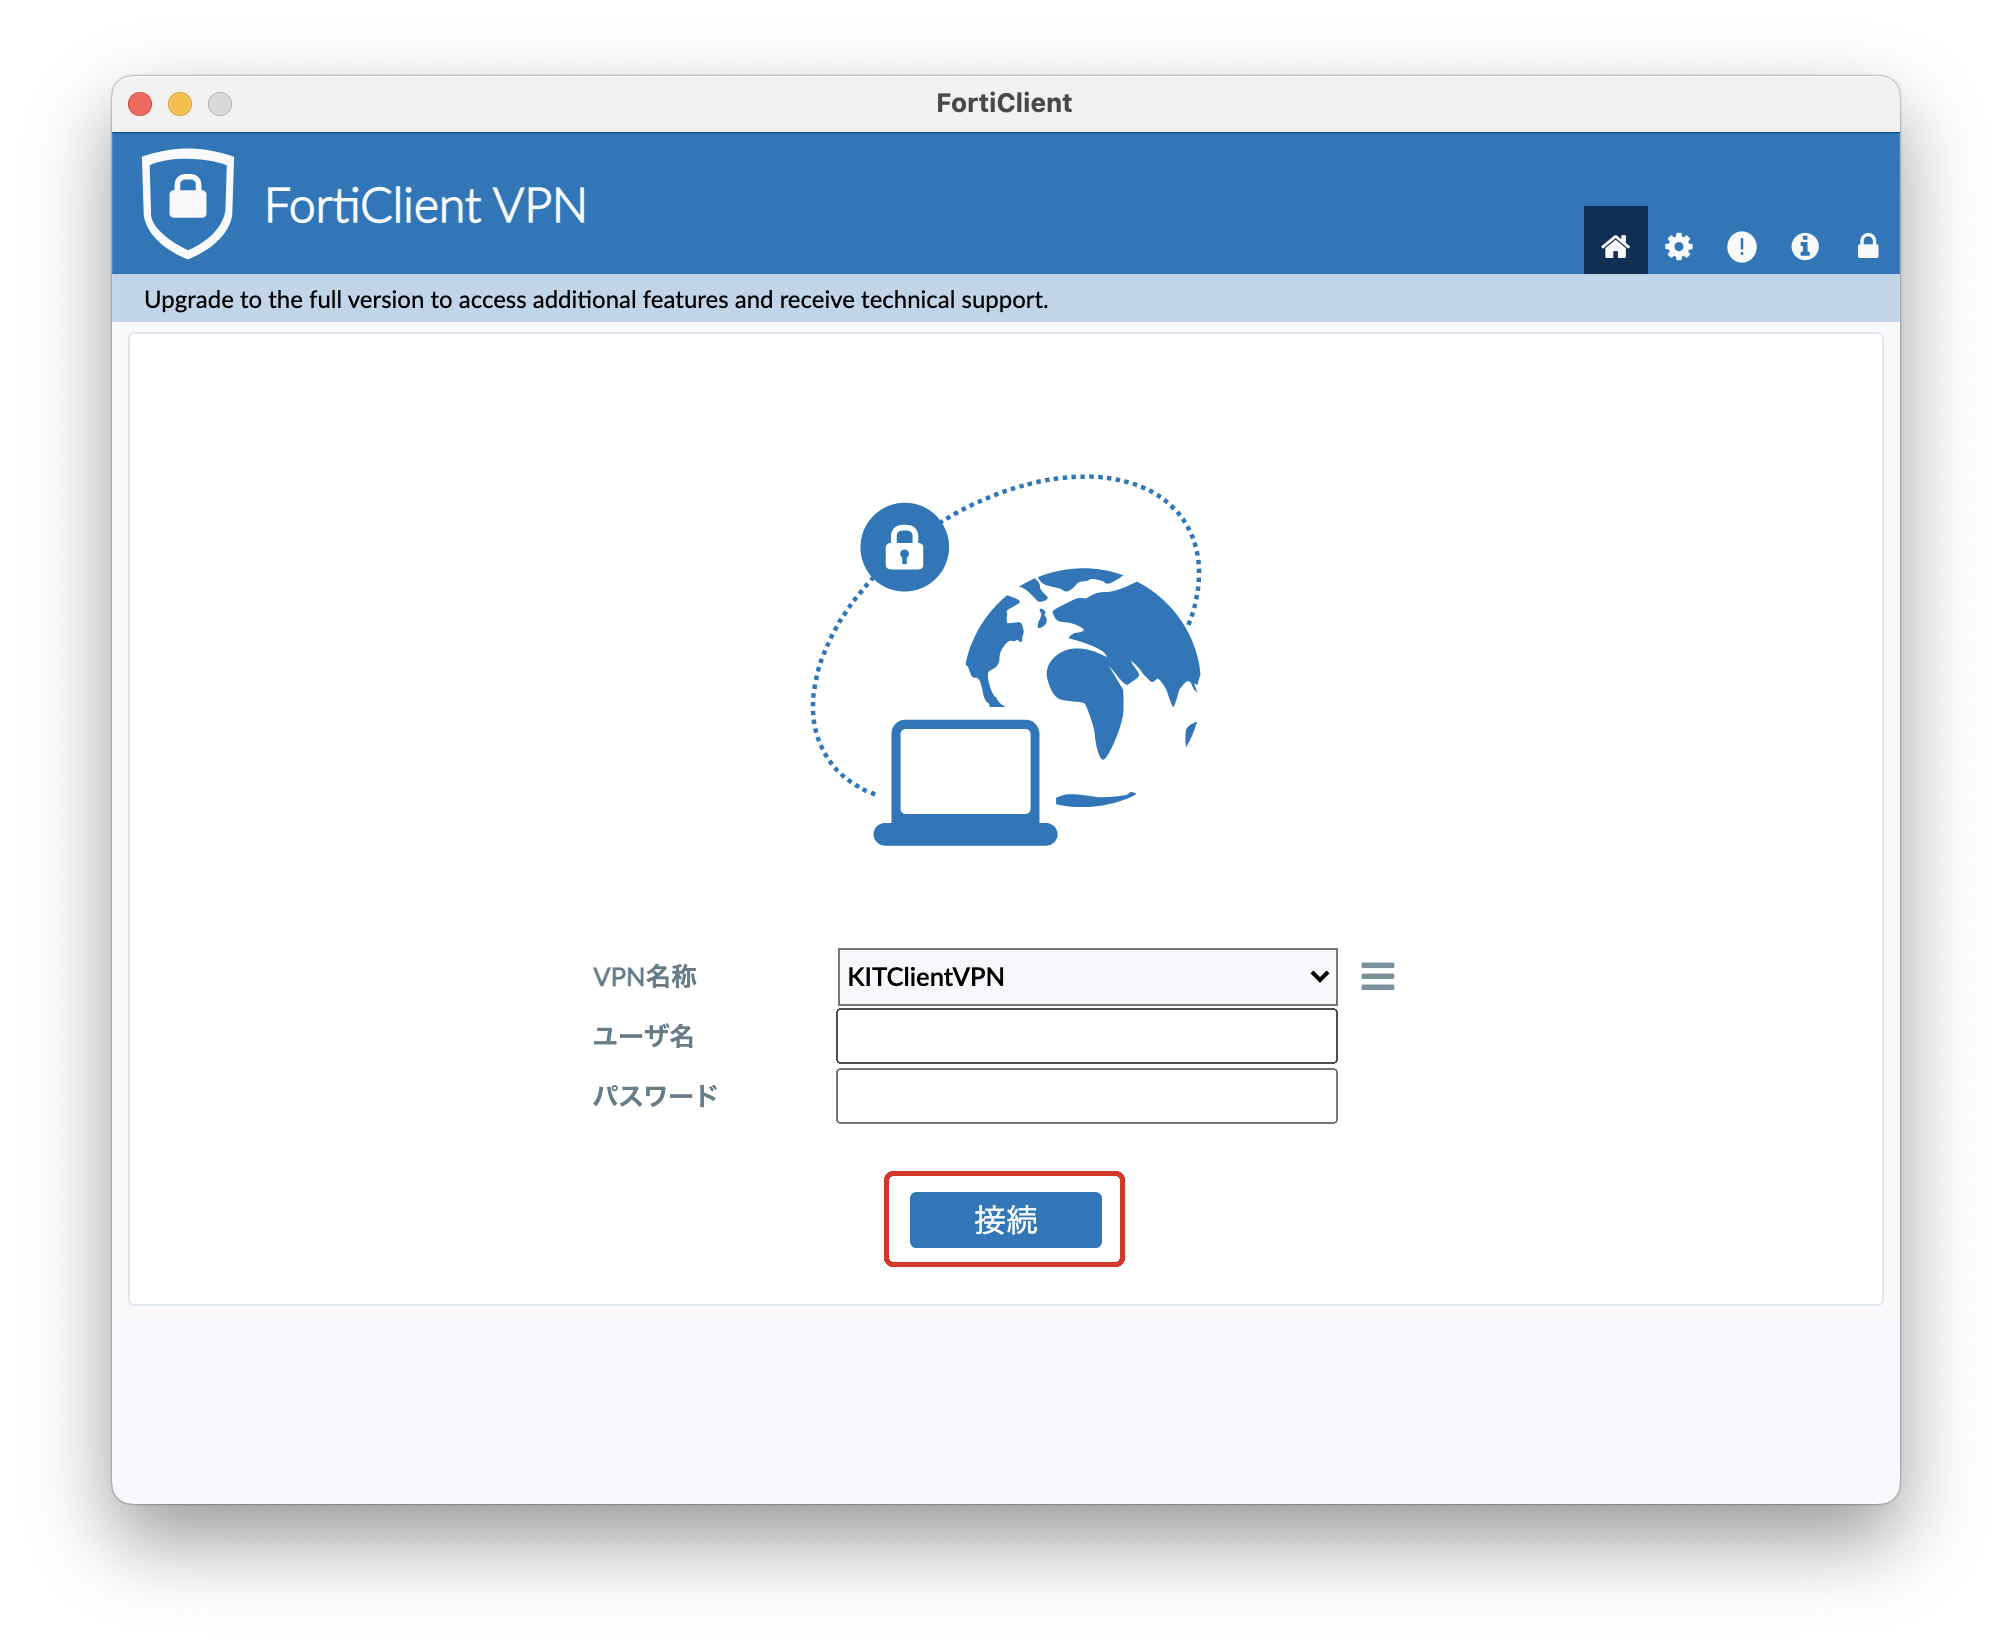
サービスに接続して端末VPNを利用する
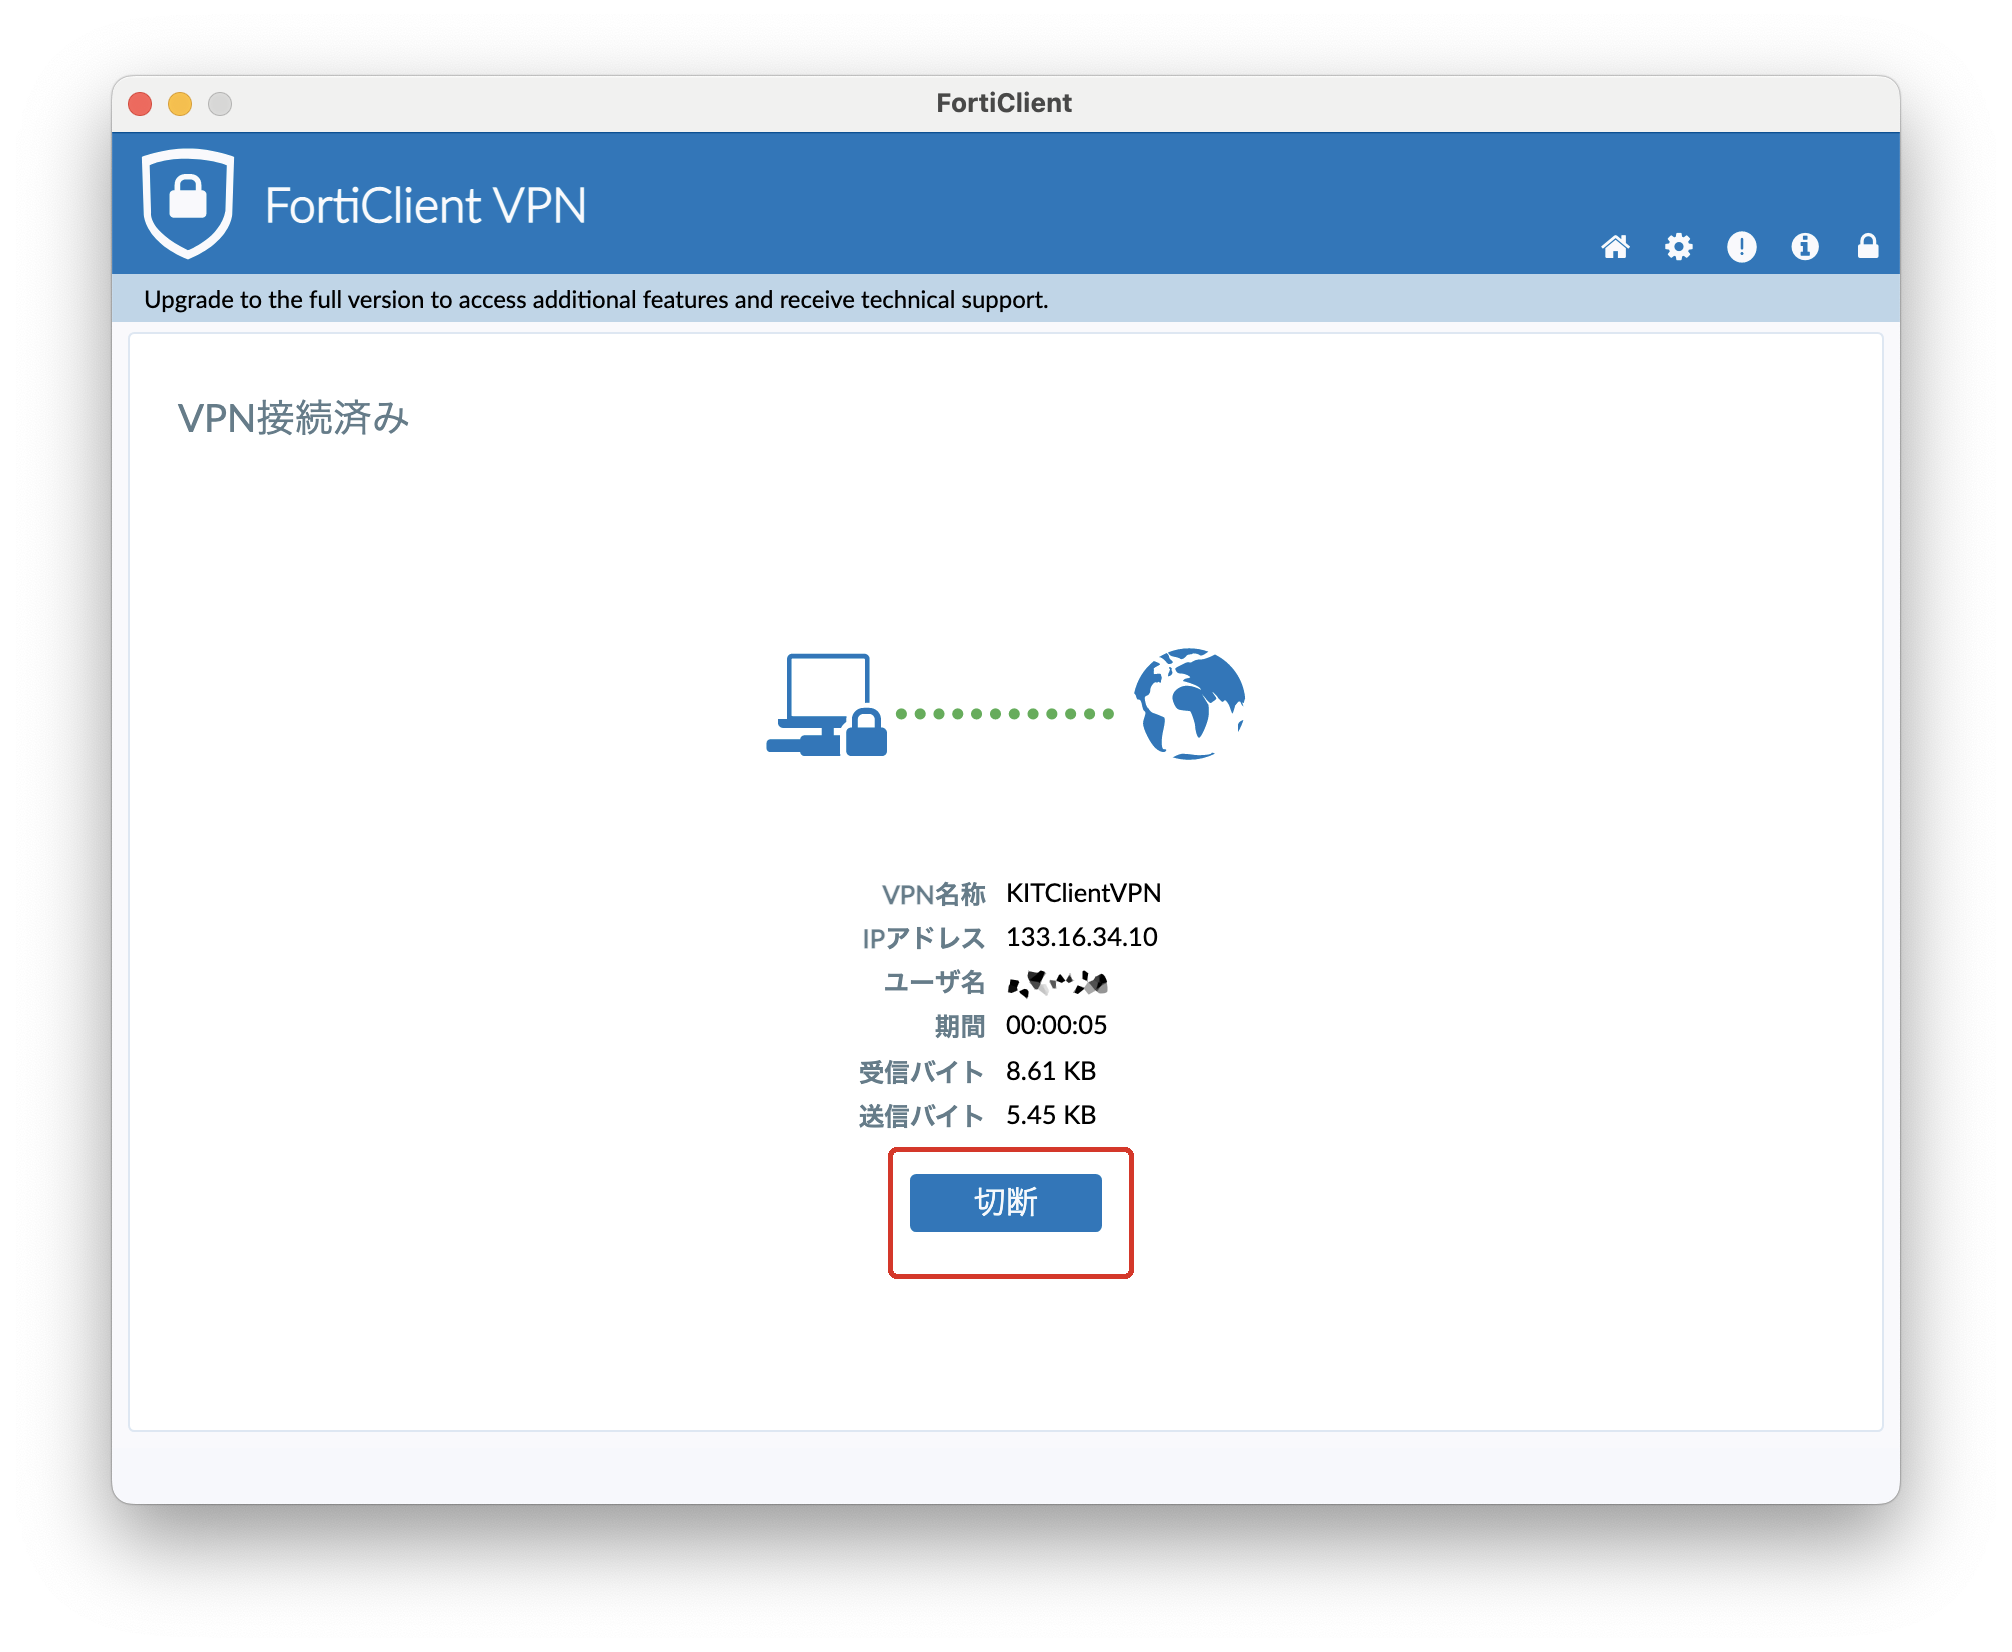
サービスから切断して元のネットワーク接続を利用する【切断】ボタンをクリックします。
関連記事
|


| Sv translation | |||||||||||||||||||||||||||||||||
|---|---|---|---|---|---|---|---|---|---|---|---|---|---|---|---|---|---|---|---|---|---|---|---|---|---|---|---|---|---|---|---|---|---|
| |||||||||||||||||||||||||||||||||
Step-GuideObtain the necessary access credentials and configuration details required for connection.
How to set up a client VPN connection on Mac
【プロキシ】タブを押します。 【プロキシ自動検出】(もしくは【Auto Proxy Discovery】)にチェックを入れて【OK】ボタンを押します。 サービスに接続して端末VPNを利用する
サービスから切断して元のネットワーク接続を利用する
情報 |
Connect to the service and use Fortigate client VPN
Disconnect from the service and revert to the original network connection
Related Articles
|