比較バージョン

キー

  • この行は追加されました。
  • この行は削除されました。
  • 書式設定が変更されました。
Sv translation
languageja

macOS

...

で端末 VPN (FortiGate) を利用する場合の手順を説明します。

警告

現在提供しているバージョンの FortiClient は macOS Sequoia (macOS 15) に対応していません。

対応バージョンがリリースされるまで macOS Sequoia にアップグレードしないでください。


情報

スクリーンショットは macOS Sonoma (14.x) のものです。


目次

ステップ ガイド

...

接続に必要な機密情報を入手する

FortiClient をインストールする

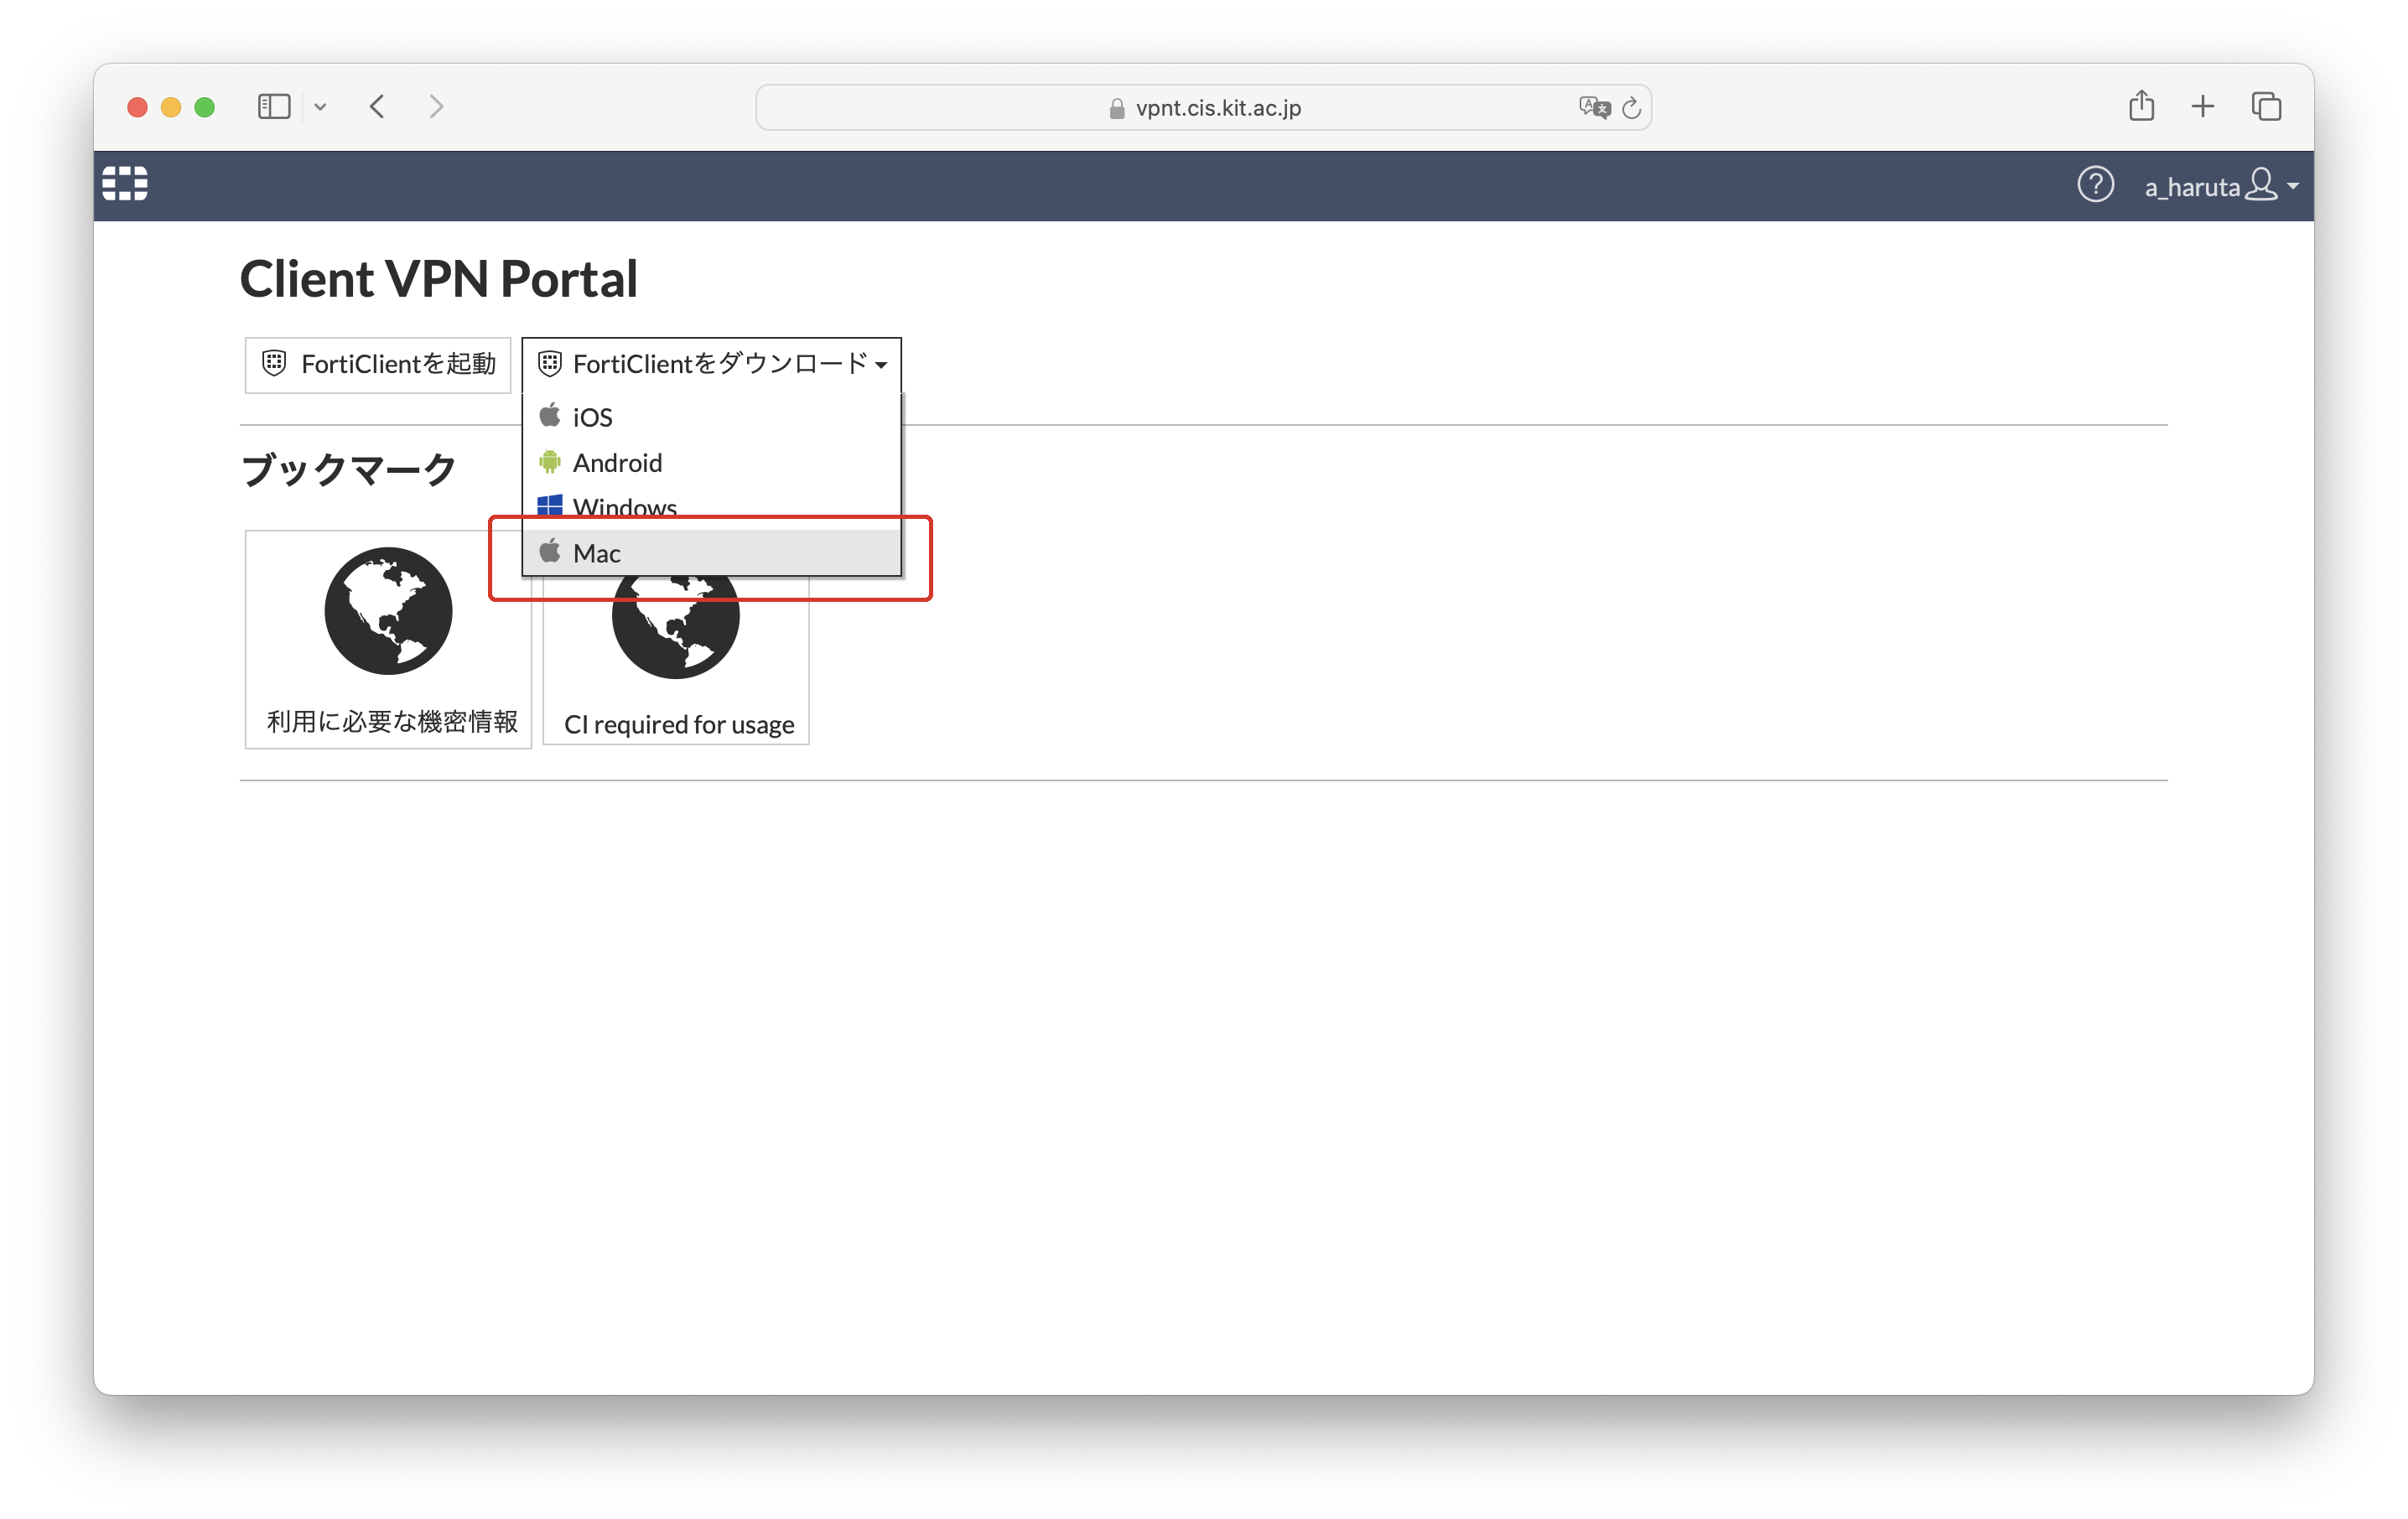
  1. https://vpnt.cis.kit.ac.jp/ にCISアカウントでログインします。
  2. 【FortiClientをダウンロード】、【Mac】の順にクリックしてインストーラーのディスクイメージをダウンロードします。
     Image Added
  3. ディスクイメージを開き、FortiClientInstaller を起動します。
    Image Added
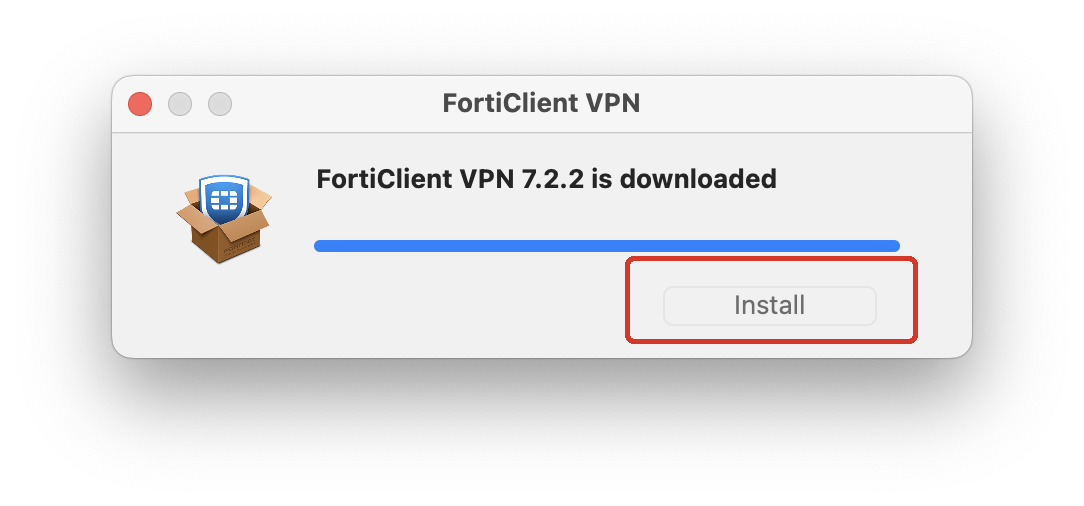
  4. プログレスバーが最後まで進むまで待ちます。
    Image Added
  5. Installボタンをクリックします。
    Image Added
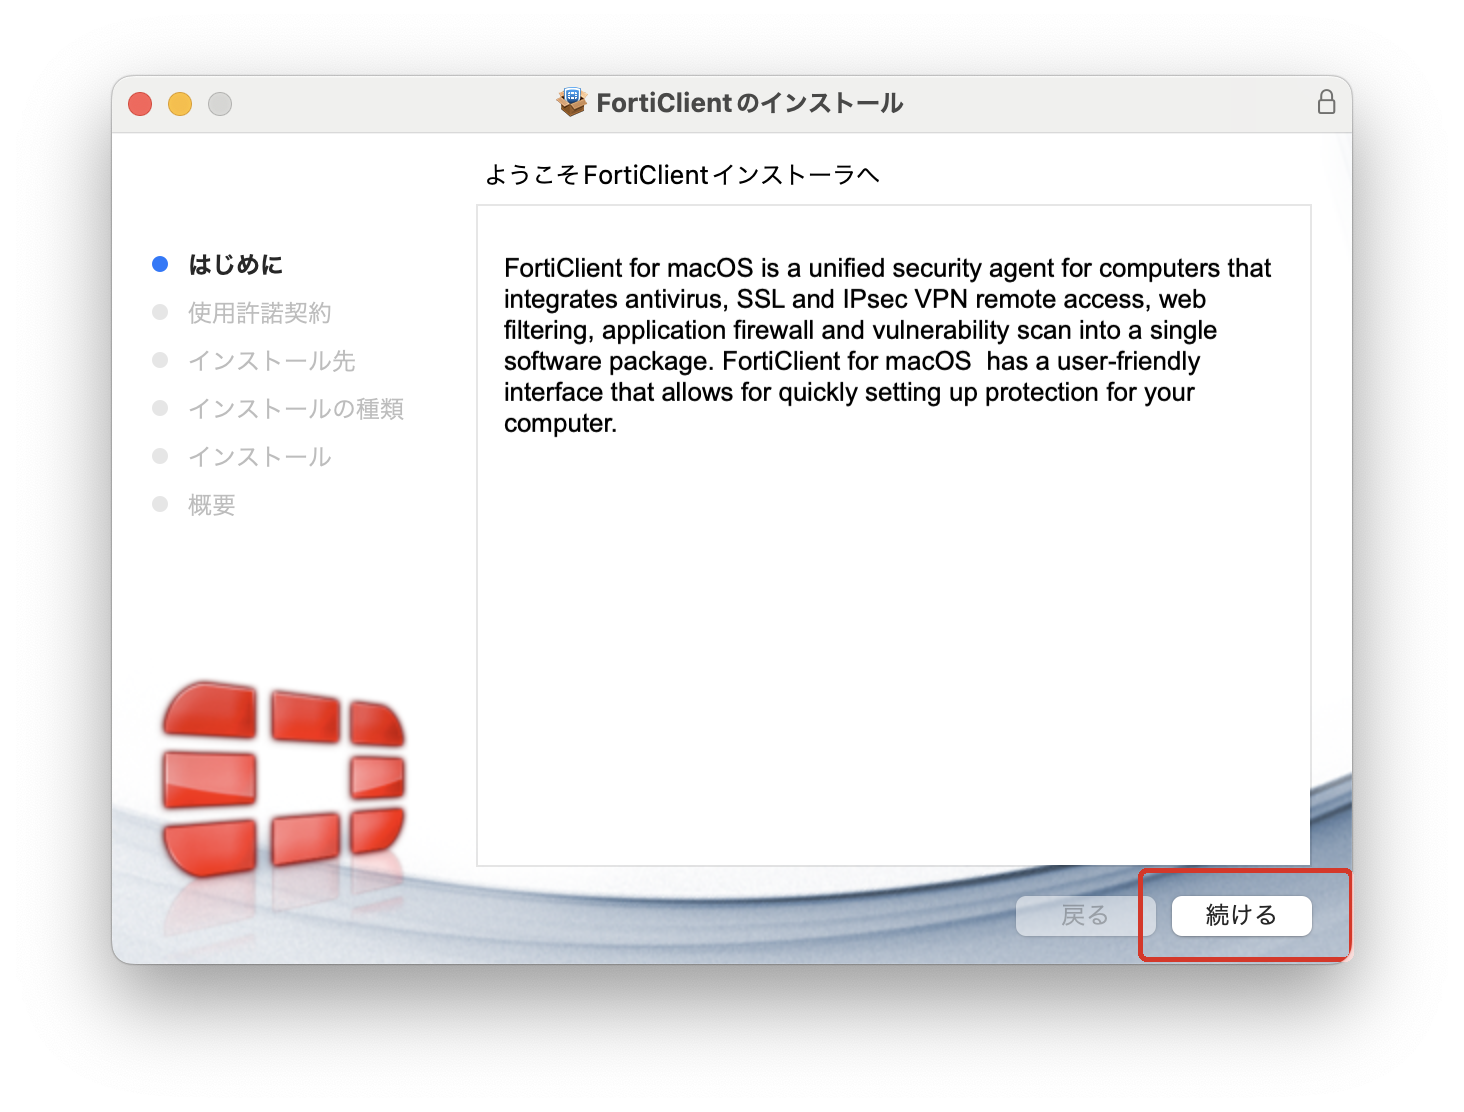
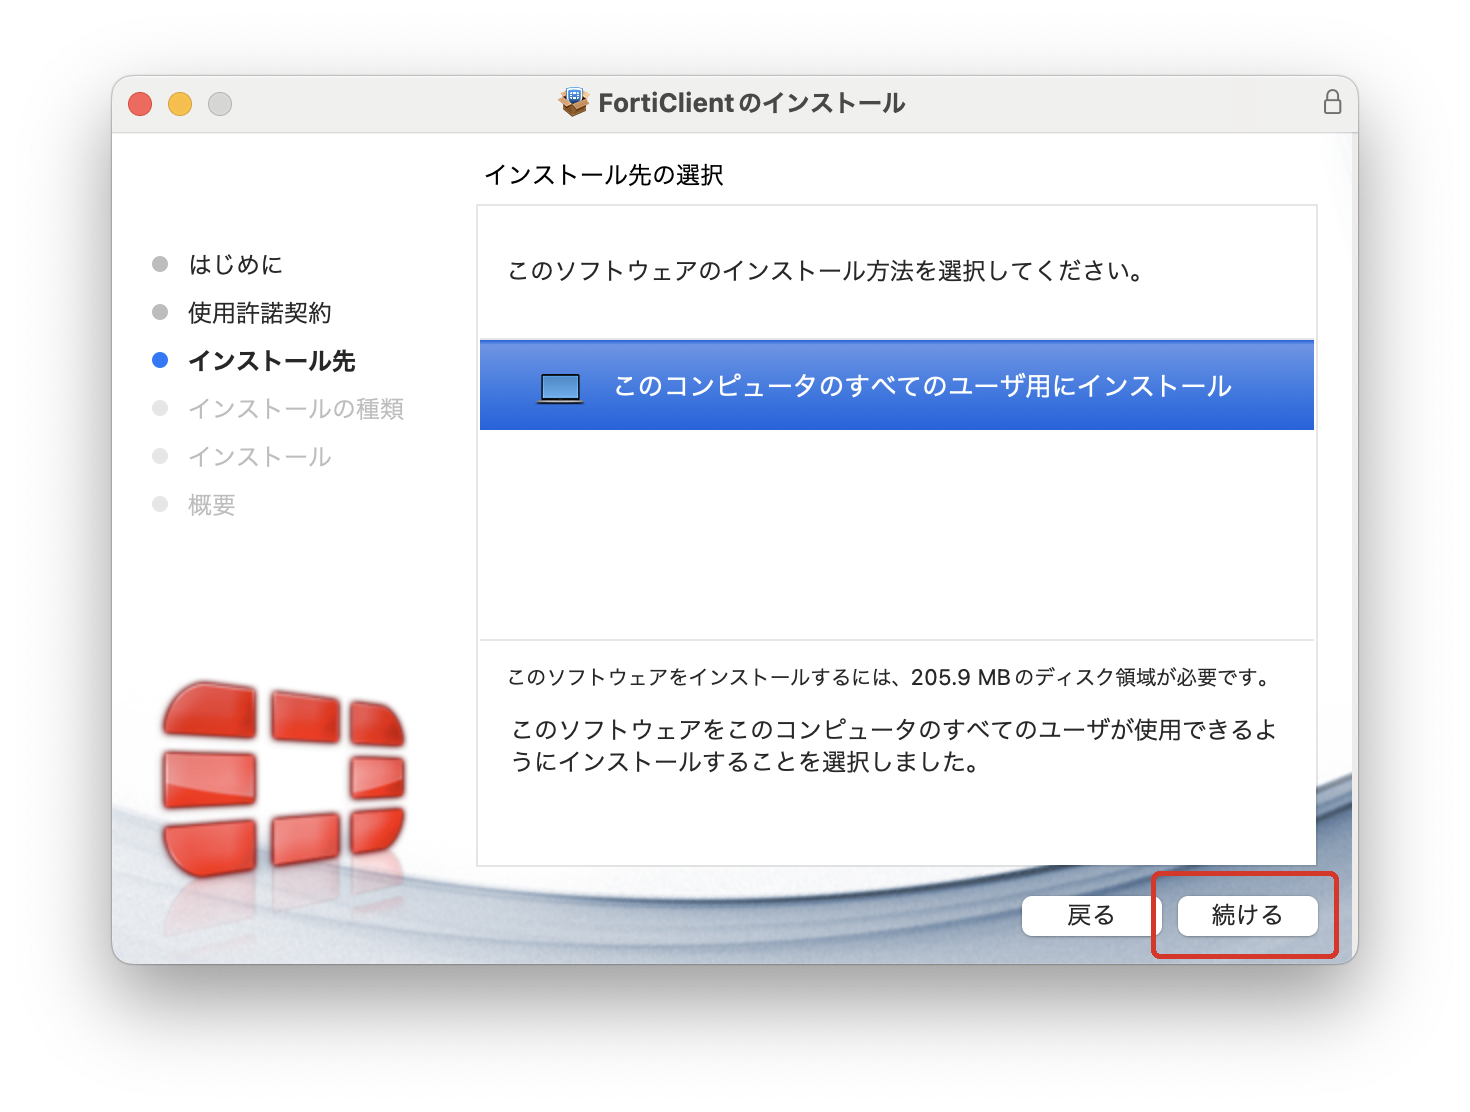
  6. 【続ける】ボタンをクリックします。
    Image Added
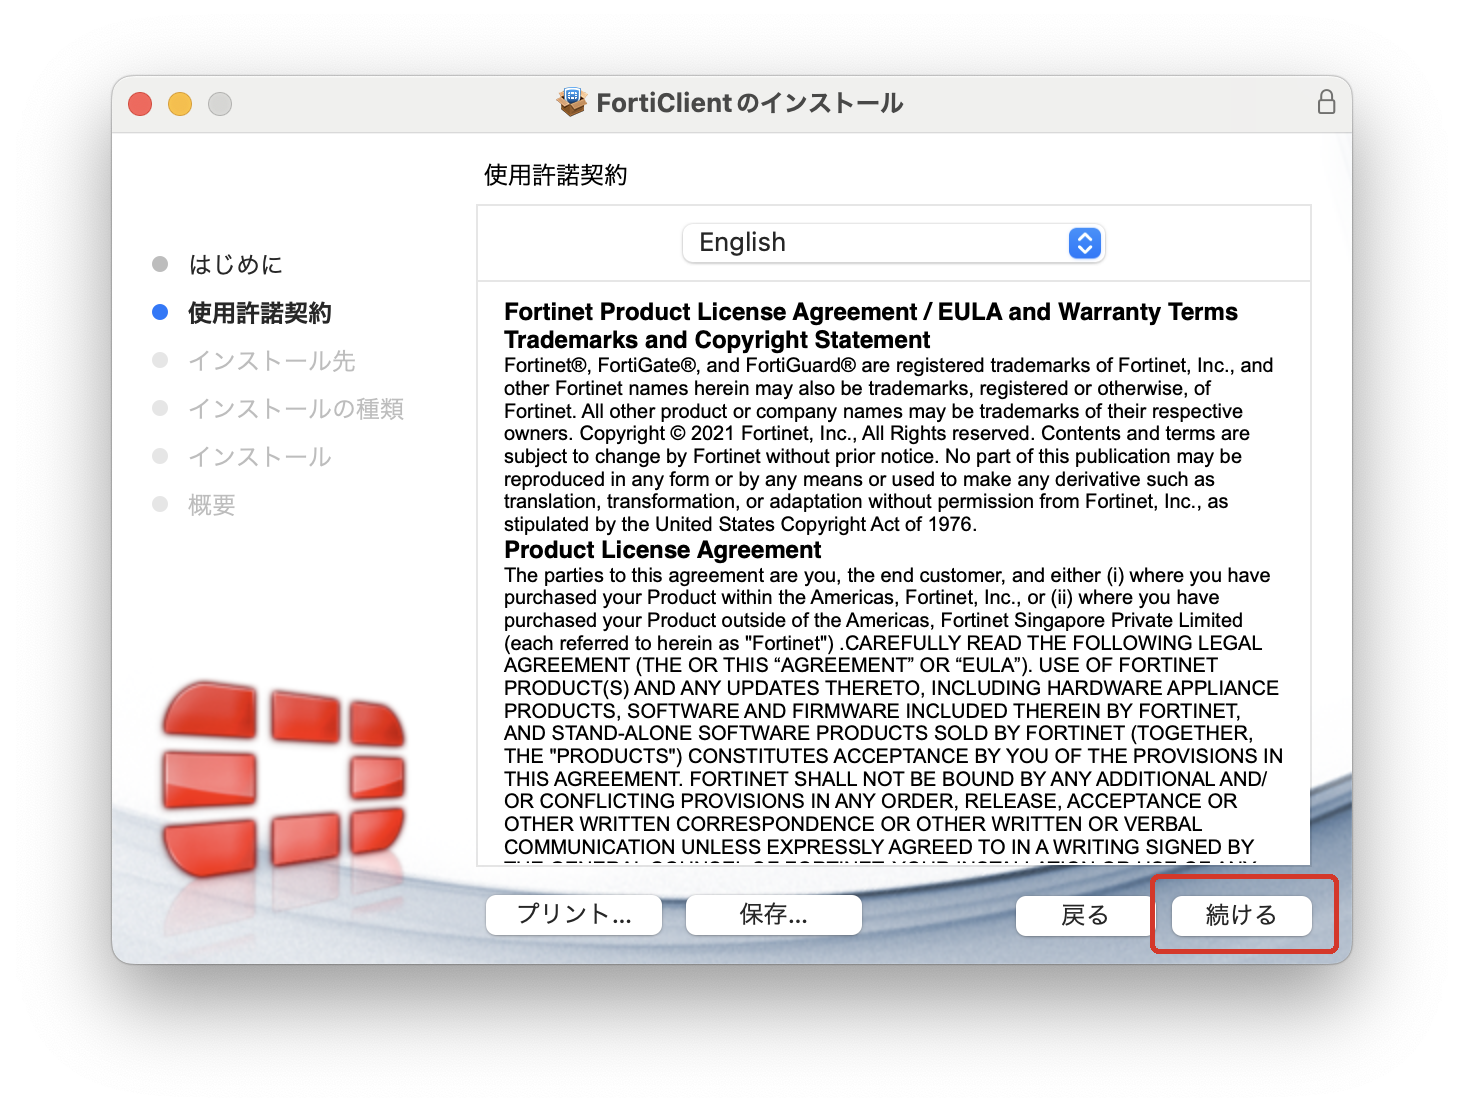
  7. 【続ける】ボタンをクリックします。
    Image Added
  8. 【同意する】ボタンをクリックします。
    Image Added
  9. 【続ける】ボタンをクリックします。
    Image Added
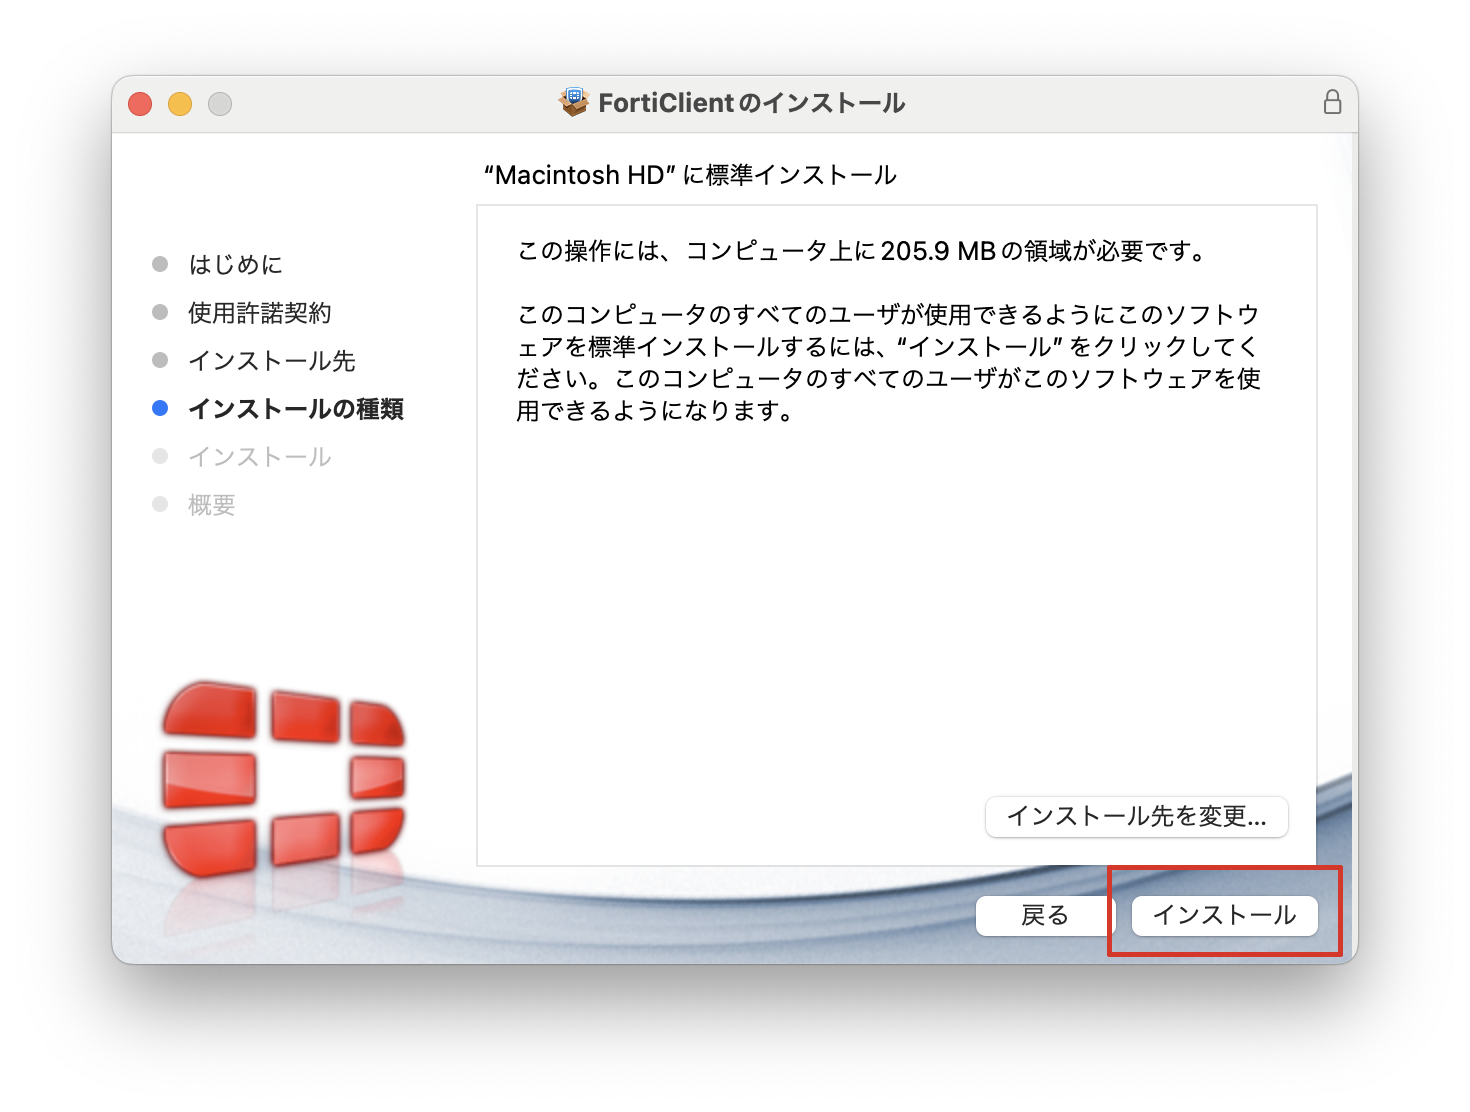
  10. 【インストール】ボタンをクリックします。
    Image Added
  11. プログレスバーがいっぱいになるまで待ちます。
    Image Added
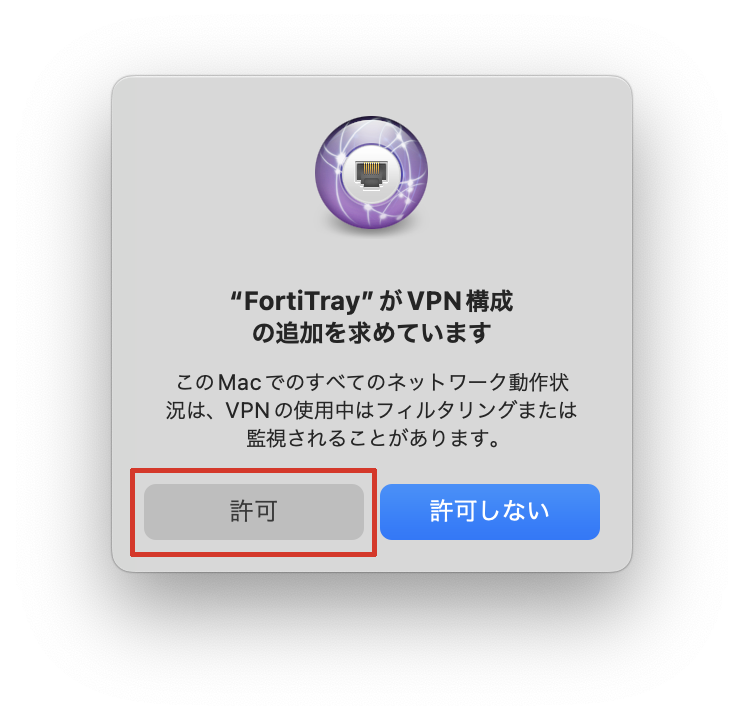
  12. 【"FortiTray" が VPN 構成の追加を求めています】ダイアログが表示されたら、【許可】ボタンをクリックします。
    Image Added
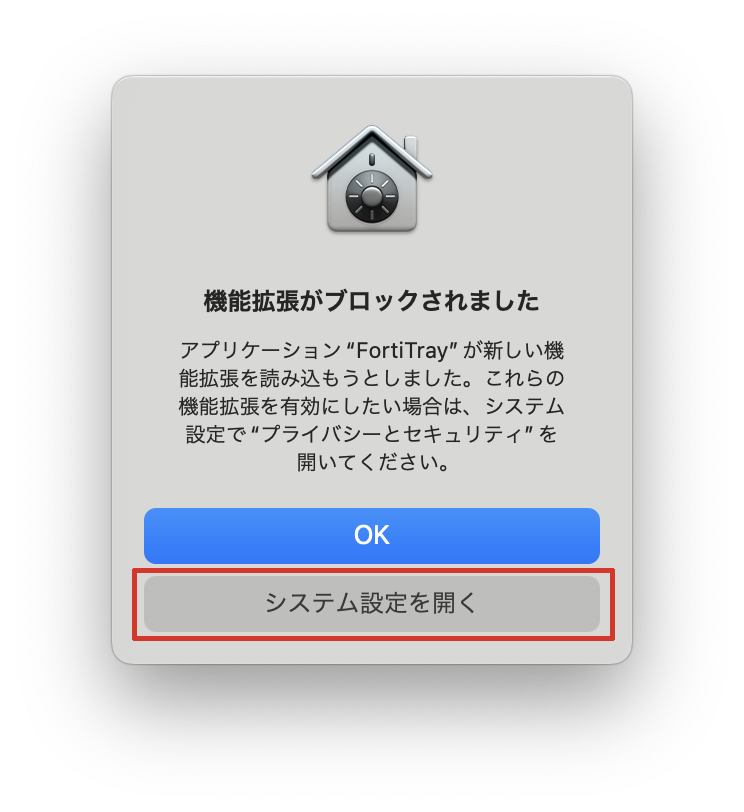
  13. 【機能拡張がブロックされました】ダイアログが表示されたら、【システム設定を開く】ボタンをクリックします。
    Image Added
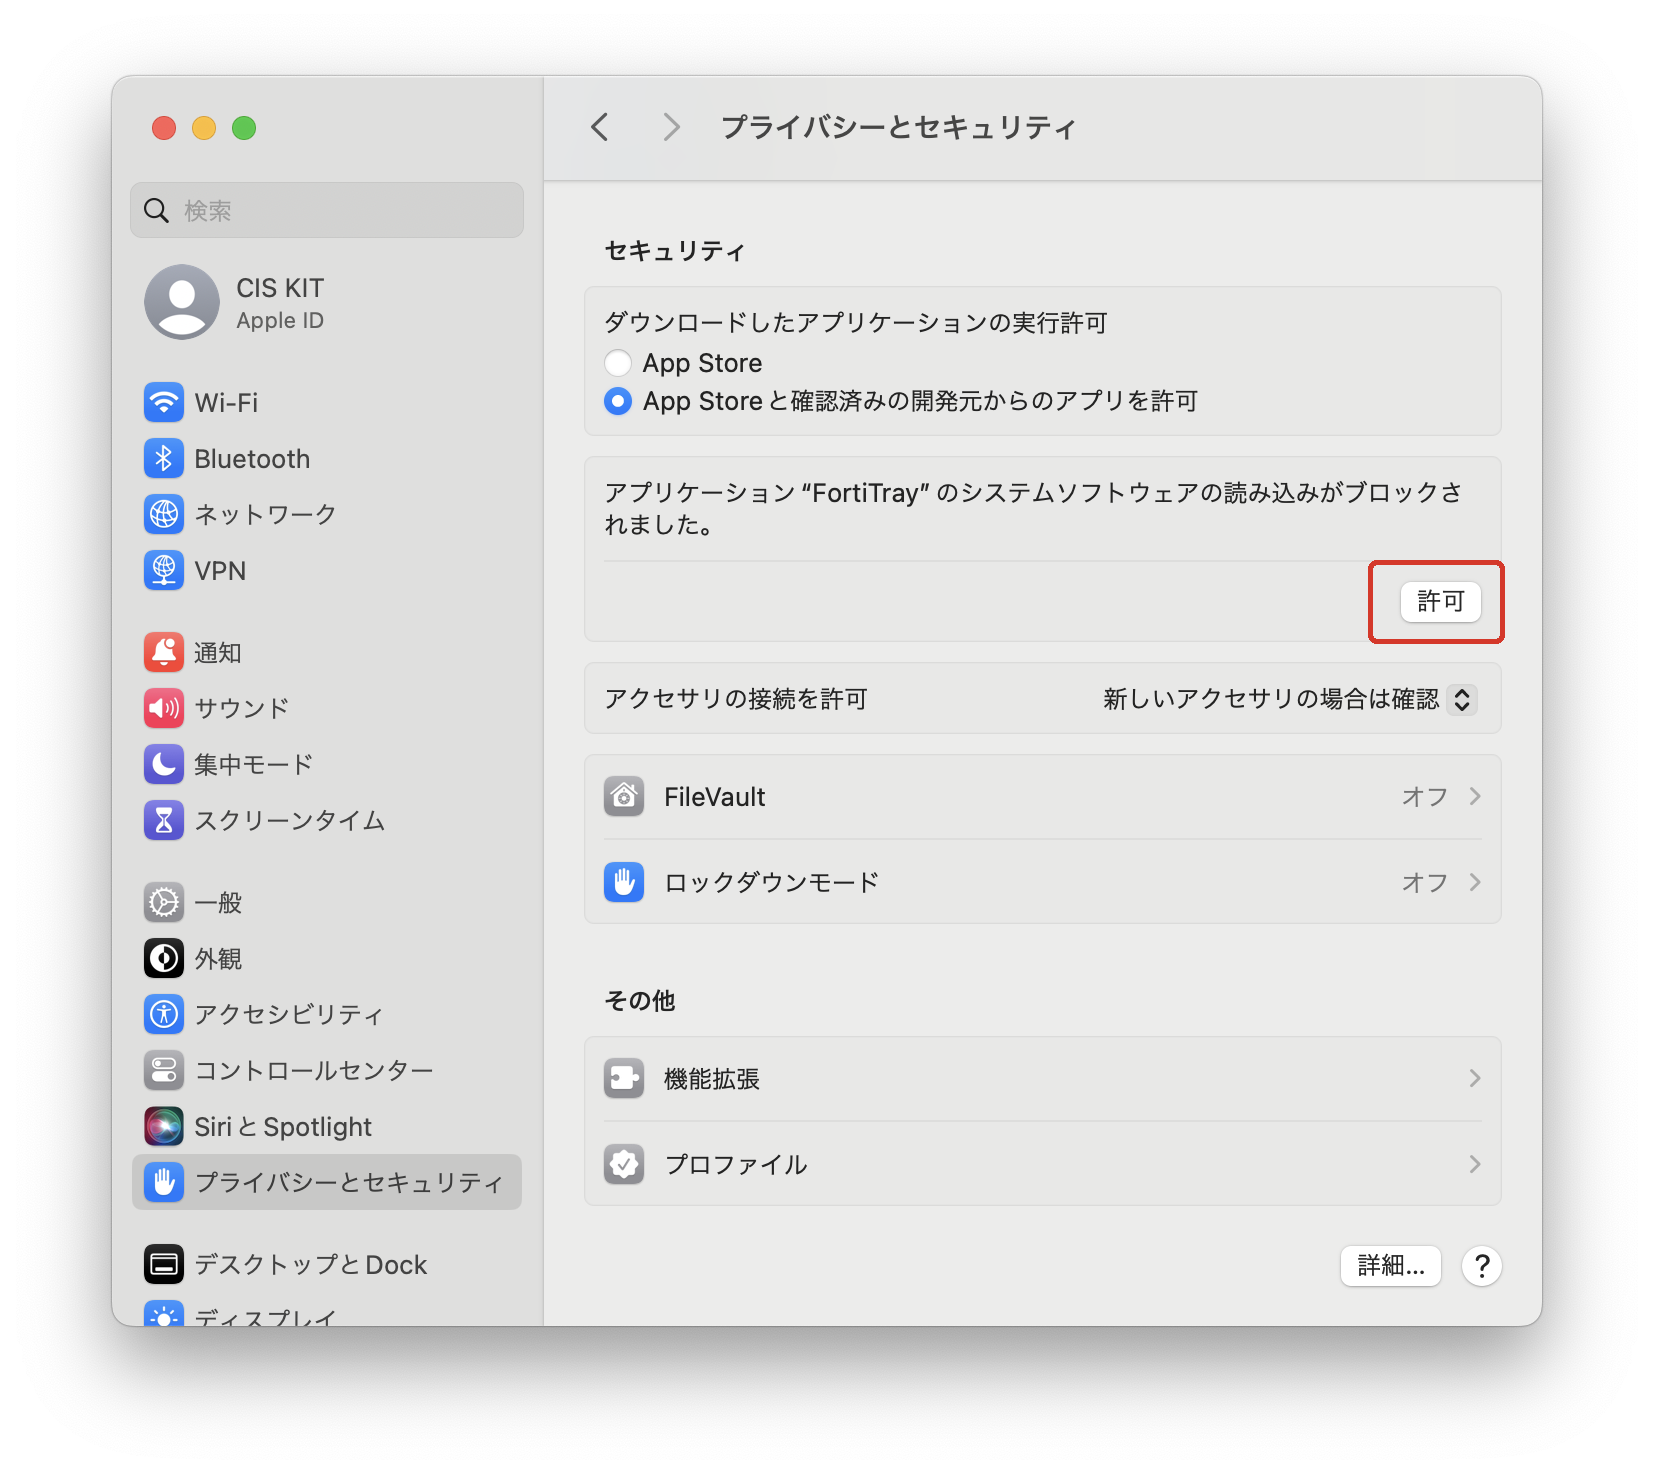
  14. 【アプリケーション "FortiTray" のシステムソフトウェアの読み込みがブロックされました。】というメッセージのそばにある【許可】をクリックし、システム設定を閉じます。
    Image Added
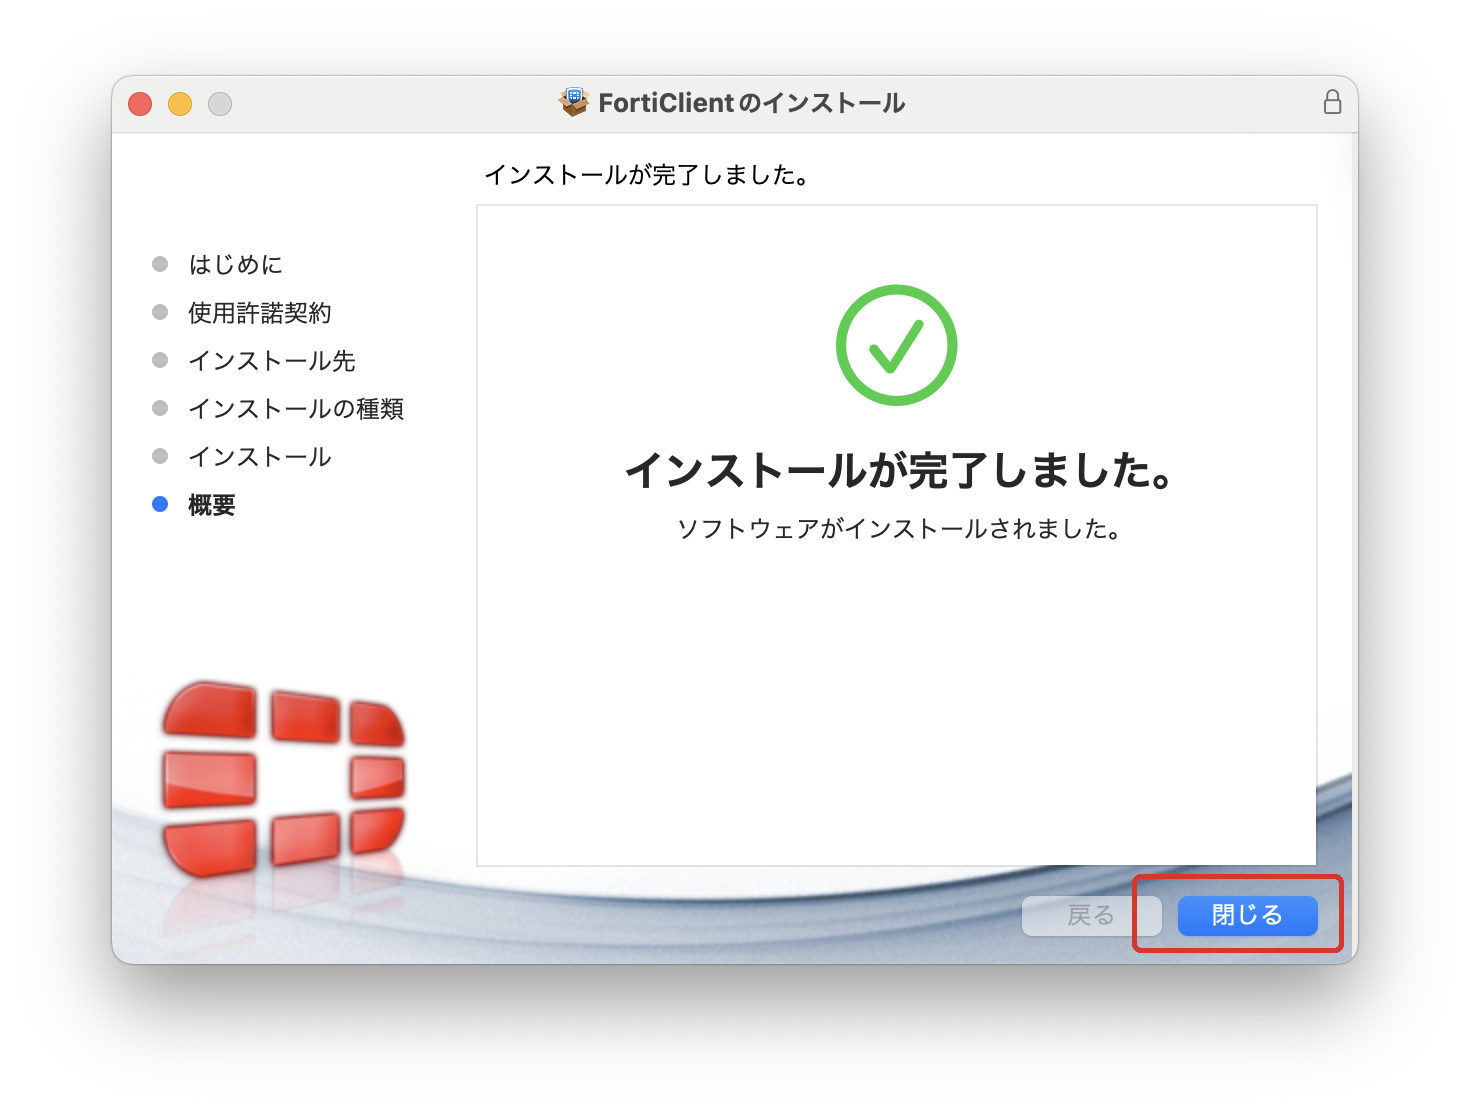
  15. インストール完了です。【閉じる】ボタンをクリックします。
    Image Added

FortiClient を設定する

  1. メニューバーの FortiClient アイコンをクリックします。
    Image Added

  2. Open FortiClient Console をクリックします。
    Image Added
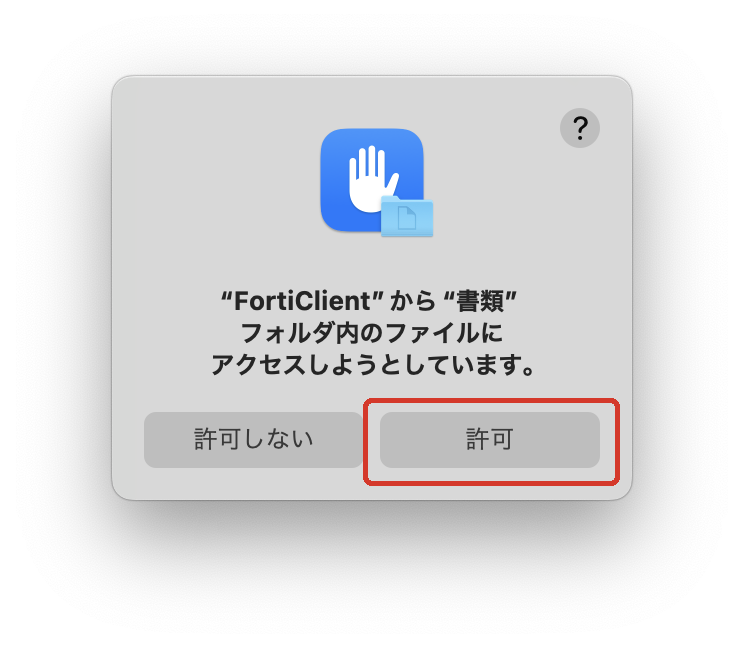
  3. 【"FortiClient" から "書類" フォルダ内のファイルにアクセスしようとしています。】ダイアログが表示されたら、【許可】ボタンをクリックします。
    Image Added
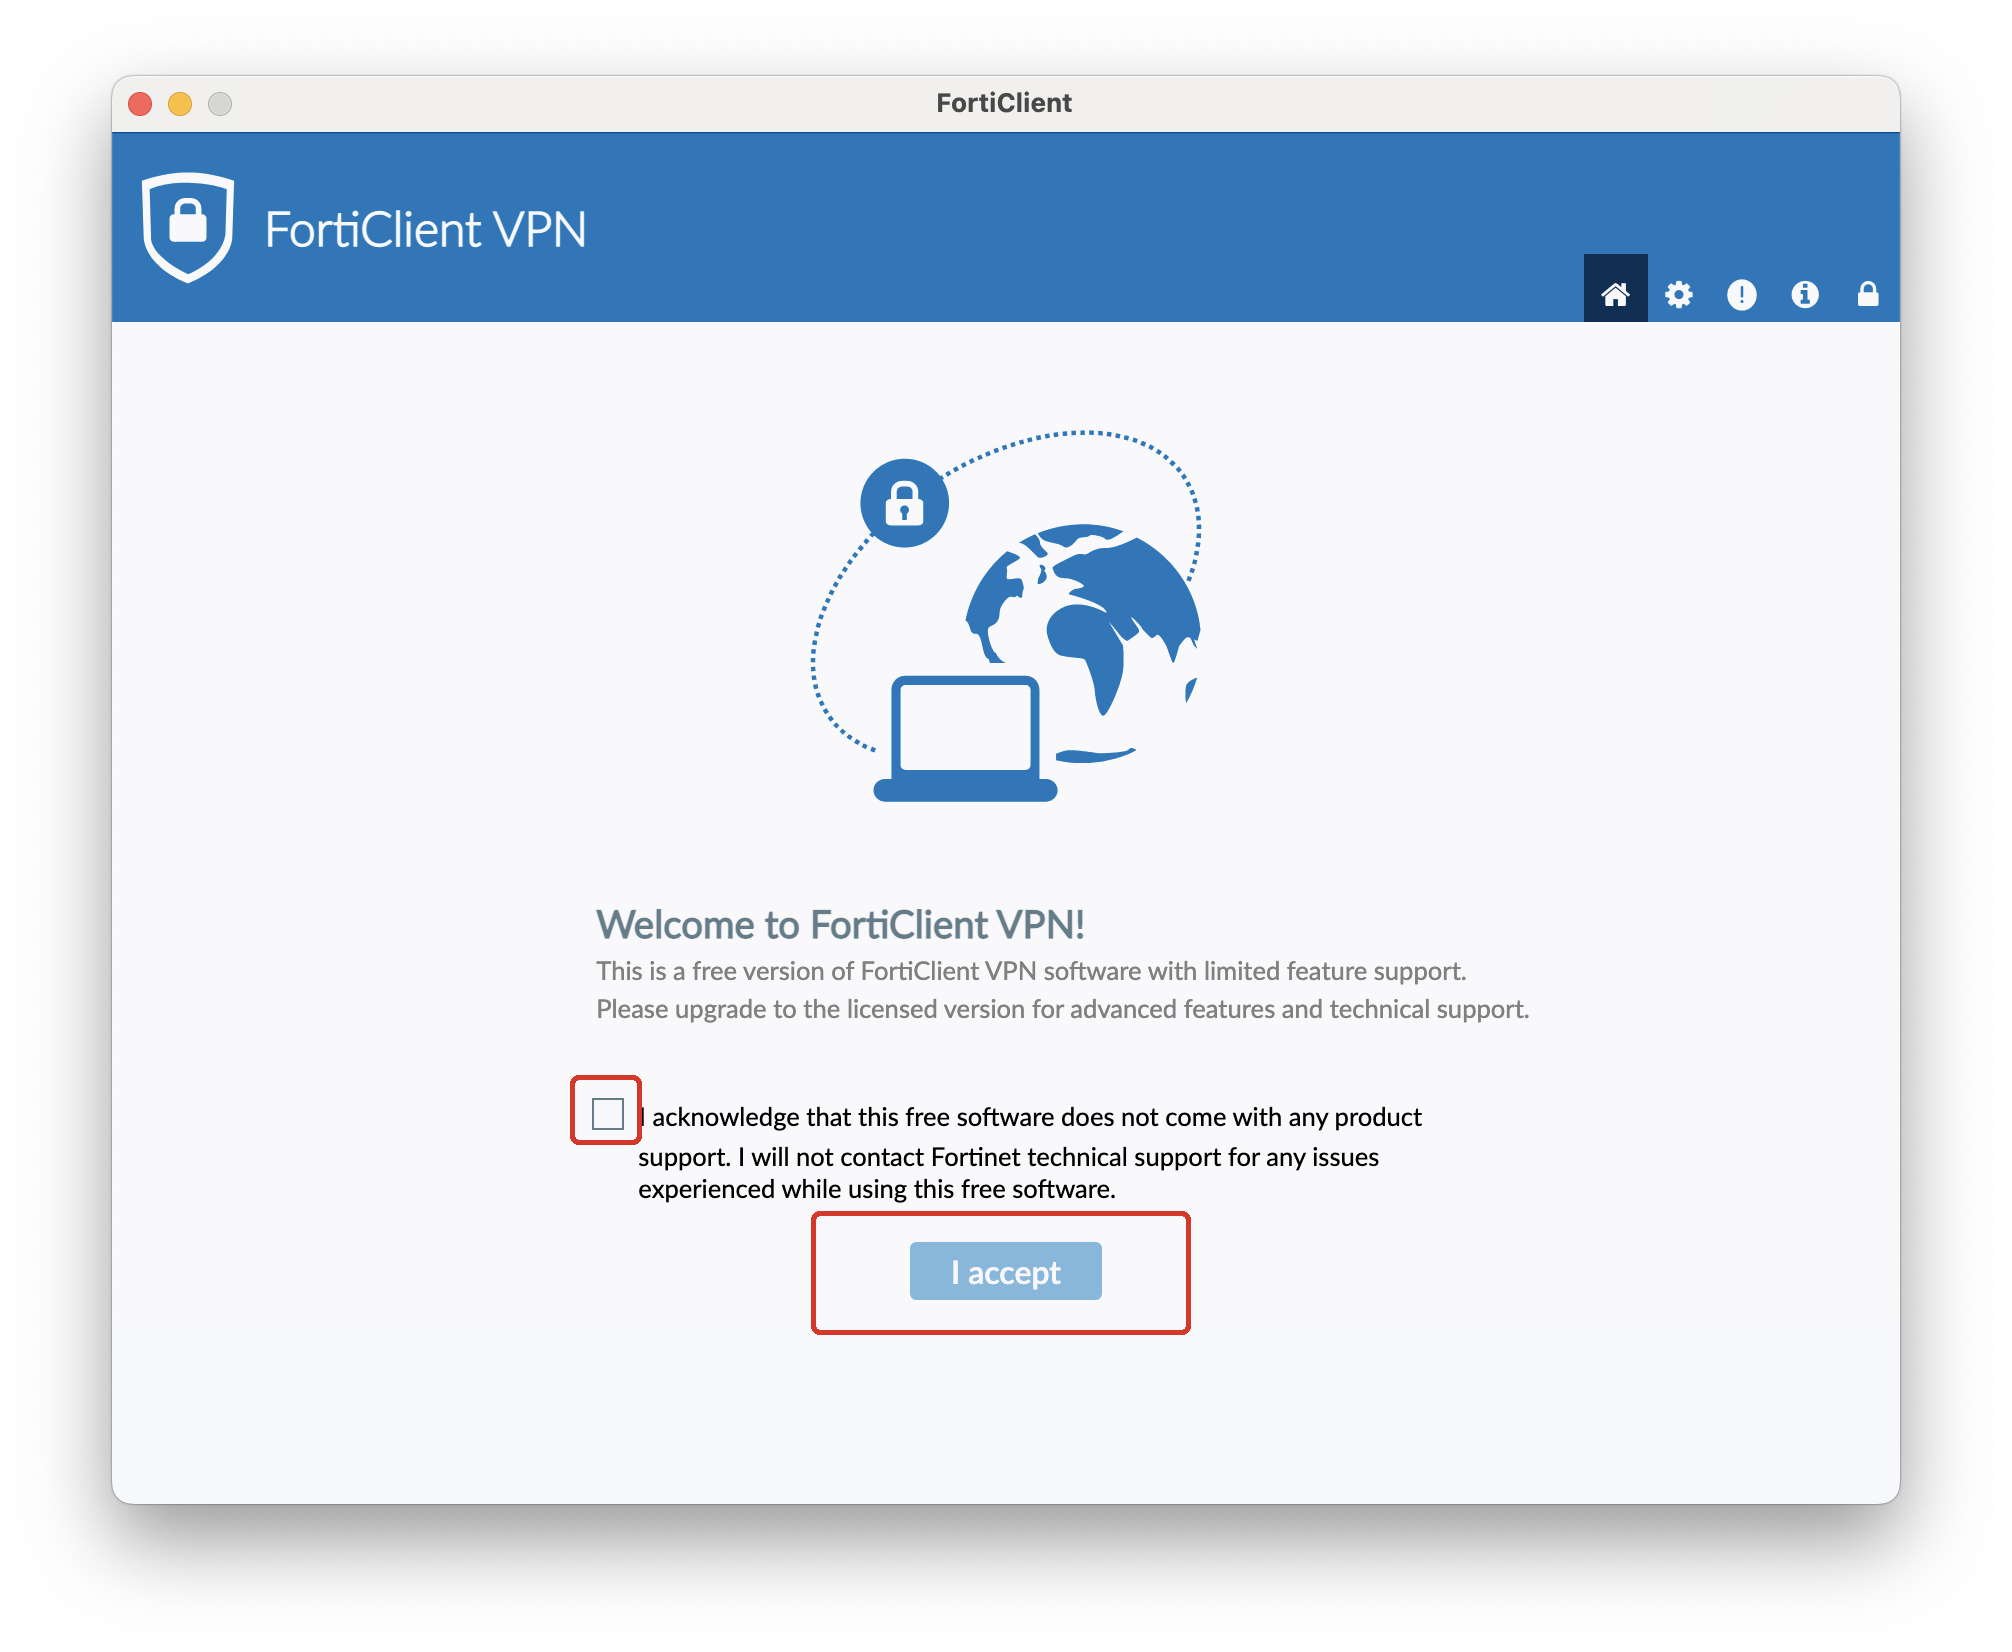
  4. 【I acknowledge ...】チェックボックスをクリックしてチェックがついていることを確認し、【I accept】ボタンをクリックします。
    Image Added
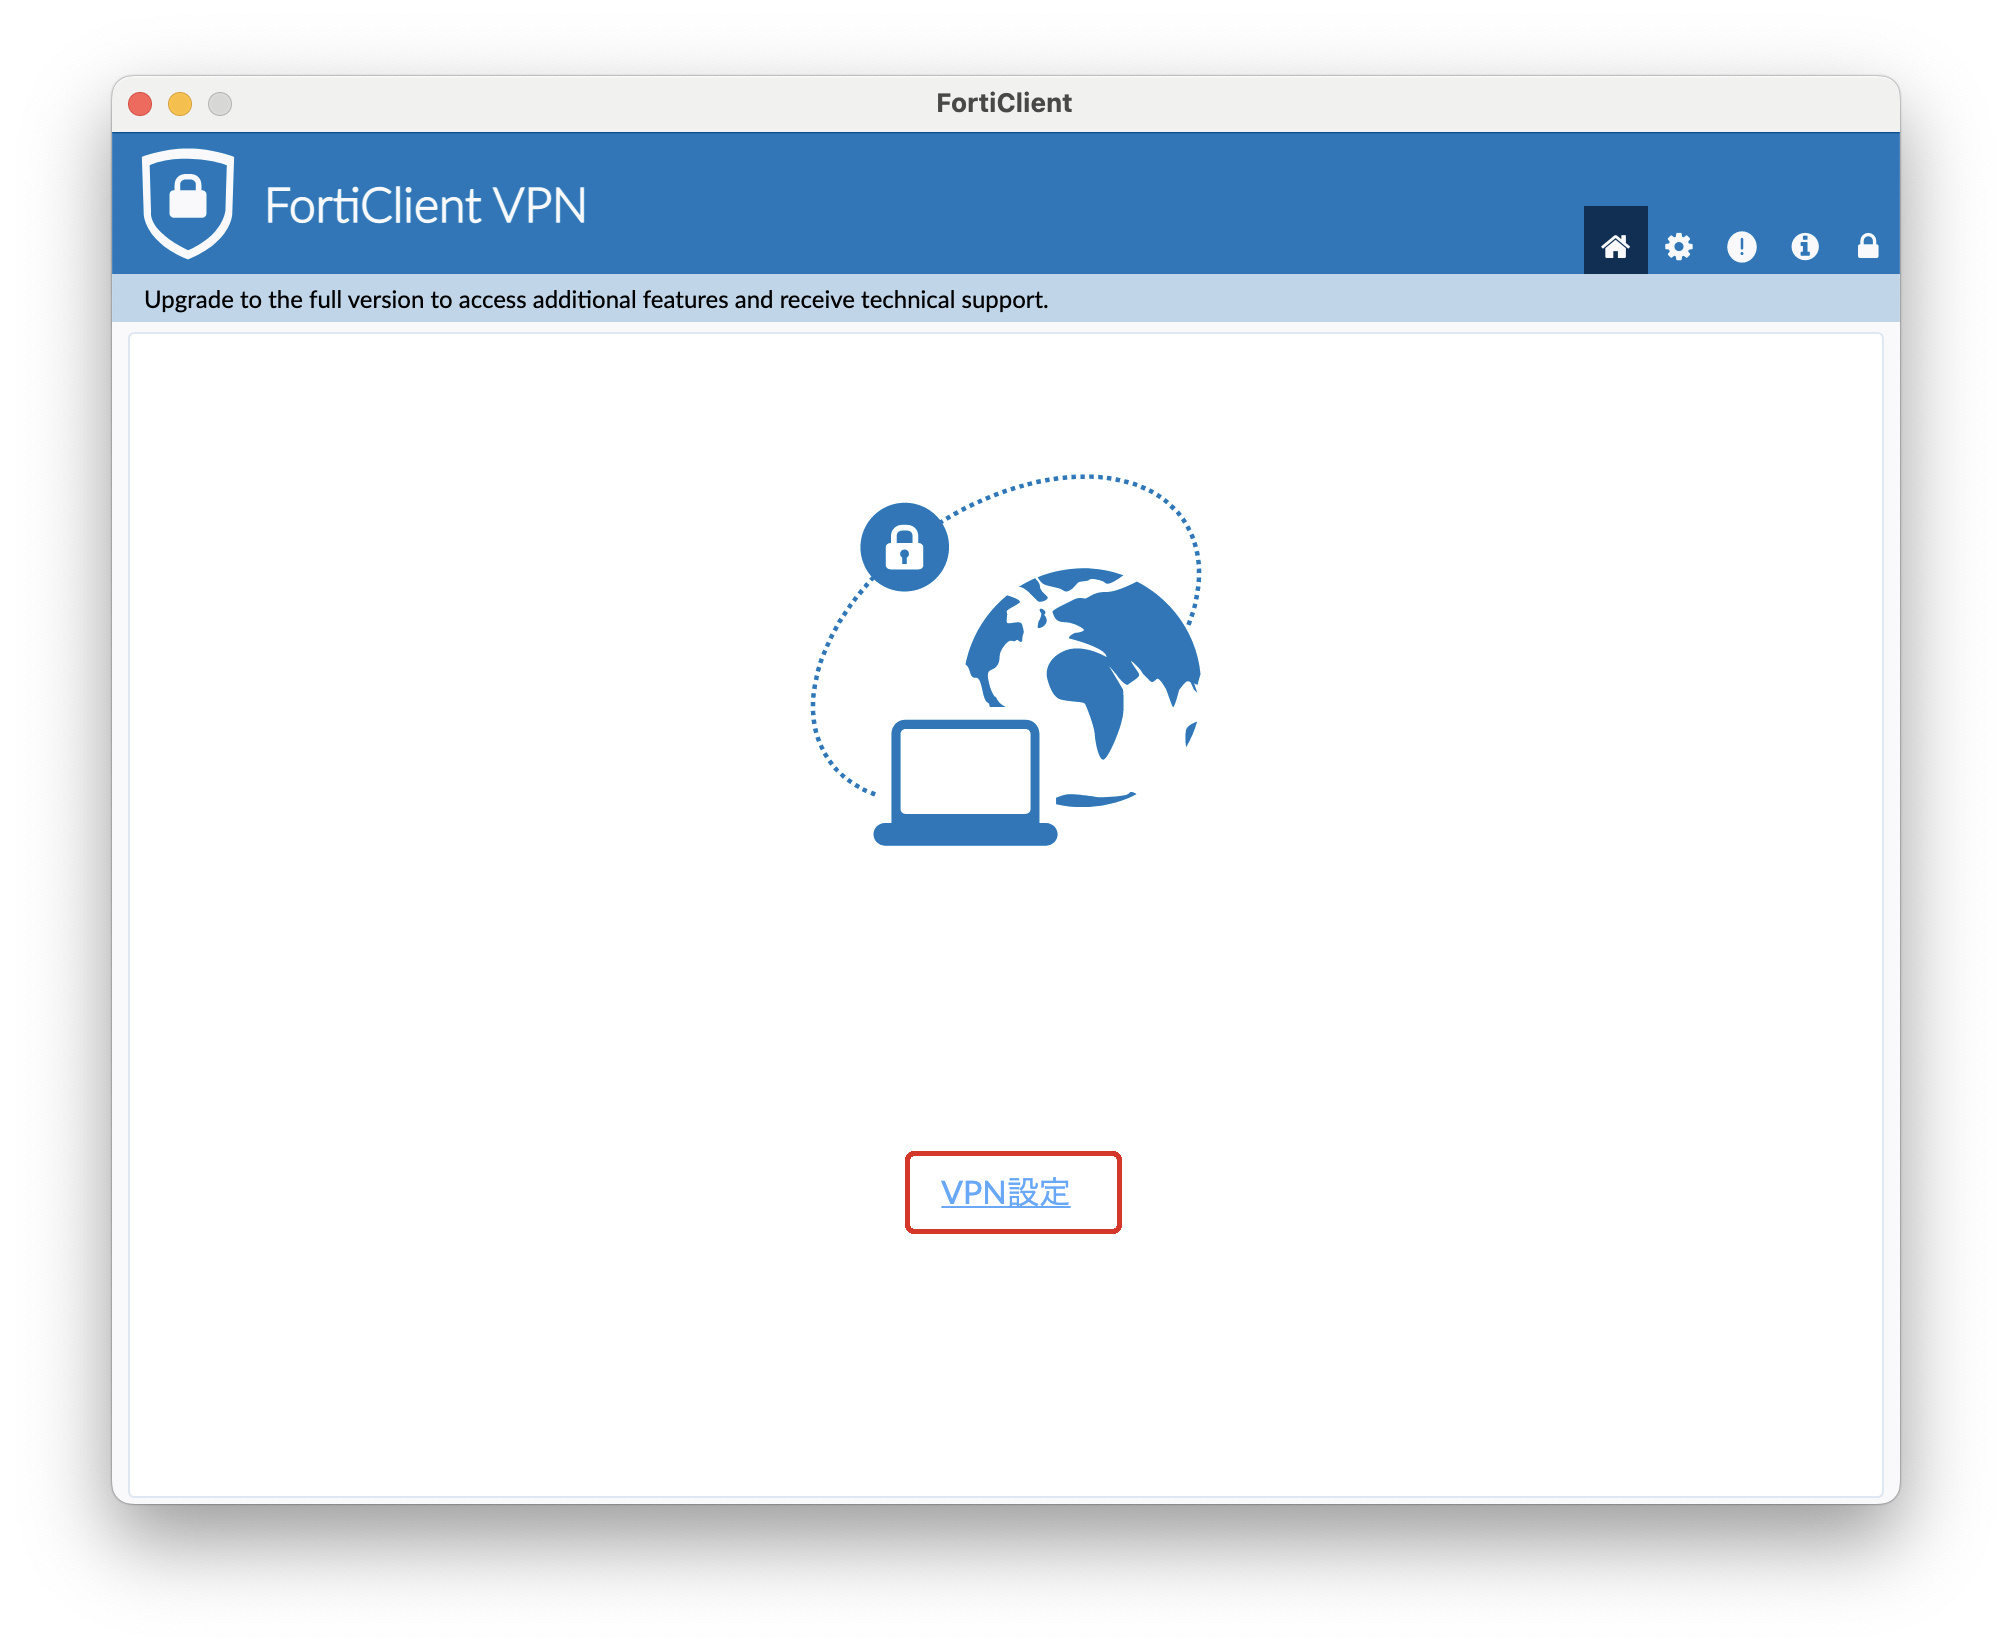
  5. 【VPN設定】をクリックします。
    Image Added
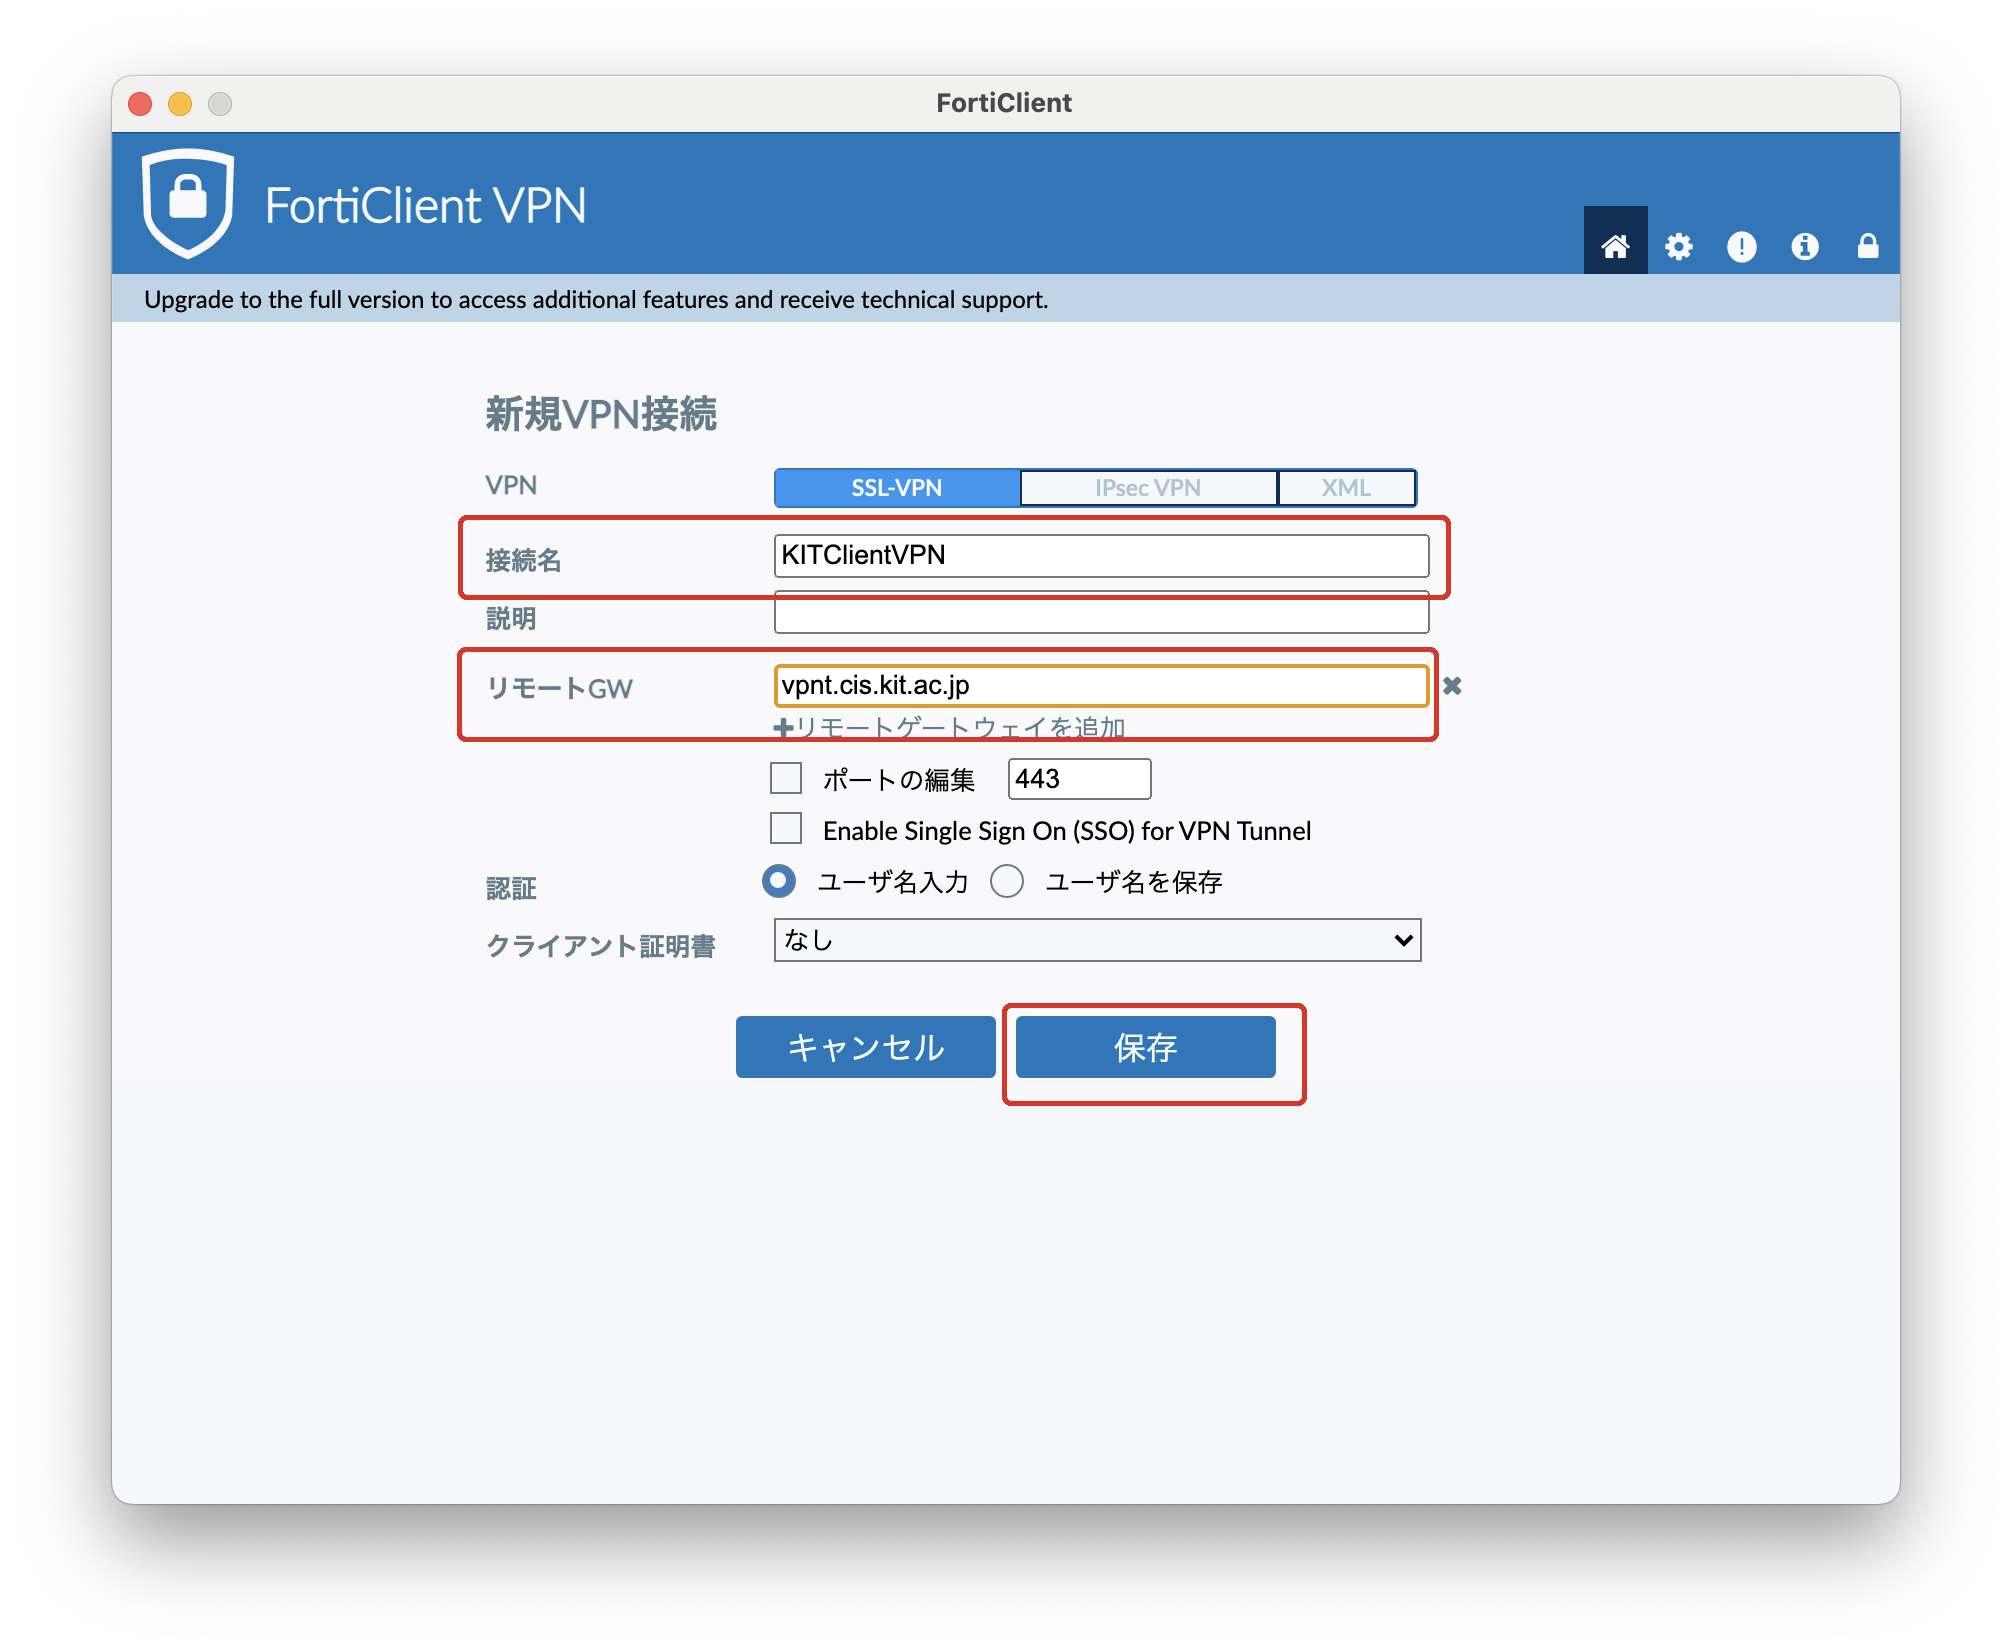
  6. 接続名に適当な名前、リモートGW に vpnt.cis.kit.ac.jp と入力して、【保存】ボタンをクリックします。
    Image Added
    情報

    「Enable Single Sign On (SSO) for VPN Tunnel」と「Use external browser as user-agent for saml user authentication]」を有効化にチェックを入れると、KIT Federation IdP でログインできます。

 サービスに接続して端末VPNを利用する

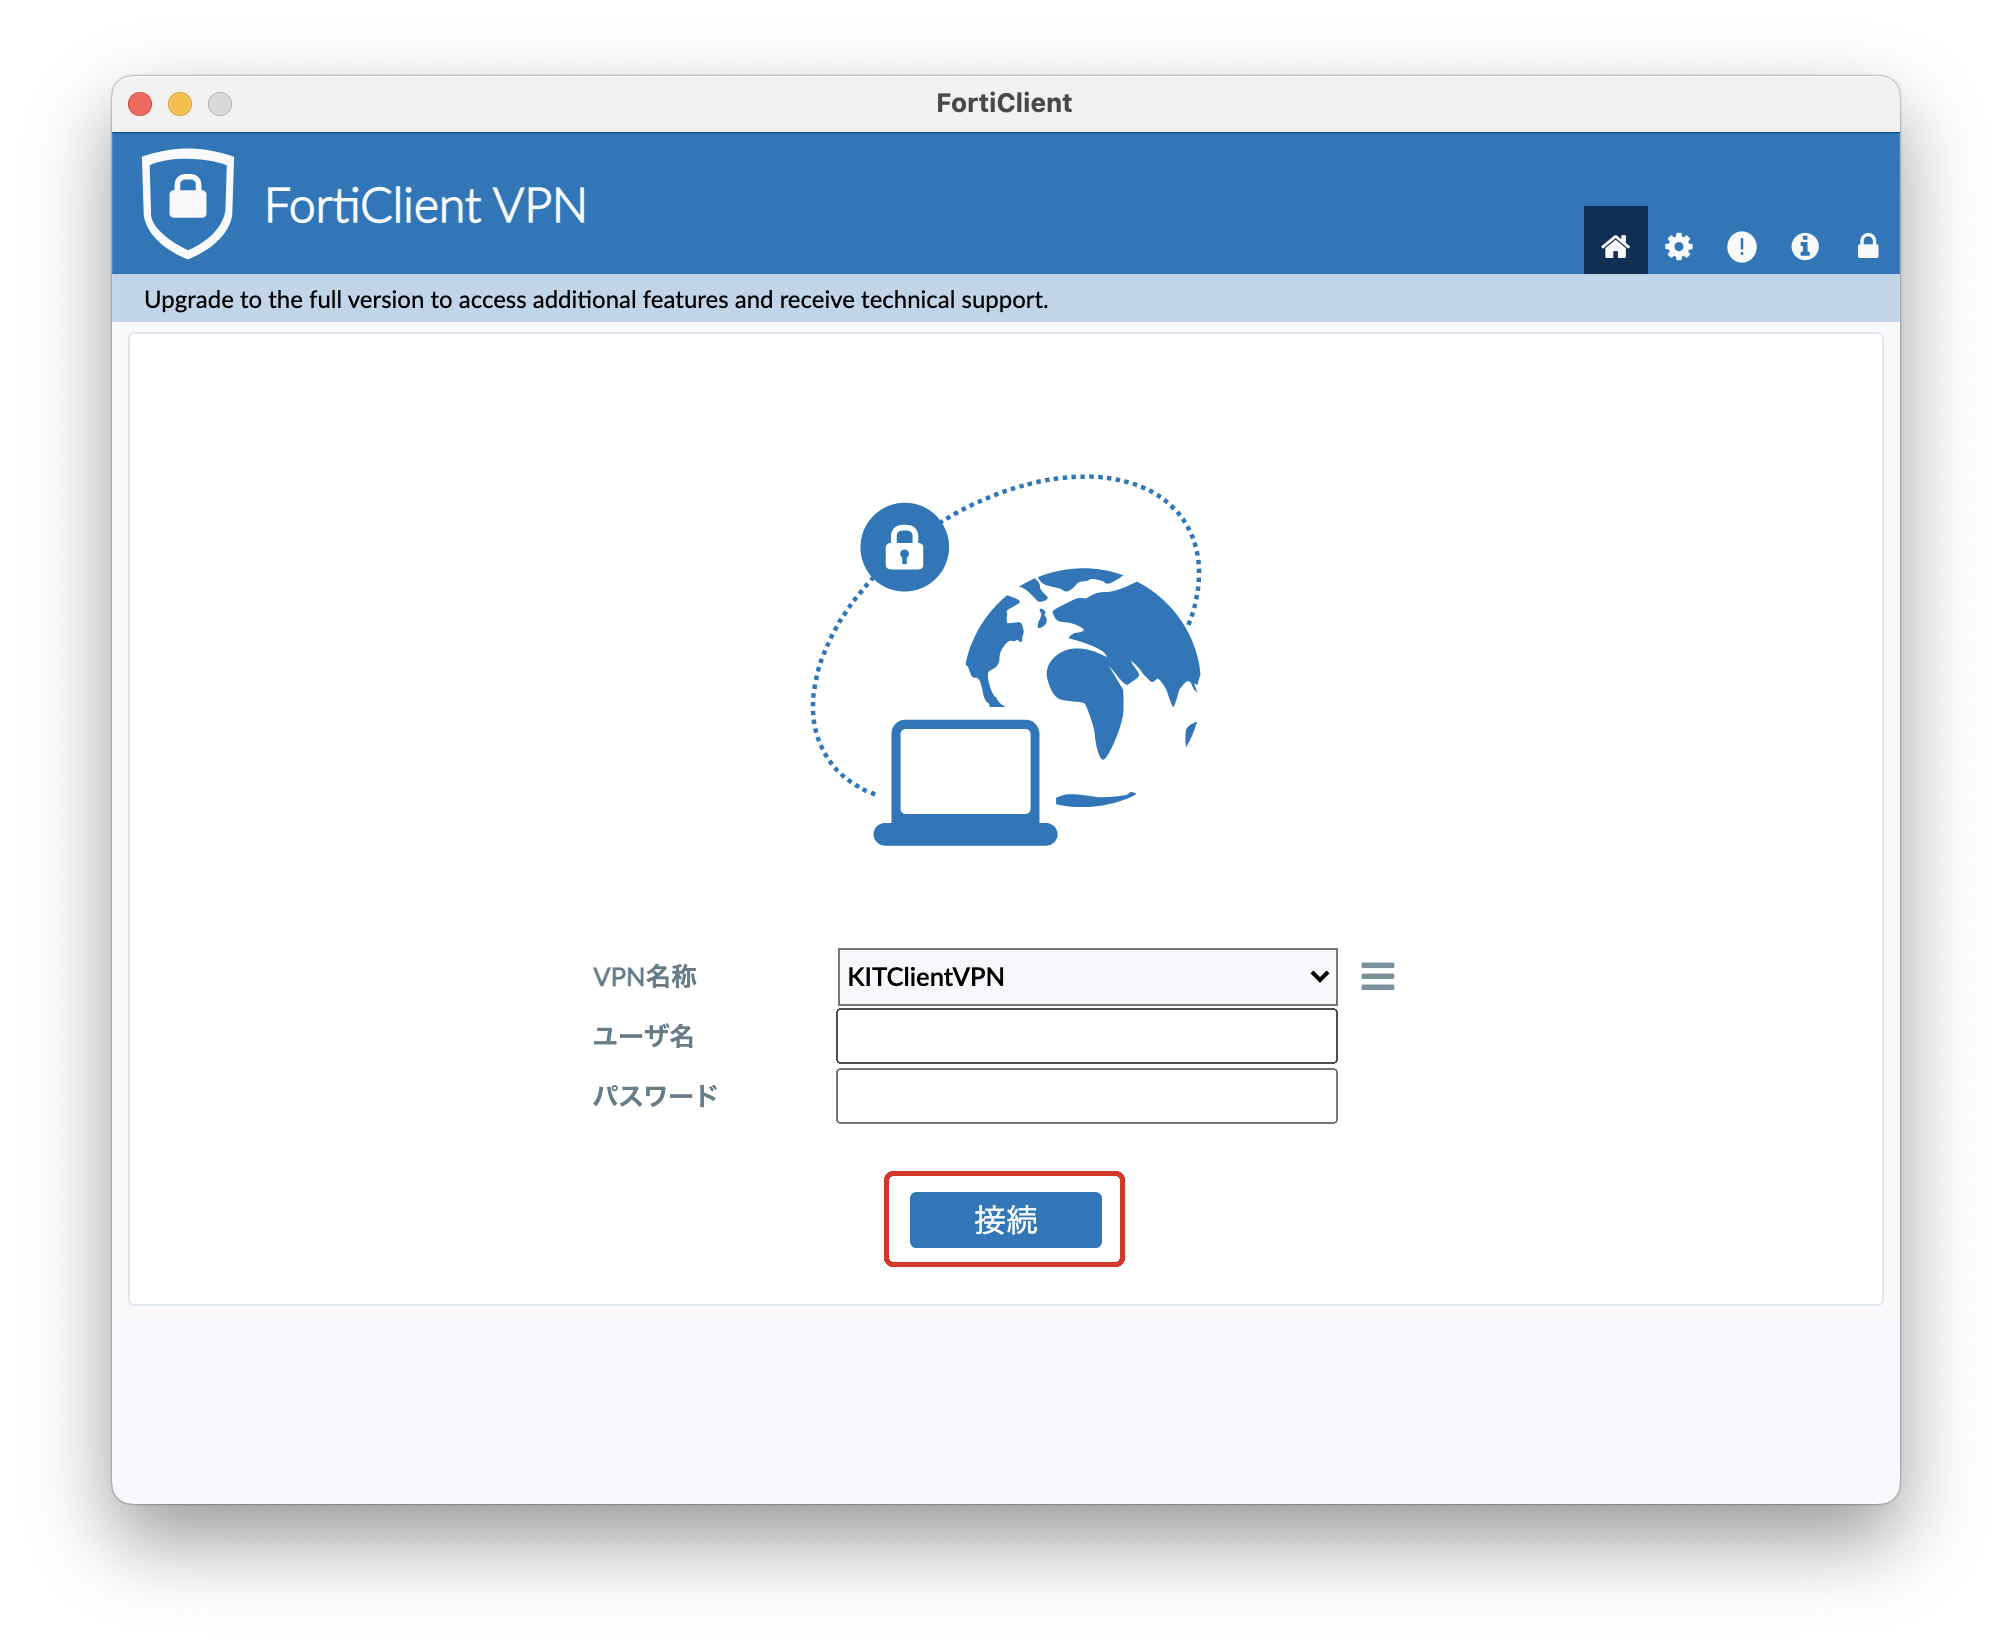
  1. ユーザー名にCISアカウントのログイン名、パスワードにCISアカウントのパスワードを入力し、【接続】ボタンをクリックします。
    Image Added
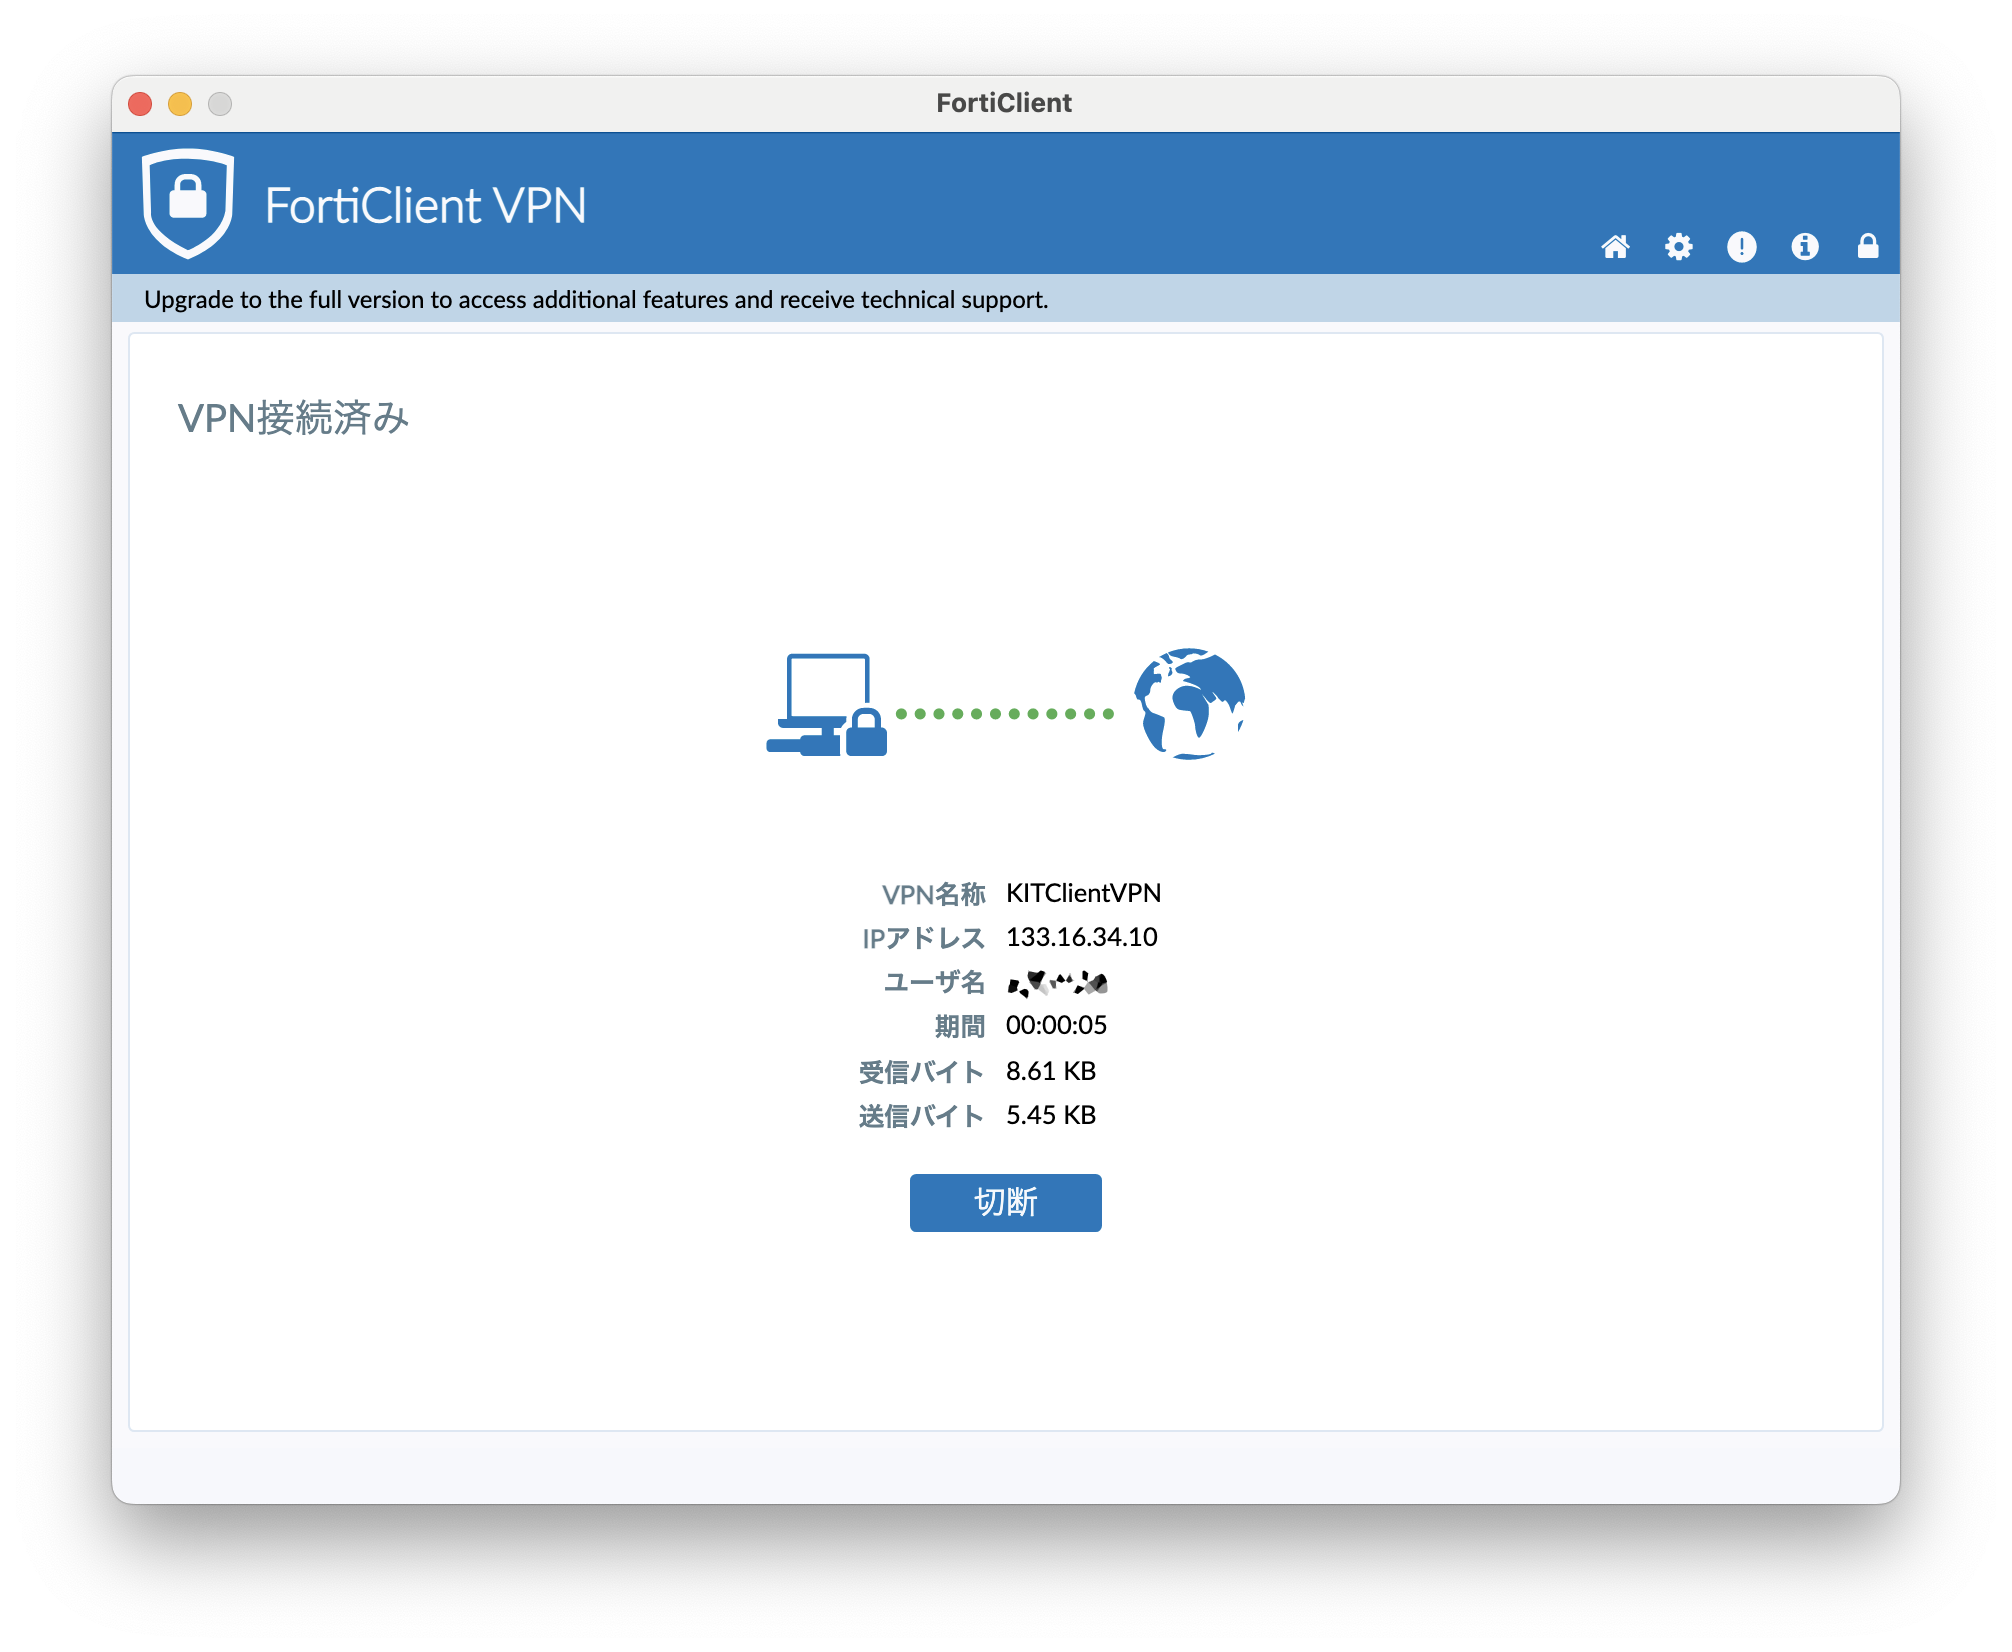
  2. 接続に成功すると【VPN接続済み】の表示になります。
    Image Added

サービスから切断して元のネットワーク接続を利用する

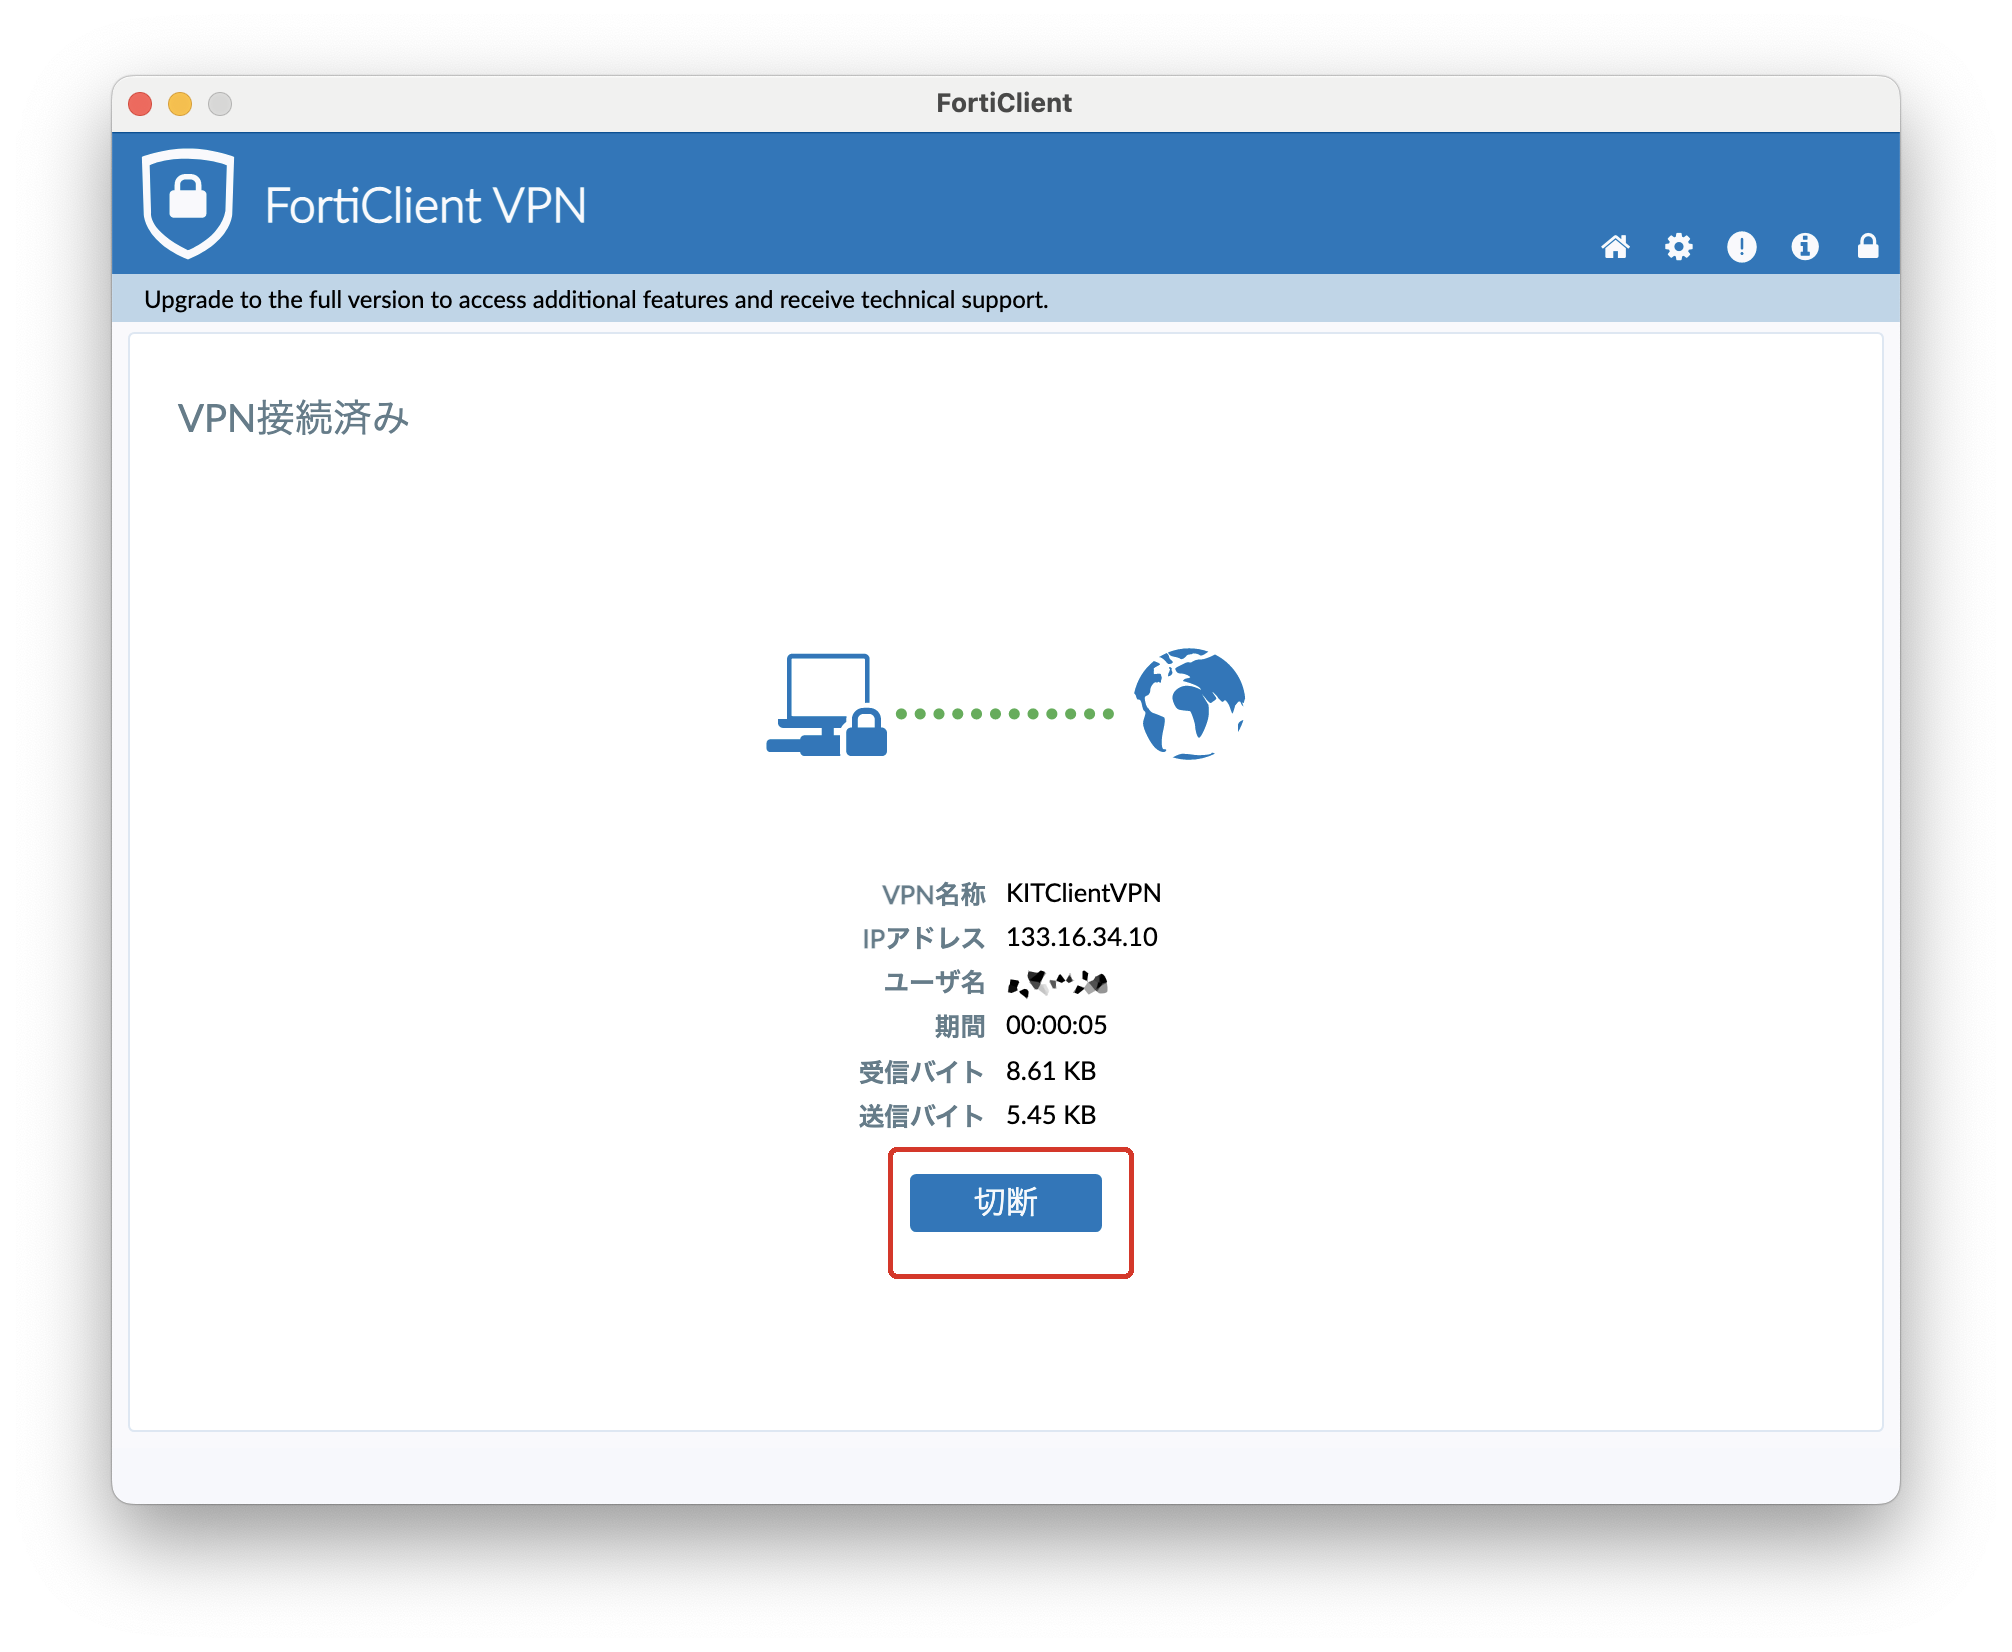
【切断】ボタンをクリックします。

Image Added

情報
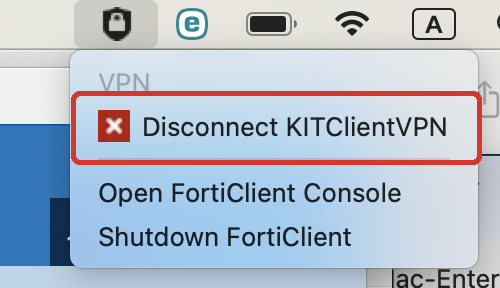
メニューバーのFortiClient アイコンをクリックし、【Disconnect (VPN の名前】をクリックすることでも切断できます。
Image Added

関連記事

ラベル別コンテンツ
showLabelsfalse
max5
spacesCISSUPPORT
showSpacefalse
sortmodified
reversetrue
typepage
cqllabel in ("mac","fortigate","端末vpn","macos") and type = "page" and space = "CISSUPPORT"
labelsmac macos 端末vpn fortigate


ページ プロパティ
hiddentrue


関連する課題


Sv translation
languageen


情報

Please note that the image is from macOS Sonoma (14.x).


目次

Step-Guide

Obtain the necessary access credentials and configuration details required for connection.

  1. Sign in to https://vpnt.cis.kit.ac.jp/

...

Mac を設定する

...

  1. using your CIS account.
  2. Click the 'CI required for usage' button to take notes of the confidential information for your Mac.

How to set up a client VPN connection on Mac

  1. Select [System Preferences] from the Apple menu.
    Image Added
  2. Click on the "Network" icon at the center of the "System Preferences" screen.
    Image Added
  3. Click the [+] button at the bottom of the list on the left side of the [Network] screen.
    Image Added
  4. Enter 'VPN' for "interface", 'Cisco IPSec' for "VPN Type", any name, such as 'KIT-VPN' for "Service Name", and then click the [Create] button.
    Image Added
  5. Enter '
  1. vpnt.cis.kit.ac.jp

...

  1. ' for "Server Address" and your CIS account for "Account Name". Then, click the [Authentication Settings] button.
    Image Added

  2. Select the [Shared Secret] radio button, enter the shared secret you noted in the input field, input the group name you noted in "Group Name" field, and then click the [OK] button.
    Image Added
  3. Click "Advanced..." button.
    Image Added

  4. Click "Proxy" tab.
    Image Added

  5. Check the checkbox "Auto Proxy Discovery" and click "OK" button.
    Image Added
  6. Click "Apply" button.
    Image Added

 Connect to the service and use Fortigate client VPN

  1. Select [System Preferences] from the Apple menu.
    Image Added
  2. Click on the "Network" icon at the center of the "System Preferences" screen.
    Image Added
  3. Choose the VPN connection you have configured, and then click the [Connect] button.
    Image Added
  4. Enter your CIS password and click "OK" button.
    Image Added
  5. The status will change to [Connected], and the VPN connection status will turn green upon successful connection.
    Image Added
  6. VPN setup has completed.

Disconnect from the service and revert to the original network connection

  1. Select [System Preferences] from the Apple menu.
    Image Added
  2. Click on the "Network" icon at the center of the "System Preferences" screen.
    Image Added
  3. Choose the VPN connection you have configured, and then click the [Disconnect] button.
    Image Added
情報

 サービスに接続して端末VPNを利用する

  1. アップルメニューの【システム環境設定】を押します。
    Image Removed
  2. 【システム環境設定】画面の中ほどにある、「ネットワーク」アイコンをクリックします。
    Image Removed
  3. 設定した VPN 接続を選んで、【接続】ボタンを押します。
    Image Removed
  4. 情報科学センターのパスワードを入力し、【OK】ボタンを押します。
    Image Removed
  5. 接続成功する状況が【接続済み】になり、VPN接続のステータスが緑色に変化します。
    Image Removed
  6. VPN 接続をご利用ください。

サービスから切断して元のネットワーク接続を利用する

  1. アップルメニューの【システム環境設定】を押します。
    Image Removed
  2. 【システム環境設定】画面の中ほどにある、「ネットワーク」アイコンをクリックします。
    Image Removed
  3. 設定した VPN 接続を選び、【接続解除】ボタンを押します。
    Image Removed

...