This section provides instructions on utilizing a web proxy to access the Internet through the campus information network on Windows11 デバイスにおいて、Webプロキシを利用して、学内情報ネットワークのネットワーク接続サービスからインターネットにアクセスする方法を説明します。. | 情報 |
|---|
スクリーンショットは The screenshot is taken from Windows 11 22H2 のものです。バージョンによってクリックする場所やメッセージが若干異なることがあります。 |
ステップ ガイドWebプロキシの設定画面を表示する- タスクバーのネットワーク接続アイコン(モニタとLANケーブルアイコン、もしくは Wi-Fi アイコン)を右クリックします。
 Image Removed Image Removed - 「ネットワーク設定をインターネット設定」メニューをクリックします。
 Image Removed Image Removed - プロキシをクリックします。
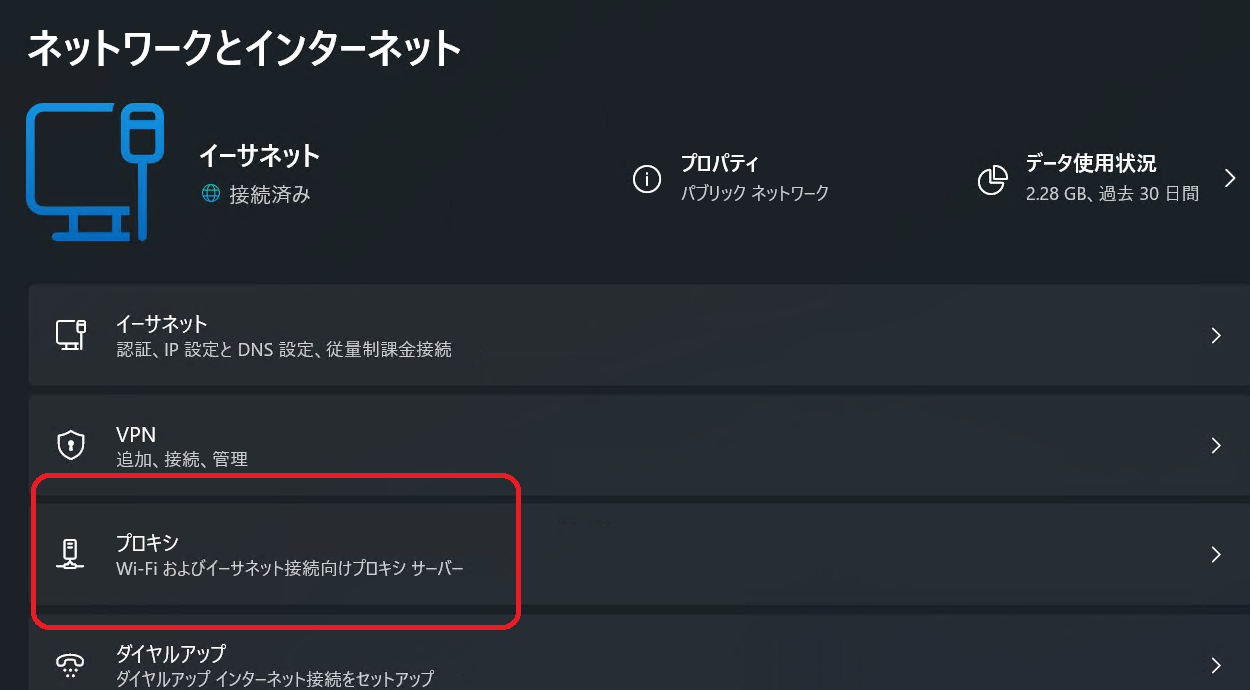 Image Removed Image Removed
のものです. Depending on the version, the location you click on and message may vary slightly. |
Step-GuideFind Web-Proxy Settings- Right-click on the network connection icon, represented by either the monitor and network cable icon or the Wi-Fi icon, located in the taskbar.
Image Added - Click 'Network & Internet Settings'.
Image Added - Click 'Proxy'.
Image Added
Proceed by configuring a proxy based on your network connection service.次にご使用のネットワーク接続サービスに応じてプロキシを設定します。 Webプロキシを設定する(認証付き無線LAN・認証付き情報コンセント)- 「自動プロキシ セットアップ」の「設定を自動的に検出」をクリックしてオンにします。
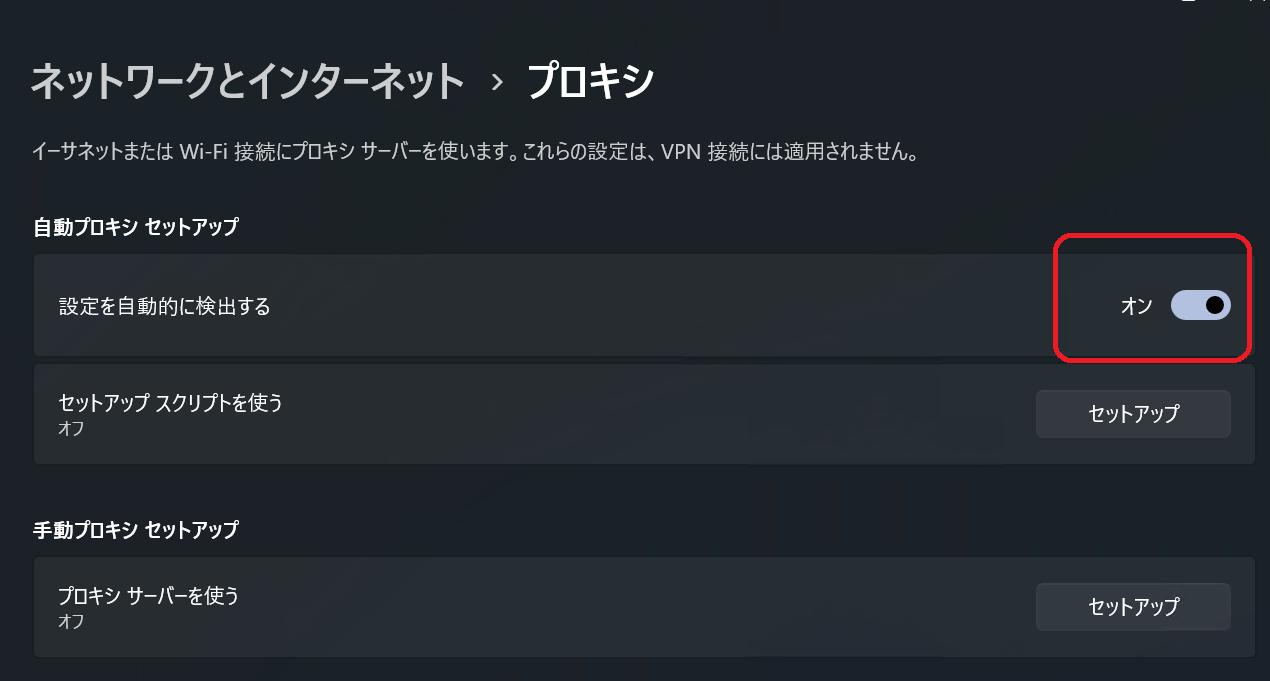 Image Removed Image Removed
Webプロキシを設定する(固定グローバル IP アドレス接続・端末VPN)Configuring Web Proxy(Wireless Connection / Wired Connection with Browser-based Authentication)- Click to enable "Automatically detect settings."
Image Added
Configuring Web Proxy(Static IP address / Client VPN)- Click 'Use automatic configuration script'.
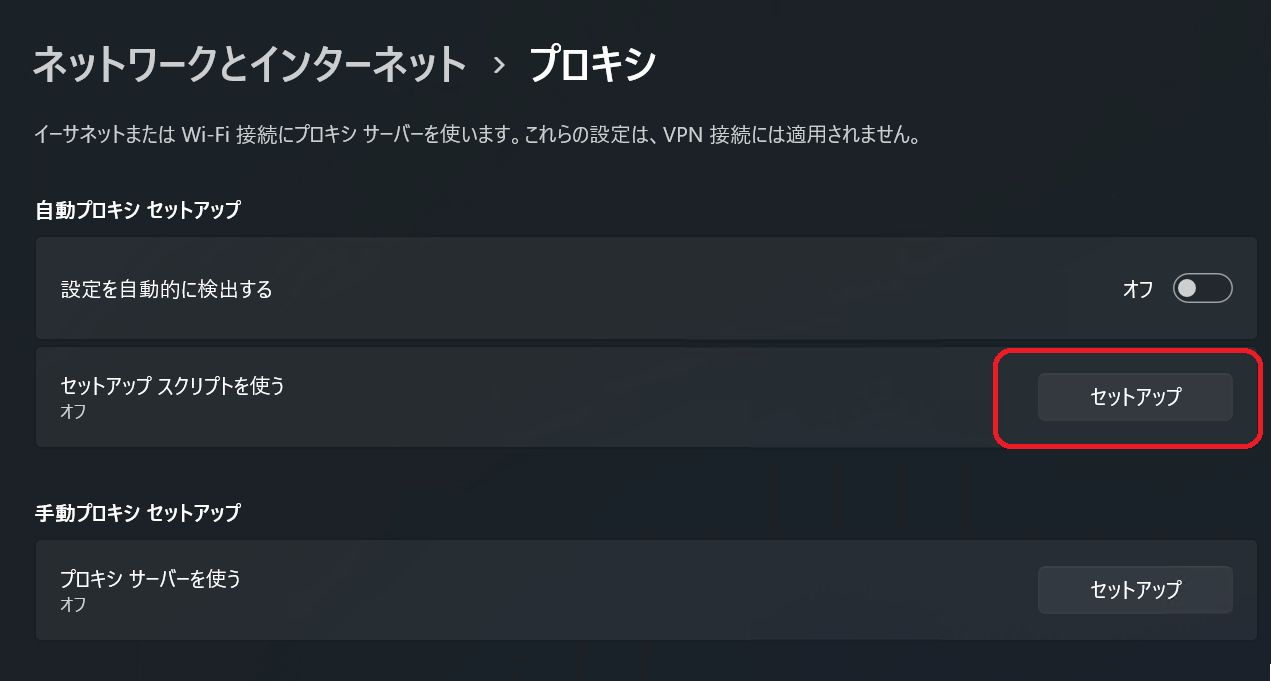 Image Added Image Added - Click to enable 'Use automatic configuration script'.
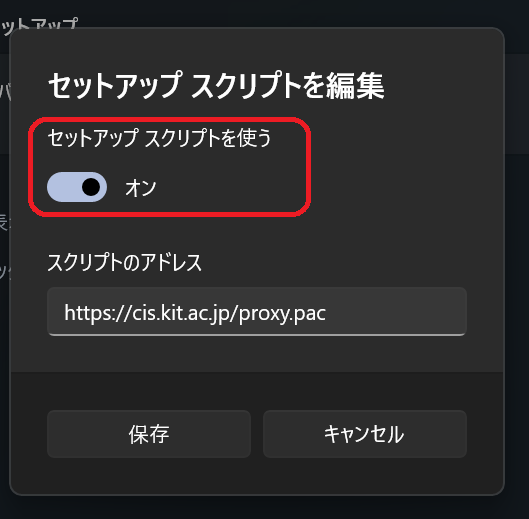 Image Added Image Added Enter the URL below in the 'Script address'. - 「セットアップ スクリプトを使う」をクリックします。
Image Removed - 「セットアップ スクリプトを使う」をクリックしてオンにします。
Image Removed 「スクリプトのアドレス」に以下のアドレスを入力します。 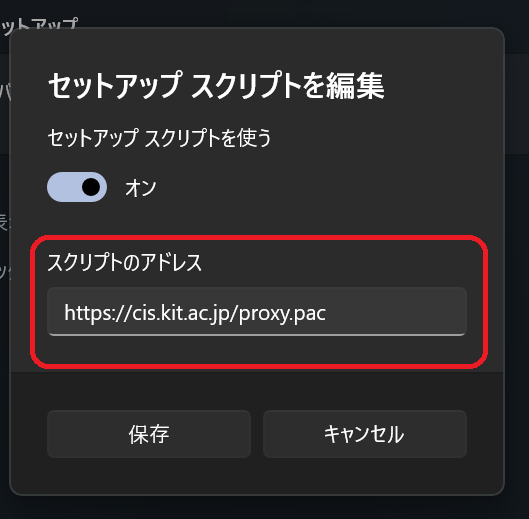
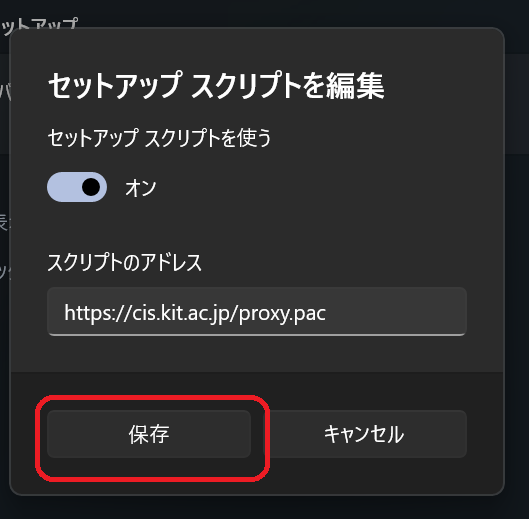
- Click the 'Save'.「保存」ボタンをクリックします。
関連記事| ラベル別コンテンツ |
|---|
| showLabels | false |
|---|
| max | 5 |
|---|
| spaces | CISsupport |
|---|
| showSpace | false |
|---|
| sort | modified |
|---|
| reverse | true |
|---|
| type | page |
|---|
| cql | label in ("手引き","webプロキシ") and type = "page" and space = "CISsupport" |
|---|
| labels | Webプロキシ 手引き |
|---|
|
|