This section outlines the steps for implementing multi-factor authentication in Email. In addition to authentication by user ID and password, authentication by one-time password can be obtained after setting up Multi-Factor Authentication (MFA). Having two or more authentication factors enhances your cyber security with email.
In the email system offered by CIS, multi-factor authentication, which incorporates OTP in addition to ID and password verification, is available when accessed from a non-global IP address.
An OTP is a single-use password with a limited validity period. The email system can generate OTPs in two ways, so please choose the method that best suits your situation. | 情報 |
|---|
| - Generate an OTP by installing a dedicated app on your smartphone.
- Receive one at a private email address (an email address other than @kit.ac.jp or @edu.kit.ac.jp).
|
However, if circumstances arise, such as changing or losing your smartphone model or forgetting the password for your private email address, please configure the system to ensure you have both options available.
Followed by the setup of the dedicated app, proceed to set up your private email address in this process.
| 注意 |
|---|
| Multi-factor authentication is applied when the setting is enabled for wireless LANs with authentication (KITnetX, KITnetW), information outlets with authentication, and eduroam. However, for the global IP address connections, such as seminar rooms, self-study rooms, web browsing corners, web browsing rooms, faculty rooms, student rooms, etc., multi-factor authentication is bypassed, even if the setting is enabled. |
Activating Multi-Factor AuthenticationMulti-factor authentication can be activated through Webmail. - Visit Webmail and log in.
https://webmail.cis.kit.ac.jp/ - Click 'Preferences' and then select 'Customize my Preferences'.
 - Select the 'Multi-Factor Auth' tab and check the radio button for 'Use Multi-Factor Authentication' to 'Yes'.
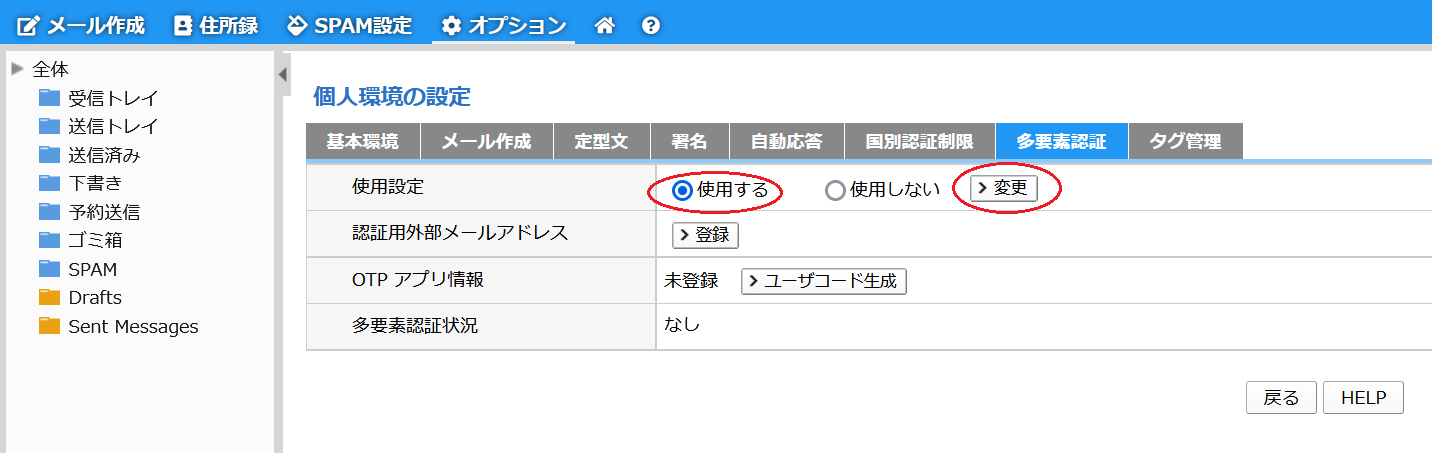 - Afterward, log out of Webmail.
Setting up OTP APP- Visit Webmail and log in.
https://webmail.cis.kit.ac.jp/ - Click 'OTP APP'.
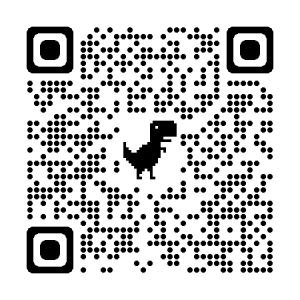
 Scan the QR code below and install the app. Alternatively, you can search for 'DEEPOTP' on Google Play or the Apple Store and install it.
【android】
【iOS】

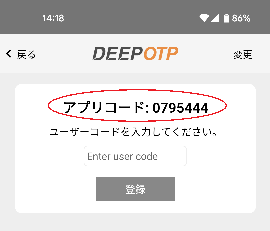
[Mobile] Open the installed app and tap on 'Add'.
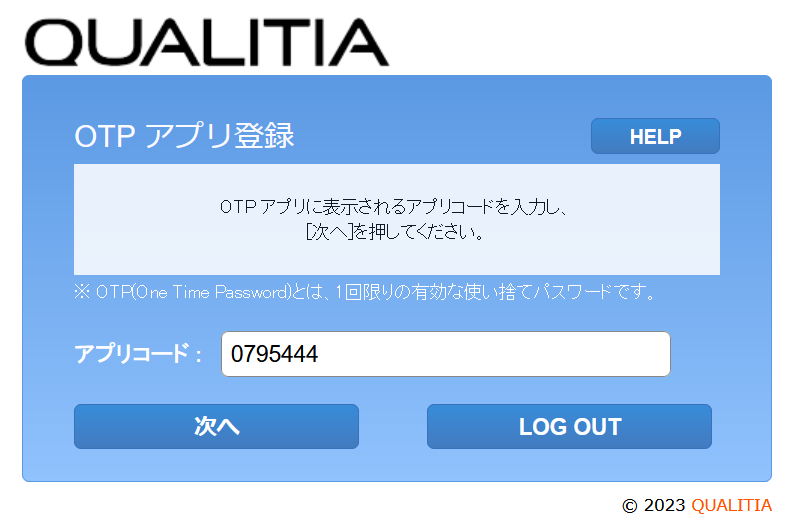
 - [Mobile] The app code is displayed.
*The app code is unique to each user and device. The image below is an example; please enter the code displayed in your app.
 - [Webmail] Return to your webmail, enter the app code, and click 'Next'.
 - [Webmail] Verify the user code.
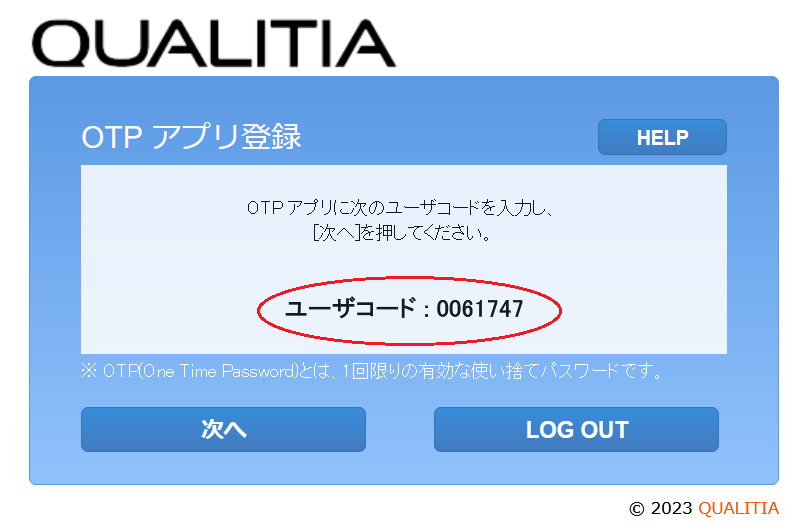 - [Mobile] モバイル端末に戻りユーザコードを入力し登録をタップします。
※ユーザコードは利用者、端末によって異なります。以下の画像は一例となりますので、ご自身のWebメールに表示されるコードをご入力下さい
 Image Removed Image Removed - 【Webメール】次へをクリックします。
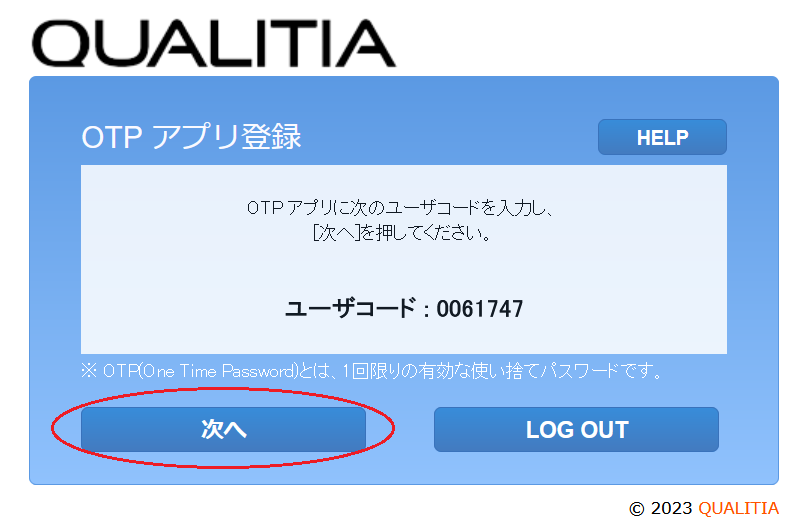 Image Removed Image Removed - 【モバイル端末】アプリのVIEW CODEをタップし(押し続けます)表示される6桁の数字を確認し
【Webメール】OTPの欄に6桁の数字を入力し次へをクリックします。
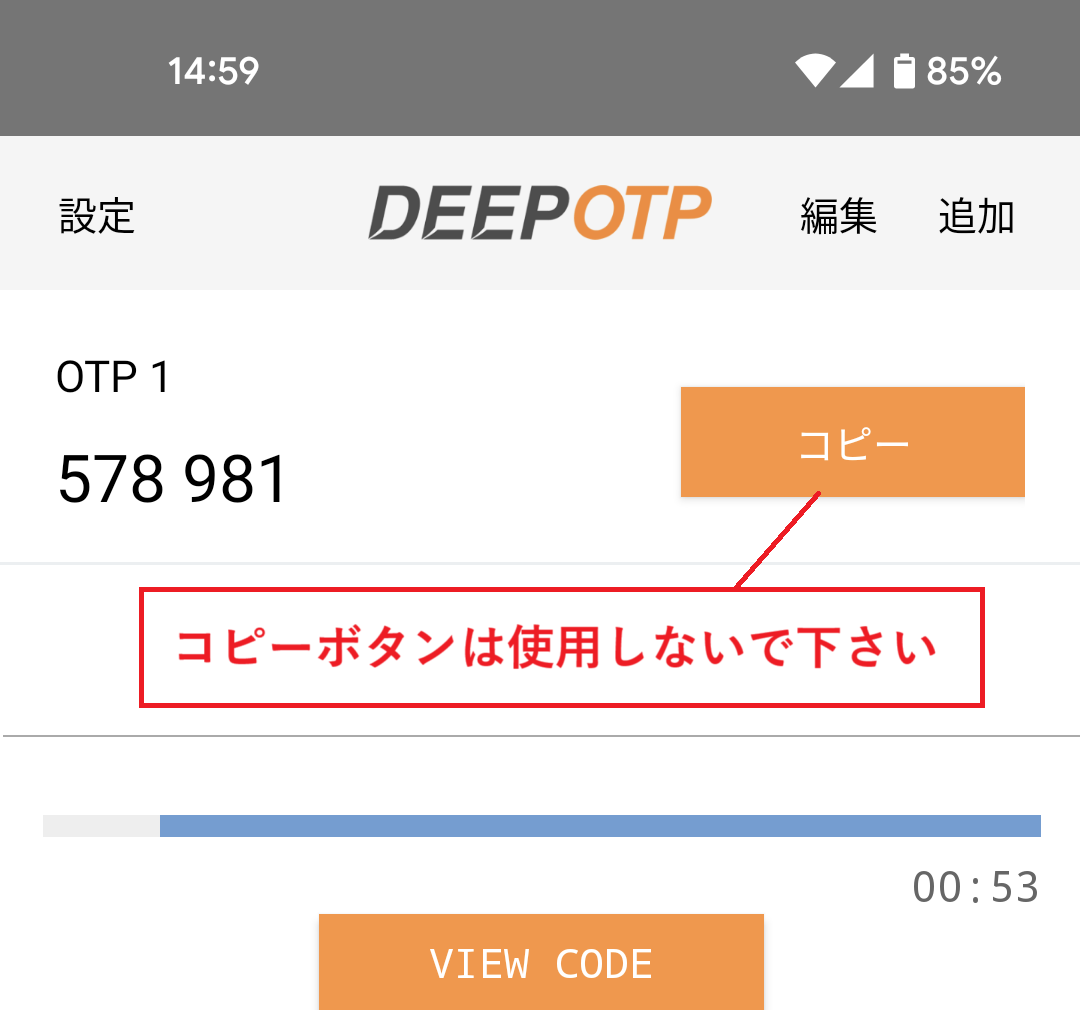 Image Removed Image Removed
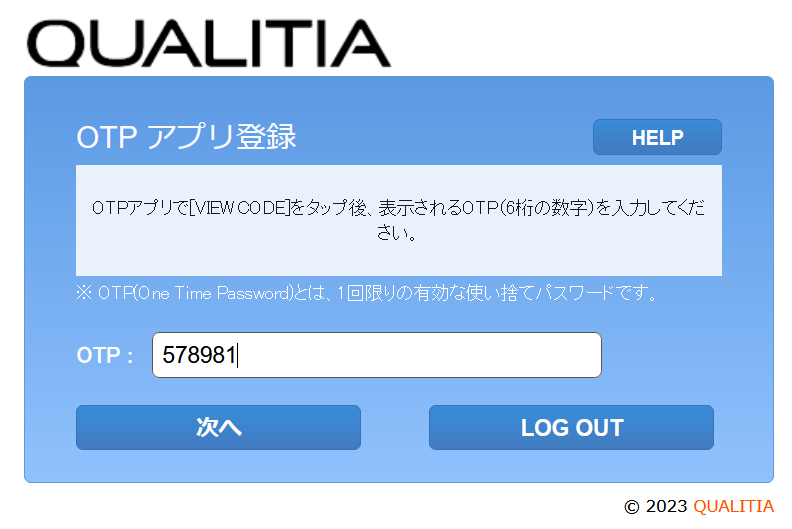 Image Removed Image Removed - Return to your mobile device, enter your user code, and tap 'Register.'
The user code varies depending on the user and device. The image below is an example; please enter the code displayed in your webmail.
Image Added - [Webmail] Click 'Next'.
Image Added - [Mobile] Tap (and hold) on 'VIEW CODE' in the app and check the 6-digit number that appears.
[Webmail] Enter this 6-digit number in the OTP field and click 'Next'.
Image Added
Image Added - [Webmail] Click 'HOME' to finish logging in to Webmail.【Webメール】HOMEへをクリックするとWebメールへのログインが完了します。

外部メール認証の設定OTPアプリが登録できましたら、引き続きがプライベートメールアドレスを登録します。
OTPは以下の送信者、件名でプライベートメールアドレス宛に送付されます。
スパムメールや迷惑メールに振分けられないよう、設定を確認して下さい。 | コード ブロック |
|---|
送信者:ご自身の本学のメールアドレス(~@kit.ac.jp、~@edu.kit.ac.jp)
件名:OTP notification (OTP発行のお知らせ) |
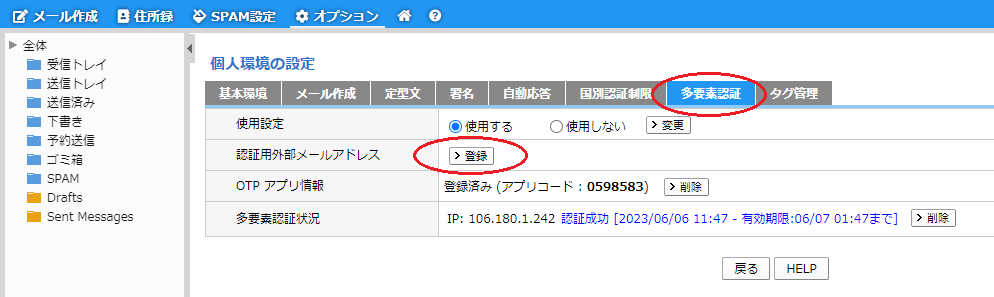
- オプションより個人環境の設定へ進みます。
- 多要素認証タブにて認証用外部メールアドレスの登録をクリックします。
 - 外部メールアドレスの入力画面が表示されましたら、OTPを受け取るプライベートメールアドレス(@kit.ac.jp、@edu.kit.ac.jp以外のメールアドレス)を入力しOKをクリックします。
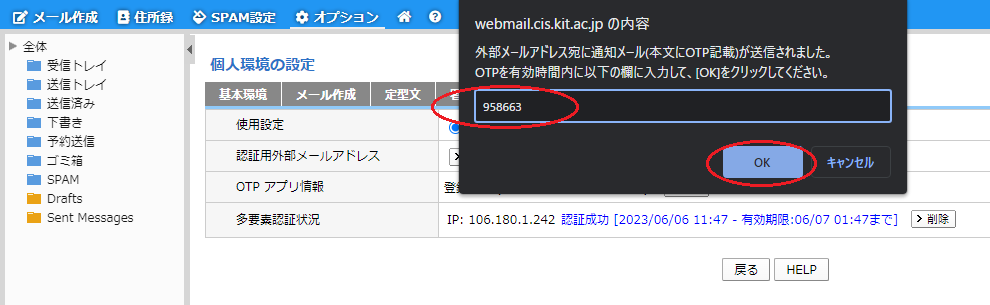
 - プライベートメールアドレス宛に以下メールが送付されます。
記載されているOTPを確認し、WebメールのOTP欄に入力しOKをクリックします。
  - 認証用外部メールアドレスにプライベートメールアドレスが表示されていれば設定は完了です。

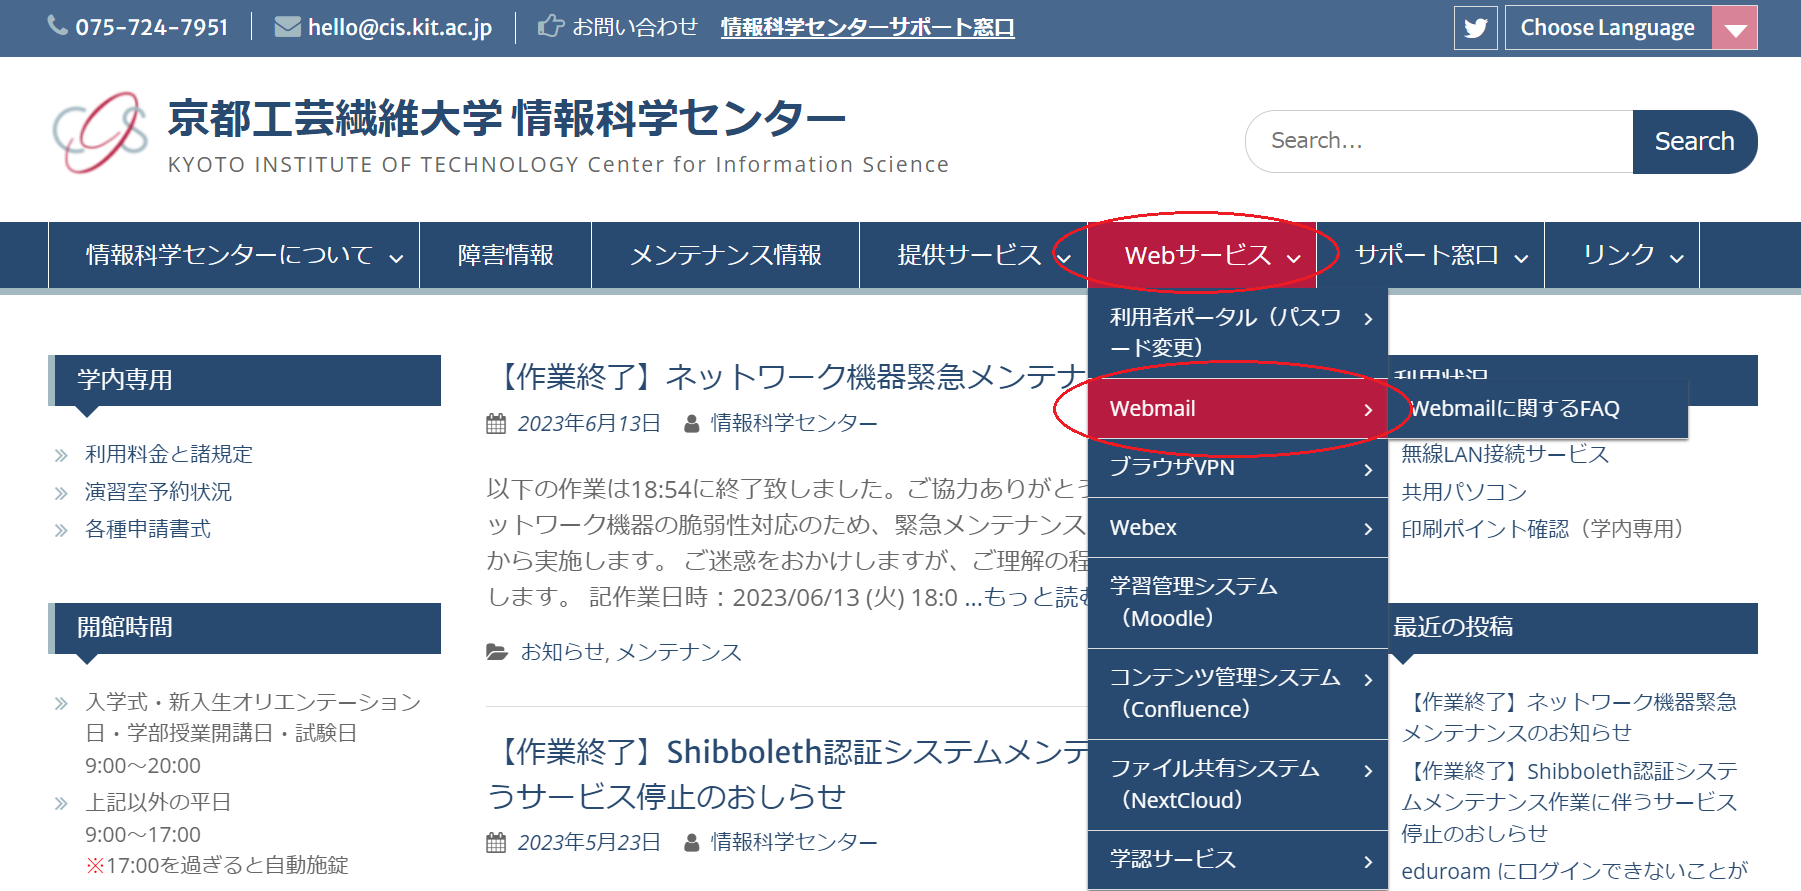
設定後のWebメールへのログイン- Webメールにアクセスします。
情報科学センターのページからは、以下メニューよりアクセスすることができます。
 - ログイン画面が表示されましたら、ユーザ名、パスワードを入力しログインします。
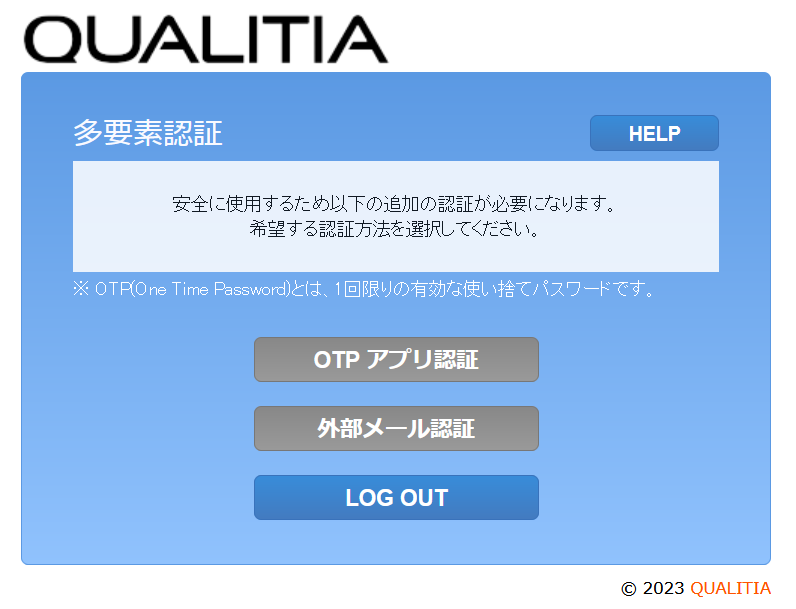
 - 多要素認証の画面が表示されますのでOTPアプリ認証、外部メール認証どちらかを選択します。
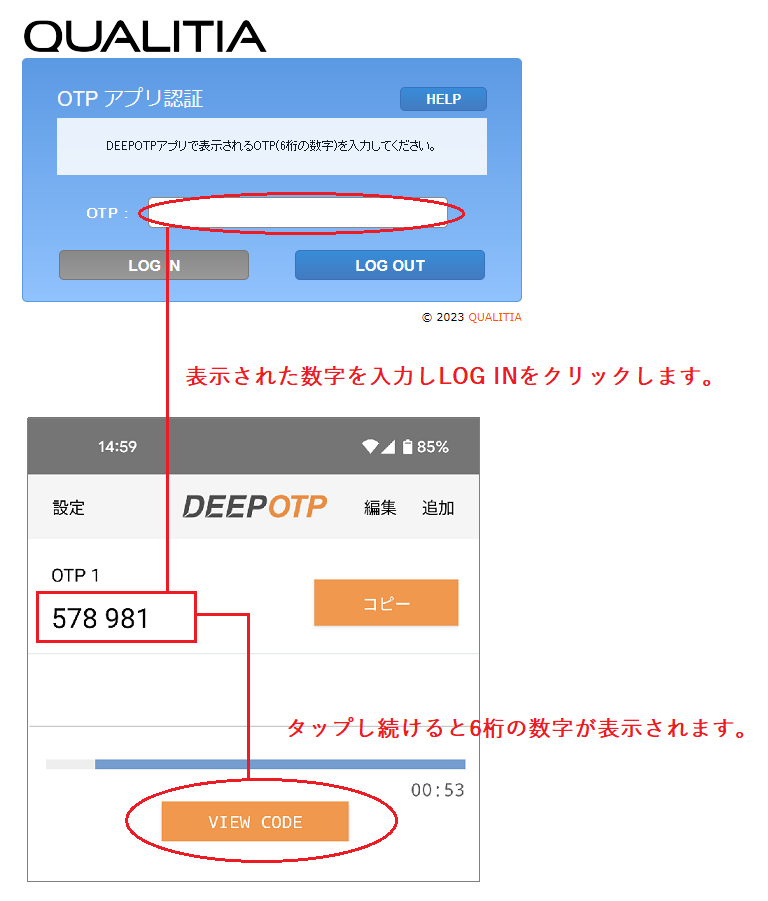
- 【OTPアプリ認証を選択した場合】
OTPの入力を求められますのでインストールしたDEEPOTPのアプリを起動し、表示されるOTPを入力しLOG INをクリックします。
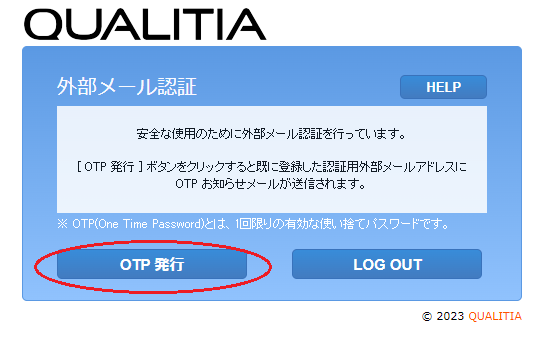
【外部メール認証を選択した場合】
OTP発行をクリックします。
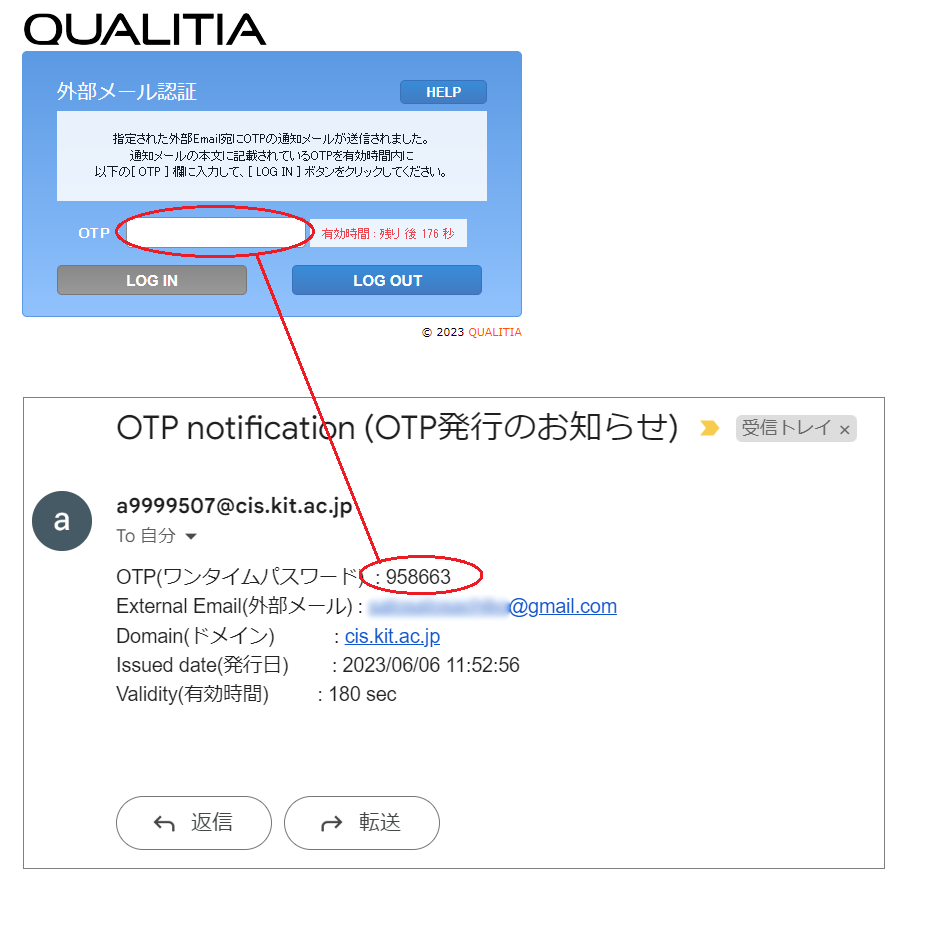
登録したプライベートメールアドレス宛に以下OTP発行のお知らせメールが送付されます。
通知されたOTPを入力しLOG INをクリックします。
メールソフトの利用についてメールソフトを利用している場合、メールソフトを起動する前にWebメールにログインし、多要素認証を済ませておく必要があります。
多要素認証の有効時間は14時間となりますので、使用時間が14時間を超過する場合には、14時間後に再度Webメールにログインして下さい。
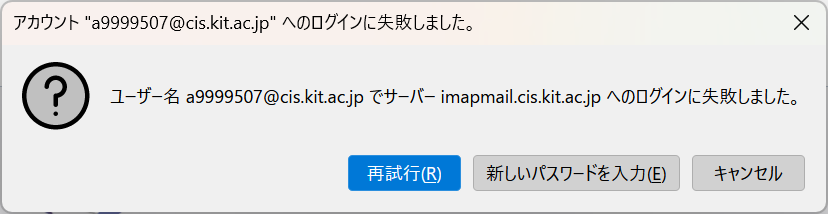
多要素認証を済ませていない状態でメールソフトを起動し、パスワードを入力すると、以下のエラーメッセージが表示されます。
多要素認証を済ませていない等のメッセージは表示されませんのでご注意下さい。
メール起動状態で多要素認証の有効期限が到達した場合も以下のメッセージが表示されます。
多要素認証の有効期間多要素認証の有効期限は個人環境の設定画面で確認することができます。

Related articles| ラベル別コンテンツ |
|---|
| showLabels | false |
|---|
| max | 5 |
|---|
| spaces | CISSUPINT |
|---|
| showSpace | false |
|---|
| sort | modified |
|---|
| reverse | true |
|---|
| type | page |
|---|
| cql | label in ("電子メール","多要素認証","mfa") and type = "page" and space = currentSpace() |
|---|
| labels | 仮想ウェブ |
|---|
|
|